– 15 –
4-5. Adjusting the thread tension
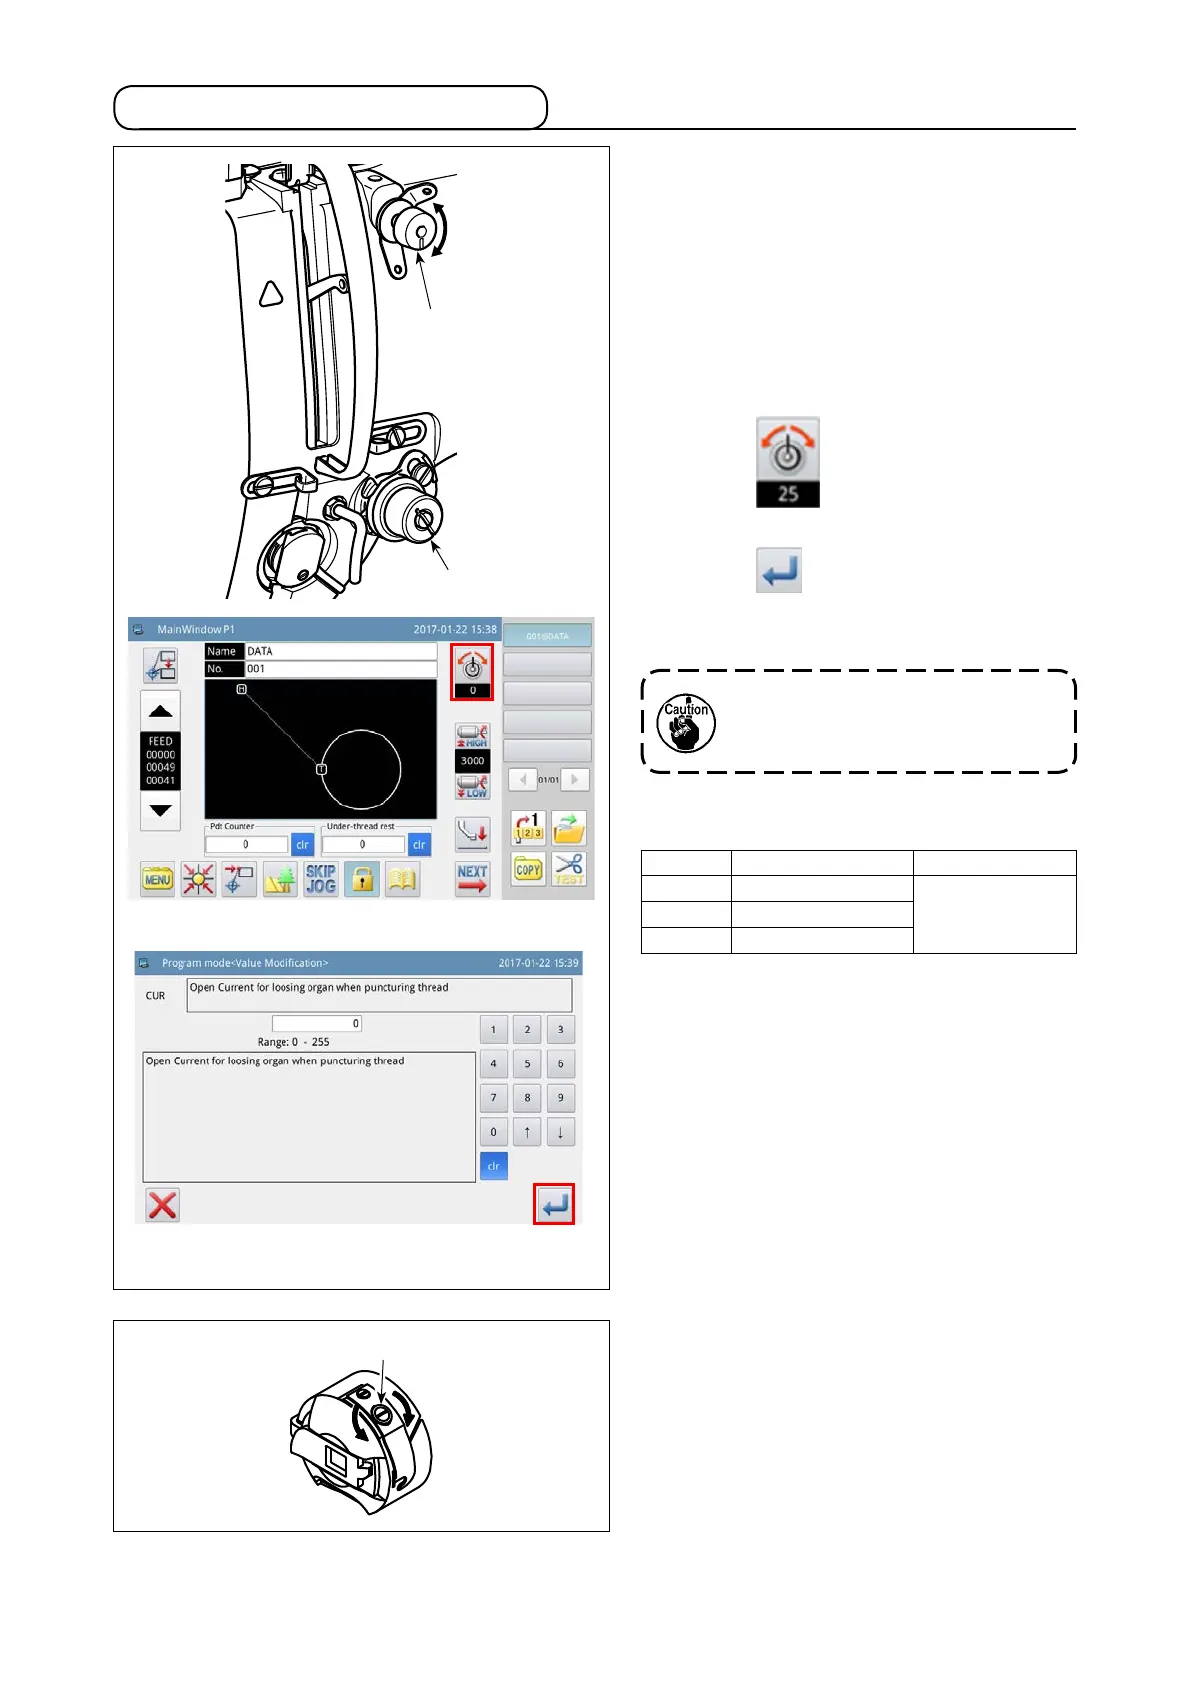
(1) Adjusting the needle thread tension
1) Turn thread tension No. 1 nut
❶
clockwise
(in direction
A
), to shorten the thread length
remaining on the needle after thread trimming
or counterclockwise (in direction
B
), to length-
en the thread length.
2)
❷
shown in the gure is the electronic thread
tension controller (AT device). The AT value
adjustment procedure is as described below.
Press the key on the main screen P1
to display the AT value setting screen.
Press the key after having entered a de-
sired AT value to store the AT value you have
set in memory.
(2) Adjusting the bobbin thread tension
1) Turn tension adjusting screw
❸
clockwise (in
direction
C
) to increase or counterclockwise
(in direction
D
) to reduce the bobbin thread
tension.
<Main screen P1>
<AT value setting screen>
[Reference values of thread tension with respect
to the AT values]
AT value Thread tension (N) Remarks
50 0.35
100 1.40
150 3.40
[Condition of measurement]
①
Thread : Tetoron #50
②
Tension of thread take-up spring : 0.12 N
③
Stroke of thread take-up spring : 15 mm
④
Tension of thread tension No. 1 : 0.05 N
The AT value entered on the pattern
sewing screen applies only to the
current sewing pattern.
C
B
❸
❶
B
A
❷