– 19 –
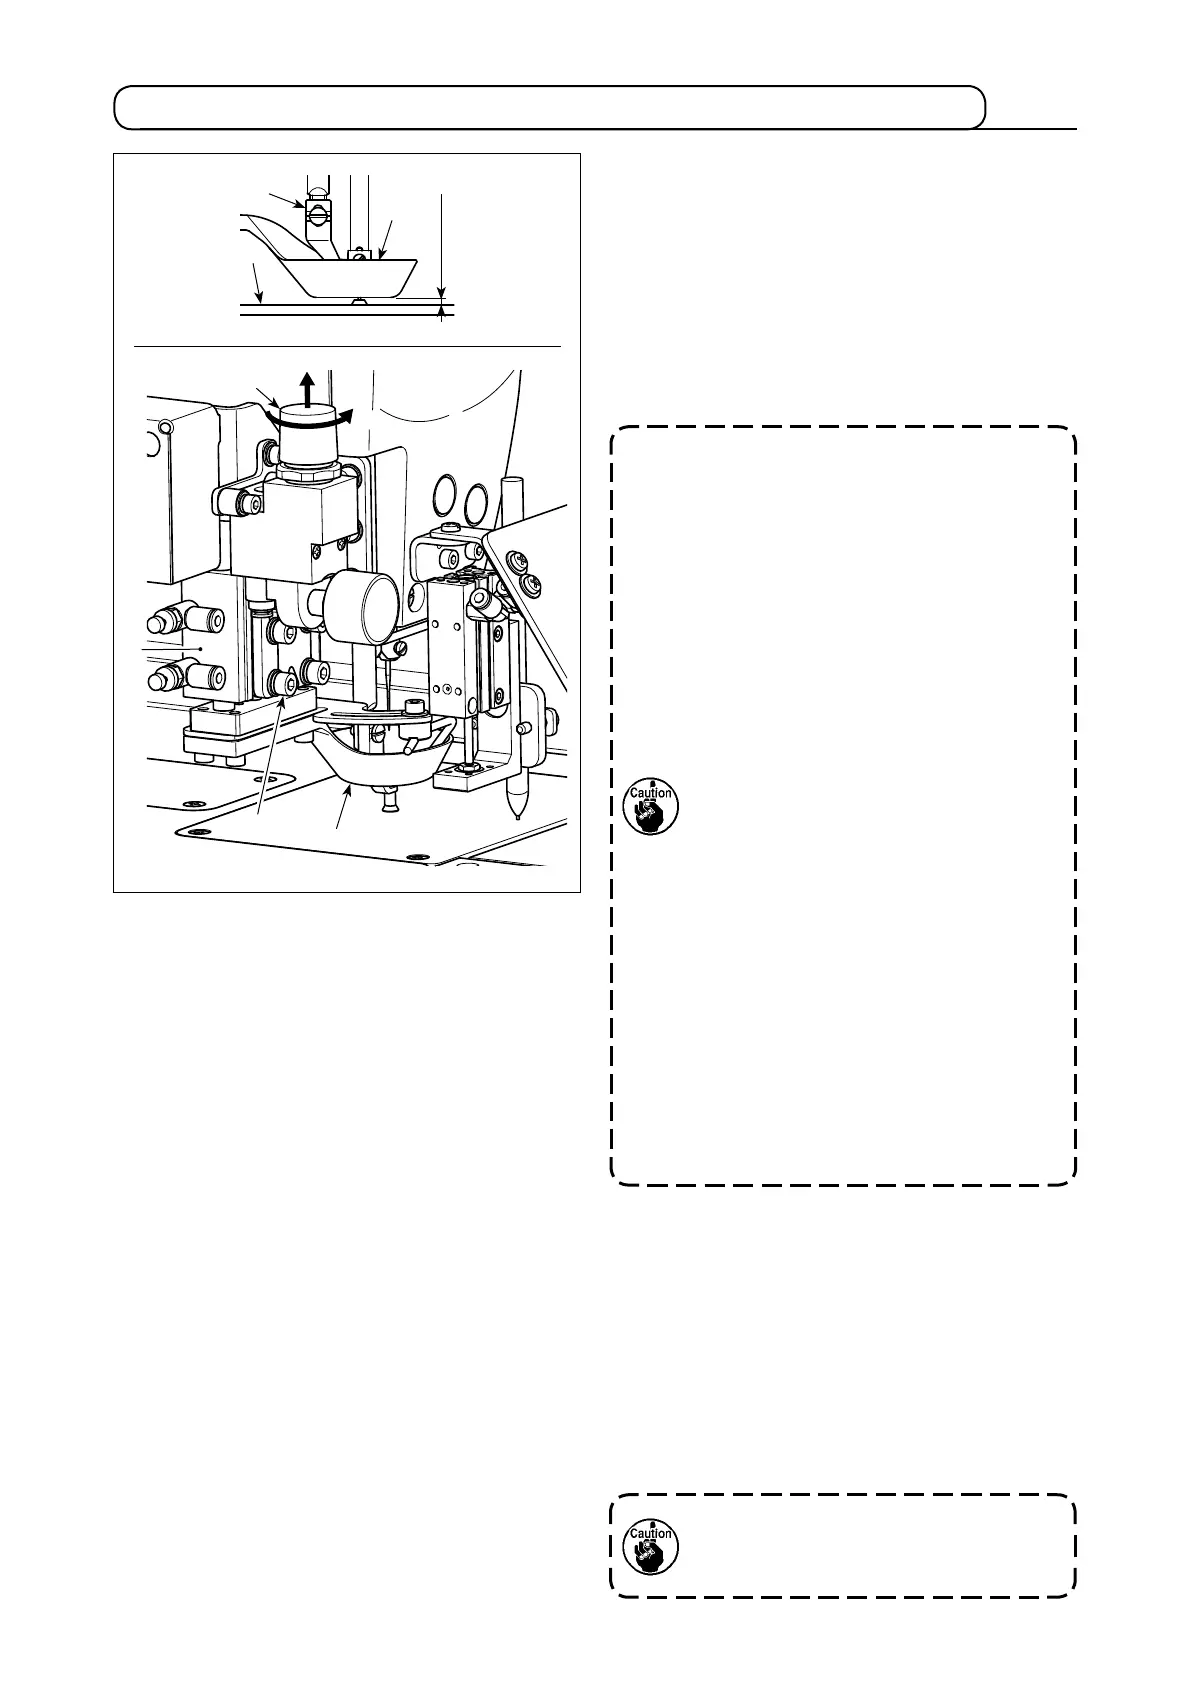
4-11. Adjusting the height of disc presser and the presser foot pressure
❷
❶
❸
3 ± 0.2 mm
❻
A
❺
❷
❹
(1) Adjusting the height of disc presser
1) Lower disc presser
❷
. In this state, loosen set-
screws
❹
(4 pieces).
2) Adjust the vertical position of air cylinder
❺
so
that the distance from the undersurface of disc
presser
❷
to the top surface of throat plate
❸
becomes 3 ± 0.2 mm. Then, tighten setscrews
❹
(4 pieces). (This distance should be adjusted ac-
cording to the thickness of template to be used.)
(2) Adjusting the disc presser pressure
Disc presser
❷
is lifted/lowered by air cylinder
❺
.
When two pieces of material are sewn with cotton or
feather stuffed between them, the pressure applied
to the material can be reduced by appropriately ad-
justing the height and pressure of disc presser
❷
.
1) Pull up pressure reducing valve
❻
. Turn the
valve in the direction of arrow
A
to reduce the
pressure applied to the material.
1. During adjustment, take care to
prevent interference between disc
presser
❷
and intermediate presser
❶
. At the same time, take care so that
the undersurface of disc presser
❷
is
in parallel to the top surface of throat
plate
❸
.
2. Aforementioned adjustment value
of the height of disc presser
❷
(3 ±
0.2 mm) is given on the assumption
that the recommended template (total
thickness of upper and lower (i.e.,
two) templates is 3 mm) is used. In the
case templates of different thickness
are used, the height of disc presser
❷
should be adjusted so that no space is
provided between disc presser
❷
and
the templates and so that the former is
not pressed against the latter.
* The height of disc presser
❷
should
be adjusted to such a height that the
thread remaining at the tip of needle
is securely clamped by disc presser
❷
at the beginning of sewing and
that the templates do not warp due to
the feed operation during sewing.
The adjustment value of air pressure
should be adjusted to 0.25 MPa or
higher.