– 4 –
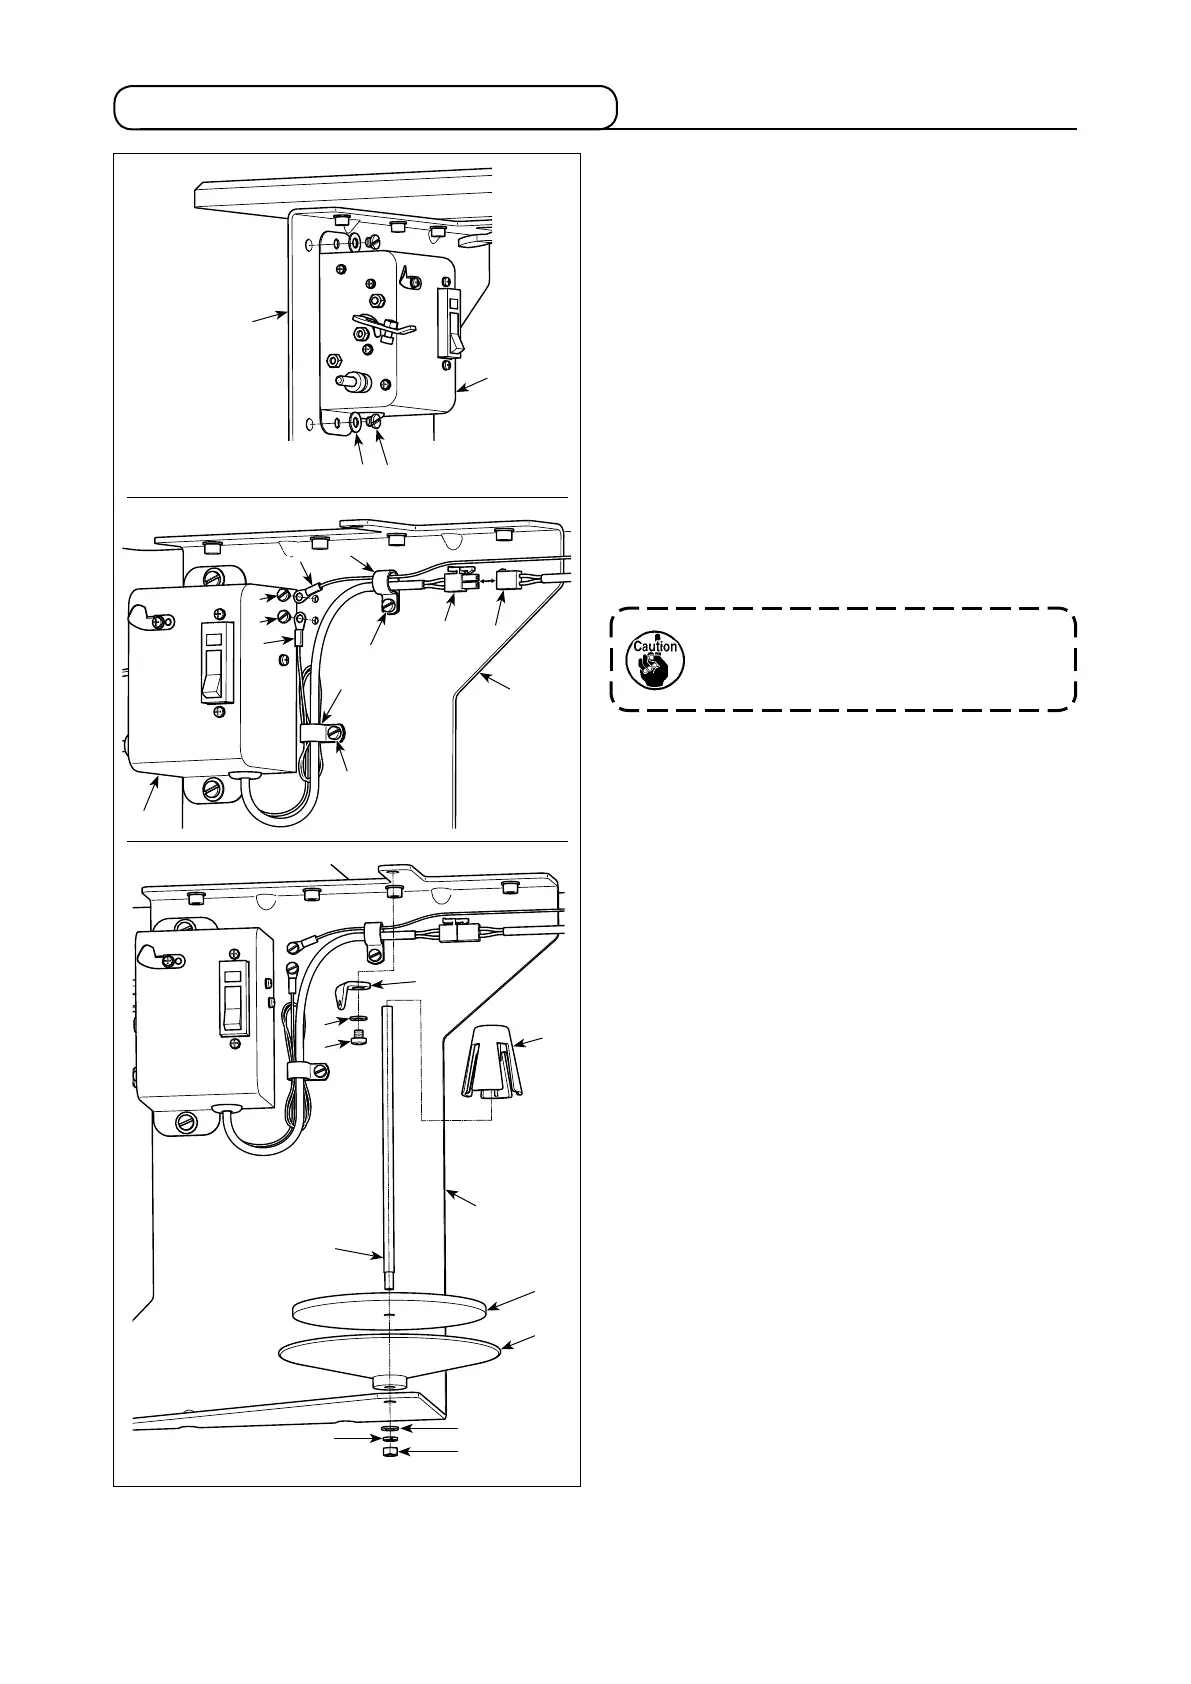
3-2. Installing the bobbin winder device
1) Attach bobbin winder (asm.)
❷
to bobbin winder
device mounting plate
❶
that has been installed
under the table as described in the previous sec-
tion of this Instruction Manual with washer
❸
and
setscrew
❹
.
2) Pass ground wire
A
and power cable
B
of
bobbin winder (asm.)
❷
through cable clip
❺
.
Then, attach cable clip
❺
to bobbin winder device
mounting plate
❶
with setscrew
❻
.
At this time, bundle the excess length of ground
wire
A
and x it with cable clip
❺
.
3) Fix ground wire
A
on bobbin winder device
mounting plate
❶
with setscrew
❼
.
4) Connect power cable
B
to junction cable
❽
on
the main body side of the sewing machine.
5) Pass ground wire
❾
on the main body side of the
sewing machine through cable clip
❺
. Then, x
ground wire
❾
on bobbin winder device mounting
plate
❶
with setscrew
.
6) Attach thread guide
to bobbin winder device
mounting plate
❶
with washer
and setscrew
.
7) Attach bobbin winder catch pan
, bobbin winder
catch pan cushion
and bobbin winder support
rod
to bobbin winder device mounting plate
❶
with nut
, spring washer
and plain washer
. Put bobbin winder anti-vibrator
over bobbin
winder support rod
.
Bundle ground wire
A
and power cable
B
with cable clip
❺
so that they do not
become loose.
❷
❶
❸ ❹
1)
2) to 5)
6) to 7)
❺
❺
B
A
❼
❾
❽
❷
❶
❻
❻
❶


 To Next Page