Select item "8: Reboot" <ENTER>
Do you want to reboot the device ?
Press small "y" <ENTER>
Rebooting the device ……..
After reboot has finished, the new IP configuration is active and will be displayed at the top of the
configuration menu.
Getting Started – IP setup of the D*AP4
–
via web browser
* Read the default IP address printed on the label at the rear of the device.
* Set up network parameters of your PC to fit the default IP address of the D*AP4
(e.g. default IP +1 and net mask = 255.255.0.0).
* Connect the D*AP4 with the PC either by a Ethernet patch or a cross over cable
(if the PC does not support Auto MDI-X) or via a switch.
* Open a browser and type the default IP address of the D*AP4 into the URL field and press <ENTER>.
This will open the AUDIO PROCESSOR tab sheet of the GUI.
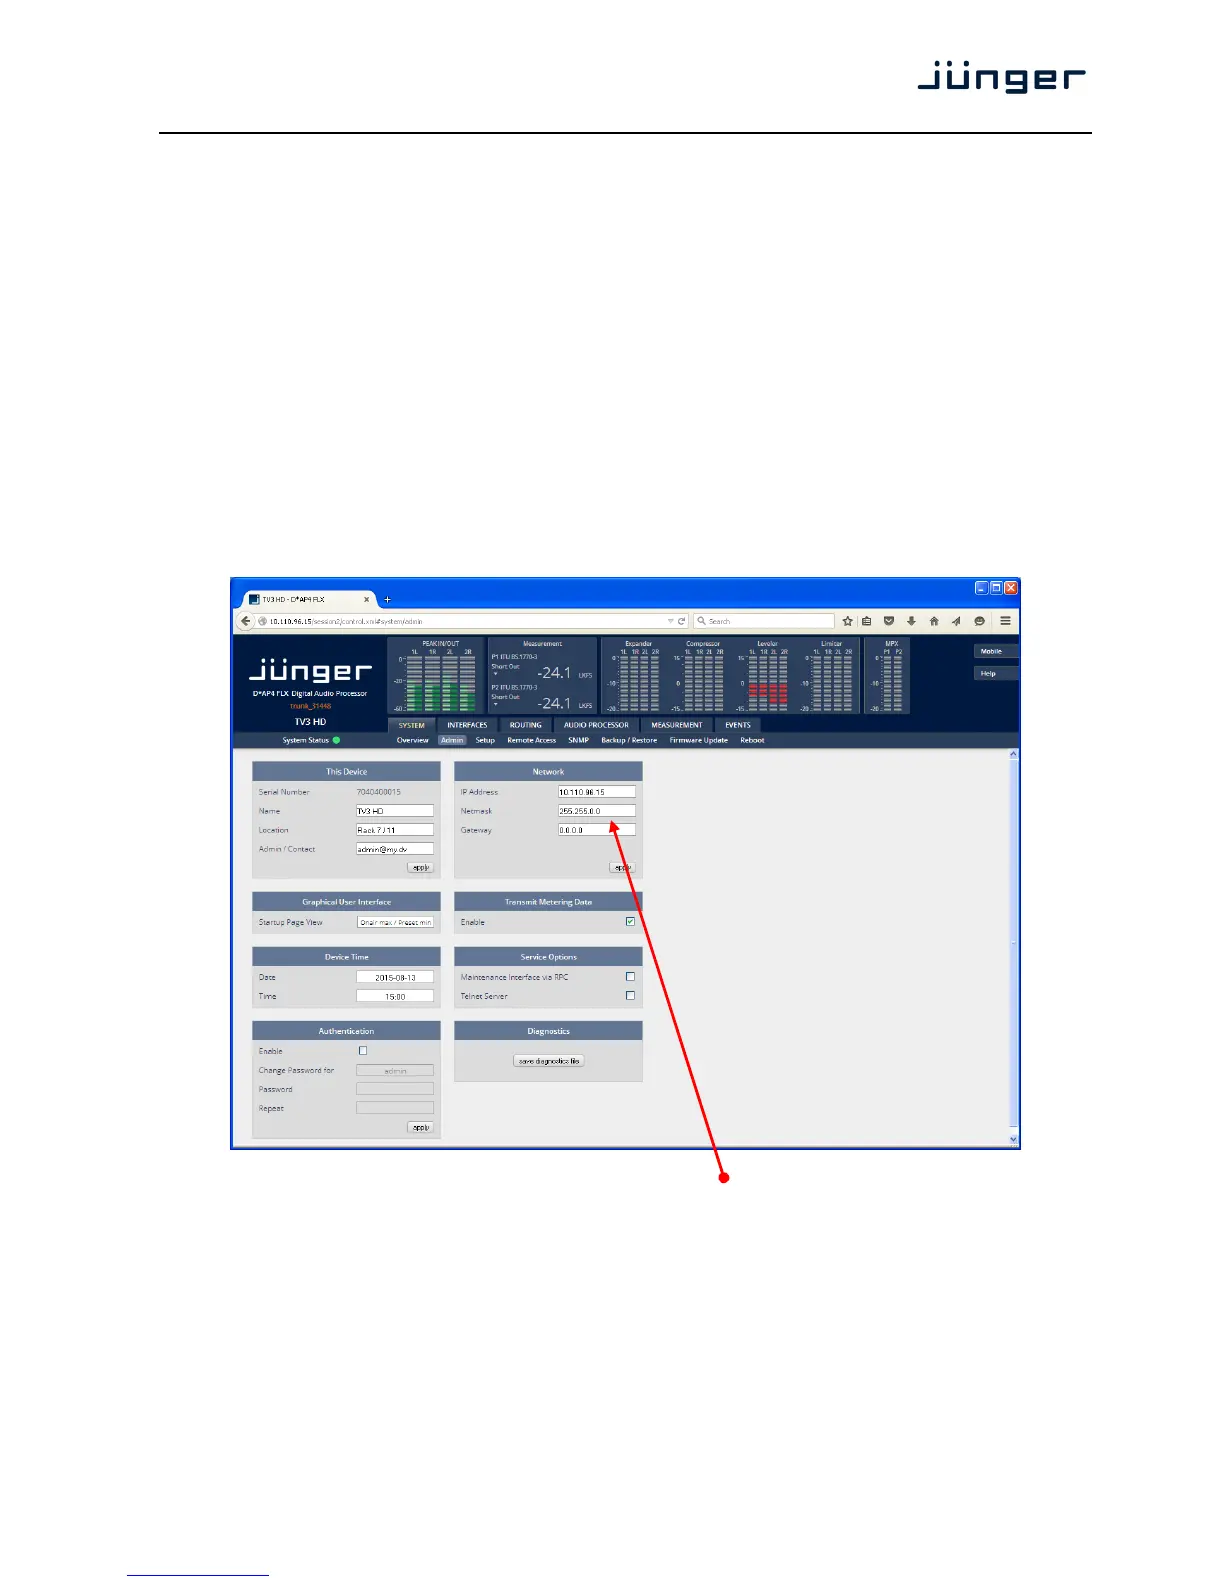
* Click on <SYSTEM> and afterwards the "Admin" tab:
Enter the desired network configuration and press <apply>
Afterwards you must reboot the D*AP4 in order to activate the new IP configuration.
Important Note! After reboot neither the web browser nor the X*AP RM
1
remote panel may be able to
communicate with the D*AP4. You must change back the IP configuration of the PC and fill in the new IP
address in the URL field. You must change the X*AP RM
1
remote panel settings as well to attach this device
again.