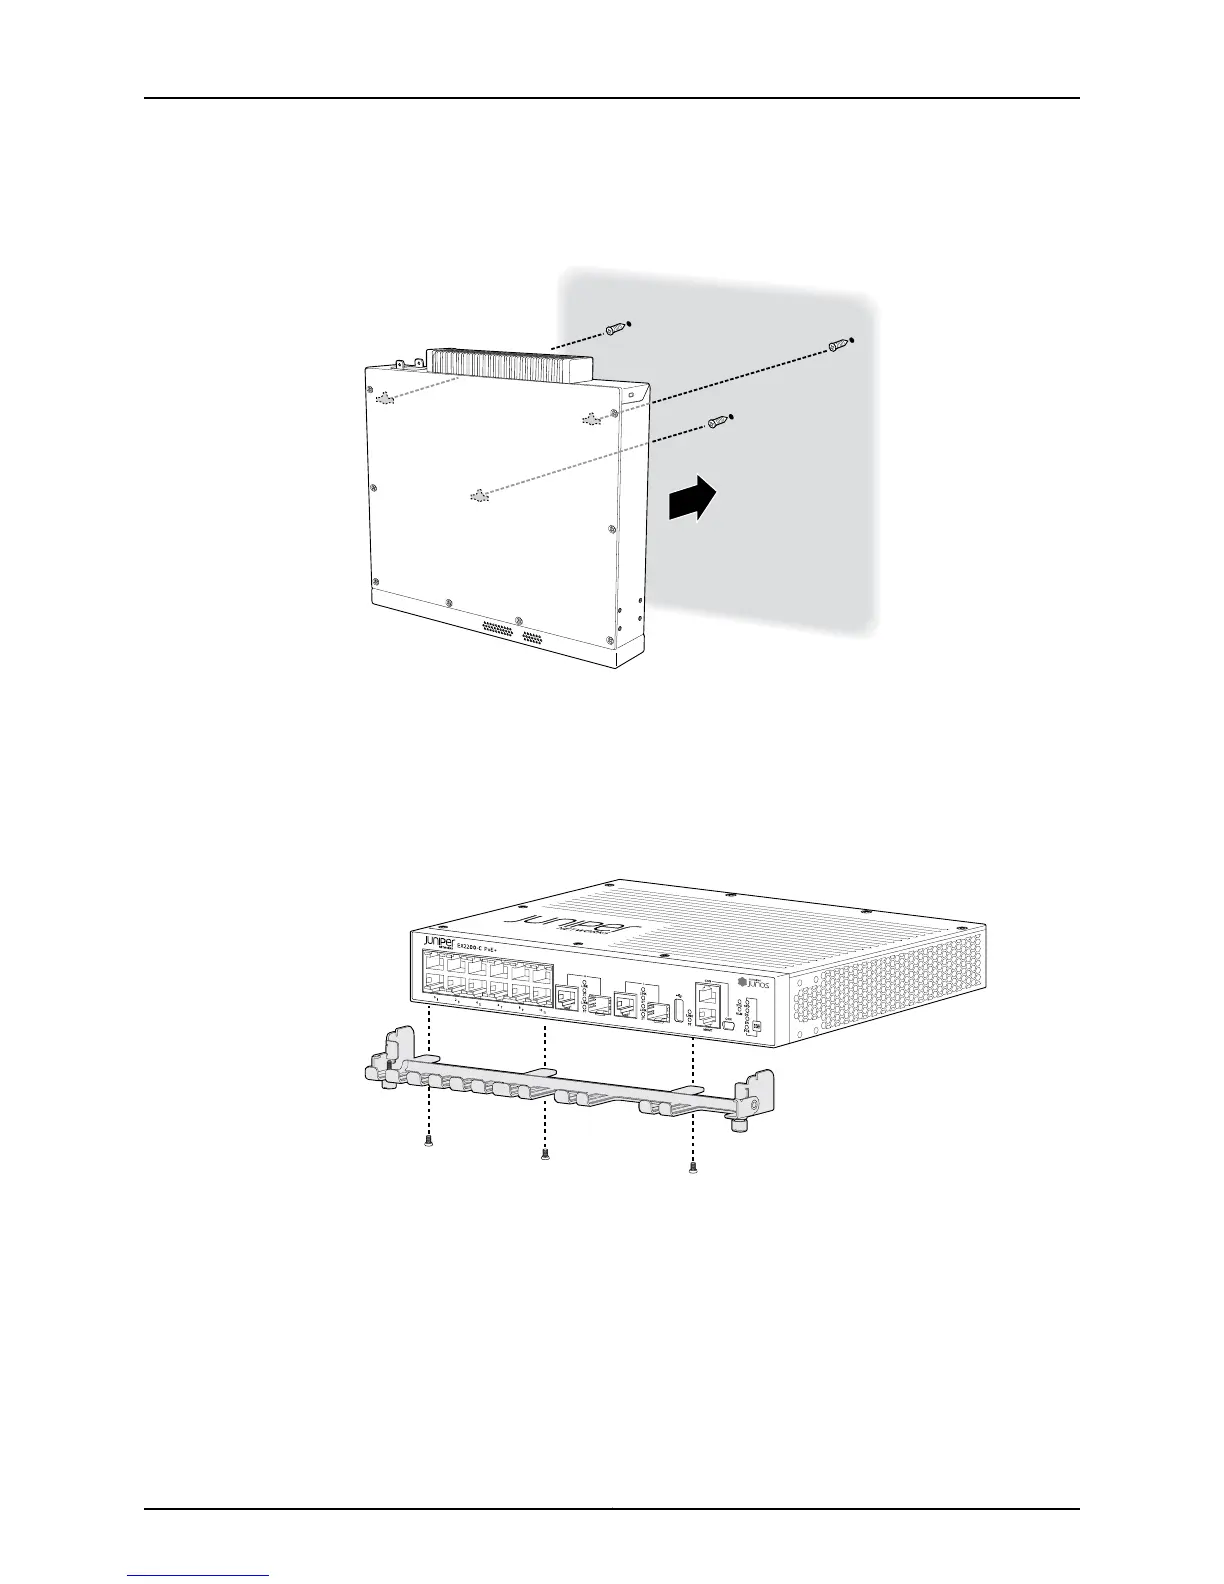
Figure 38: Mounting the EX2200-C Switch on a Wall Using Screws
5. (Optional) Attach the optional cable guard to protect cable connections:
a. Usethe 3 truss-head screws to attach the cable guard to the bottom of the chassis.
b. Use the thumbscrews to tighten or loosen the guard to allow you to insert cables.
See Figure 39 on page 93.
Figure 39: Attaching a Cable Guard to an EX2200-C Switch
6. (Optional) Attach the optional standard cable lock to a security slot on the side of
the switch:
a. Rope the cable to a desk or a rack and set the lock to the unlocked position.
b. Insert the lock into a security slot on your chassis and set the lock to the locked
position. See Figure 40 on page 94.
93Copyright © 2011, Juniper Networks, Inc.
Chapter 8: Installing the Switch

 Loading...