Changing the filter cartridge
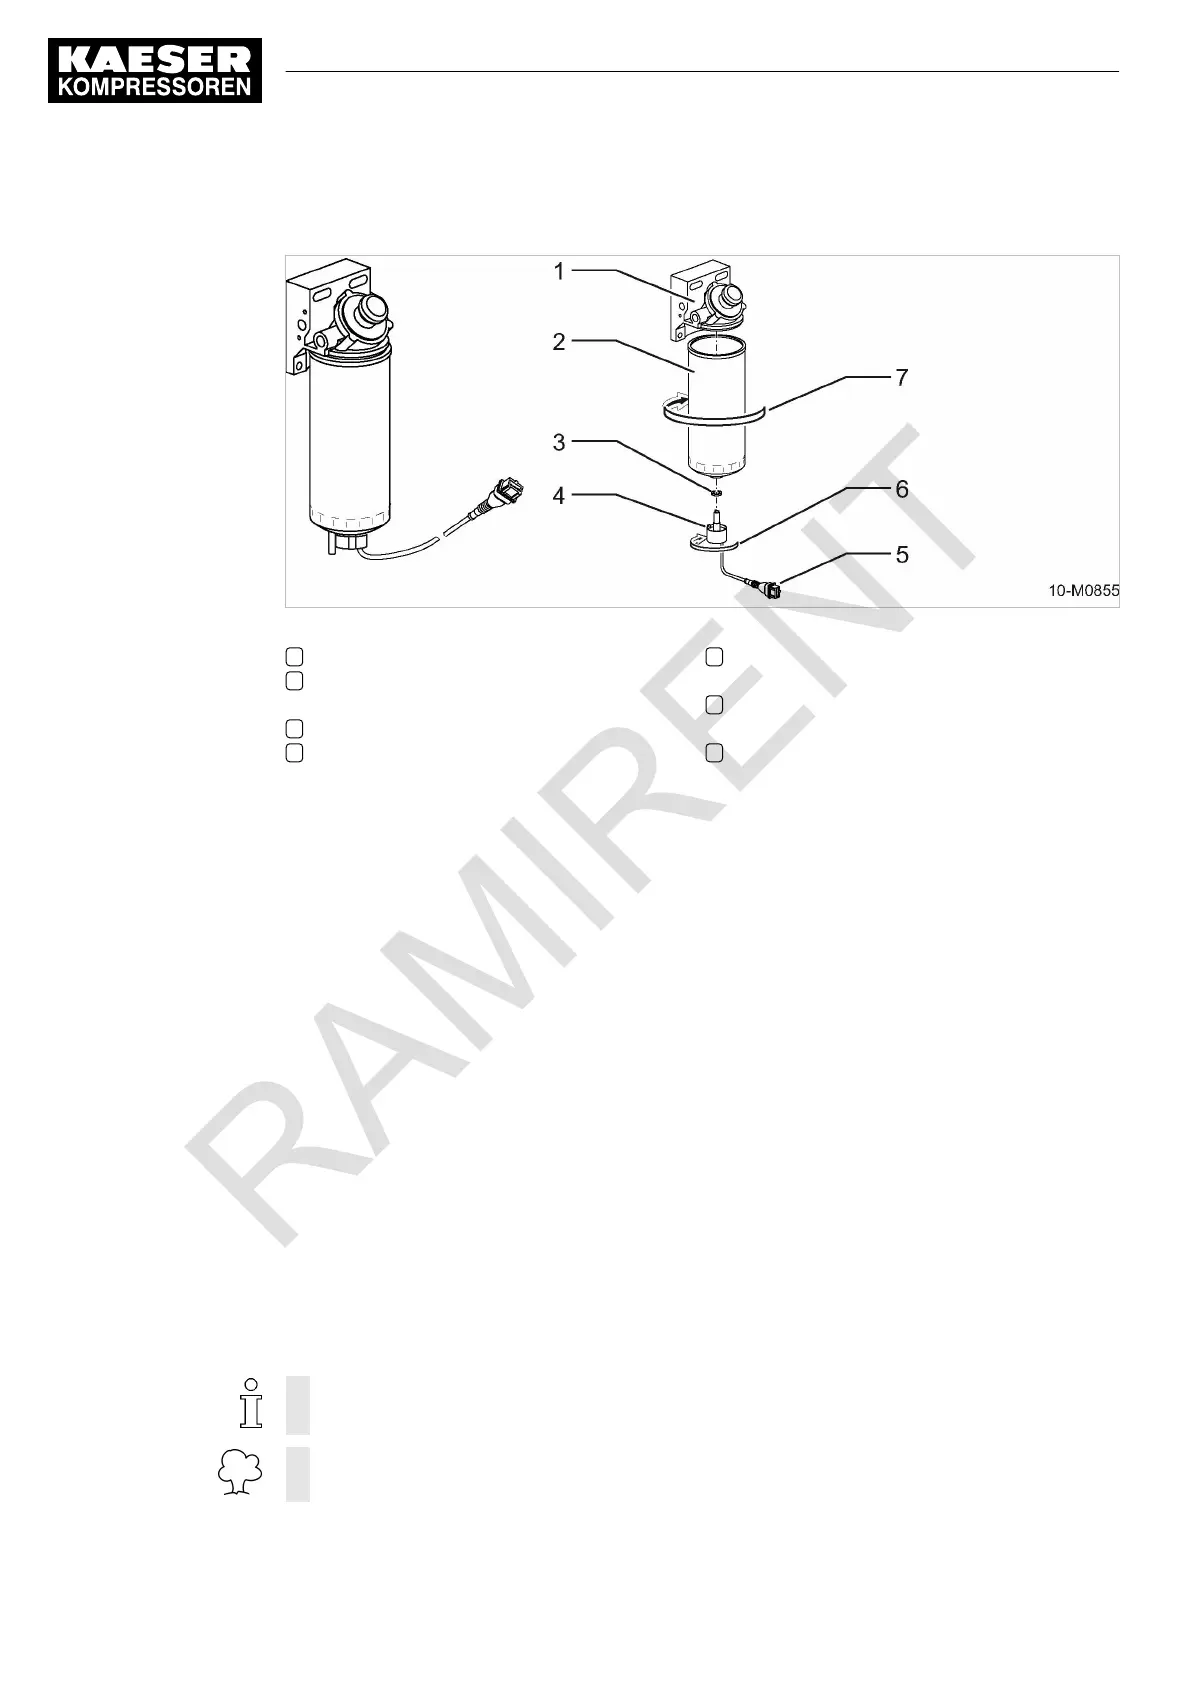
Fig. 44 Changing the fuel pre-filter cartridge
1 Filter head
2 Filter cartridge with integrated water re‐
ceptacle.
3 Draining stopper seal
4 Draining stopper with integrated level sen‐
sor
5 Water level sensor connecting plug (fuel fil‐
ter maintenance)
6 Direction of rotation to unscrew the drain‐
ing stopper.
7 Turn in this direction to unscrew the filter
cartridge.
1. Place a receptacle beneath the fuel pre-filter housing.
2.
Unscrew the draining stopper on the bottom of the filter cartridge (2 turns max.) and drain wa‐
ter and contamination.
3. Remove the connecting plug of the water level sensor.
4. Use a standard wrench to loosen and unscrew (counter-clockwise) the filter cartridge.
5. Empty any remaining fuel into a receptacle.
6. Unscrew the draining stopper of the filter cartridge and clean with lint-free cloth.
7. Check the seal of the draining stopper.
Change the gasket if defective.
8. Screw the draining stopper to a new filter cartridge.
9. Clean the sealing faces of the filter cartridge and filter head with a damp cloth.
10. Mount the filter cartridge to the filter head:
■ Moisten the sealing faces of the new filter cartridge with some fuel.
■ Manually screw the filter cartridge to the filter head (clockwise), until seal is tight.
■ Continue to manually turn until the filter cartridge is seated tightly (½ to ¾ turn approxi‐
mately).
11. Fasten the connecting plug of the water level sensor.
12. Reconnect the batteries.
13. Close the access door.
The fuel system must be bled after the filter cartridge has been changed.
Dispose of fuel and any materials and components contaminated with it in accordance with
environmental protection regulations.
10 Maintenance
10.3 Engine maintenance
96
Service manual Portable compressor
M122 No.: 9_6974 20 E
 Loading...