microKORG2 Part names - Front panel
14
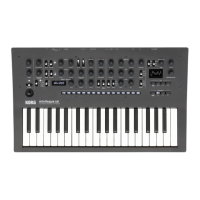
11 Keyboard
This instrument features a 37-note keyboard (mini keyboard, velocity sensitive, no aftertouch).
Velocity: The effect changes in relation to how hard you play the keys. Normally, the tonal color
and volume changes according to how hard you play.
Keyboard tracking: The effect that’s applied changes according to which key you play (low range
vs. high range). Normally, the sounds are set so that the tonal color gets brighter as you go up the
keyboard, to make the volume sound different from low to high notes and so forth.
By using the velocity and keyboard tracking as a virtual patch source, you can create a variety of
effects in addition to those listed above.
12 Display
This is a 2.8-inch TFT IPS LCD display. The display shows various information like the current pro-
gram number and parameter values.
13 FUNCTION 1, 2, 3, 4, 5 buttons
Use these buttons to increase or decrease the parameter values, show the oscilloscope, save the
programs, initialize the data and so on.
14 LOOP RECORDER , , buttons
Use these buttons to record and play back the microKORG2’s audio as well as audio from a mic or
from the AUX IN.
When the loop recorded is stopped, press the button to enter record standby, then the
button to start and stop recording and playback. Alternatively, you when the loop recorded is
stopped press the button to begin playback and the button to start and stop recording.
Press the button to undo or redo a loop recording.
Long-press the or button to access the loop recording or playback settings pages. Long-
press the button to erase the audio data.
15 EDIT CONTROL 1, 2, 3, 4, 5 knobs
When on the home page, as accessed by changing the program or pressing the FUNCTION 5 but-
ton, these knobs work as Performance Edit controls. When the respective pages for TIMBRE MIX,
the TIMBRE EDIT–EQ section or the SETTING 1, 2 pages of LOOP RECORDER are shown, these
knobs increase or decrease the relevant parameter values.
Tip:
Turn the EDIT CONTROL 1–5 knobs while holding down the FUNCTION 5 button to select a
parameter without changing the values. After selecting a parameter, you can use the FUNCTION 1
(DEC), 2 (INC) buttons to change the values by one step.
Tip:
You can change how the EDIT CONTROL 1–5 knobs behave when the internal value doesn't
match the position of the knob. → Details
16 TIMBRE button
Selects the timbre to edit.
Note:
When using a dual program, you can select which timbre (1, 2) to edit (either LED 1 or 2 lights
up). You can’t switch between timbres for single programs (LED 1 and 2 go dark).
When you long-press this button, the levels and panpots (TIMBRE MIX) for timbres 1 and 2 are
shown.
17 TIMBRE EDIT VOICE–PATCH 1–6 buttons
Use these buttons to access the section of the currently selected timbre that you wish to edit.
Pressing the button multiple times will cycle through the available pages for that section.
18 EDIT ARP A–GLOBAL button
Use these buttons to access the arpeggiator or global settings for editing. Pressing the button
multiple times will cycle through the available pages for that section.