5-44 LeeBoy 8520C Conveyor Paver
Maintenance
Under Auger Material Cut-OffsUnder Auger Material Cut-Offs
1. Remove roll pin from the cut-off hinge. (Figure
5-58)
2. Insert a 3/8” bolt in the end of the hinge to remove
the hinge pin (inside hinge). Cut-off will slide down.
3. Clean area around the cut-off hinge.
4. Realign cut-off hinge.
5. Grease and insert new hinge pin.
6. Reinsert roll pin into outer cut-off hinge.
7. Reconnect cylinder to cut-off.
Roll Pin
Hinge Pin
(Inside Hinge)
Figure 5-58. Under Auger Material Cut-Offs
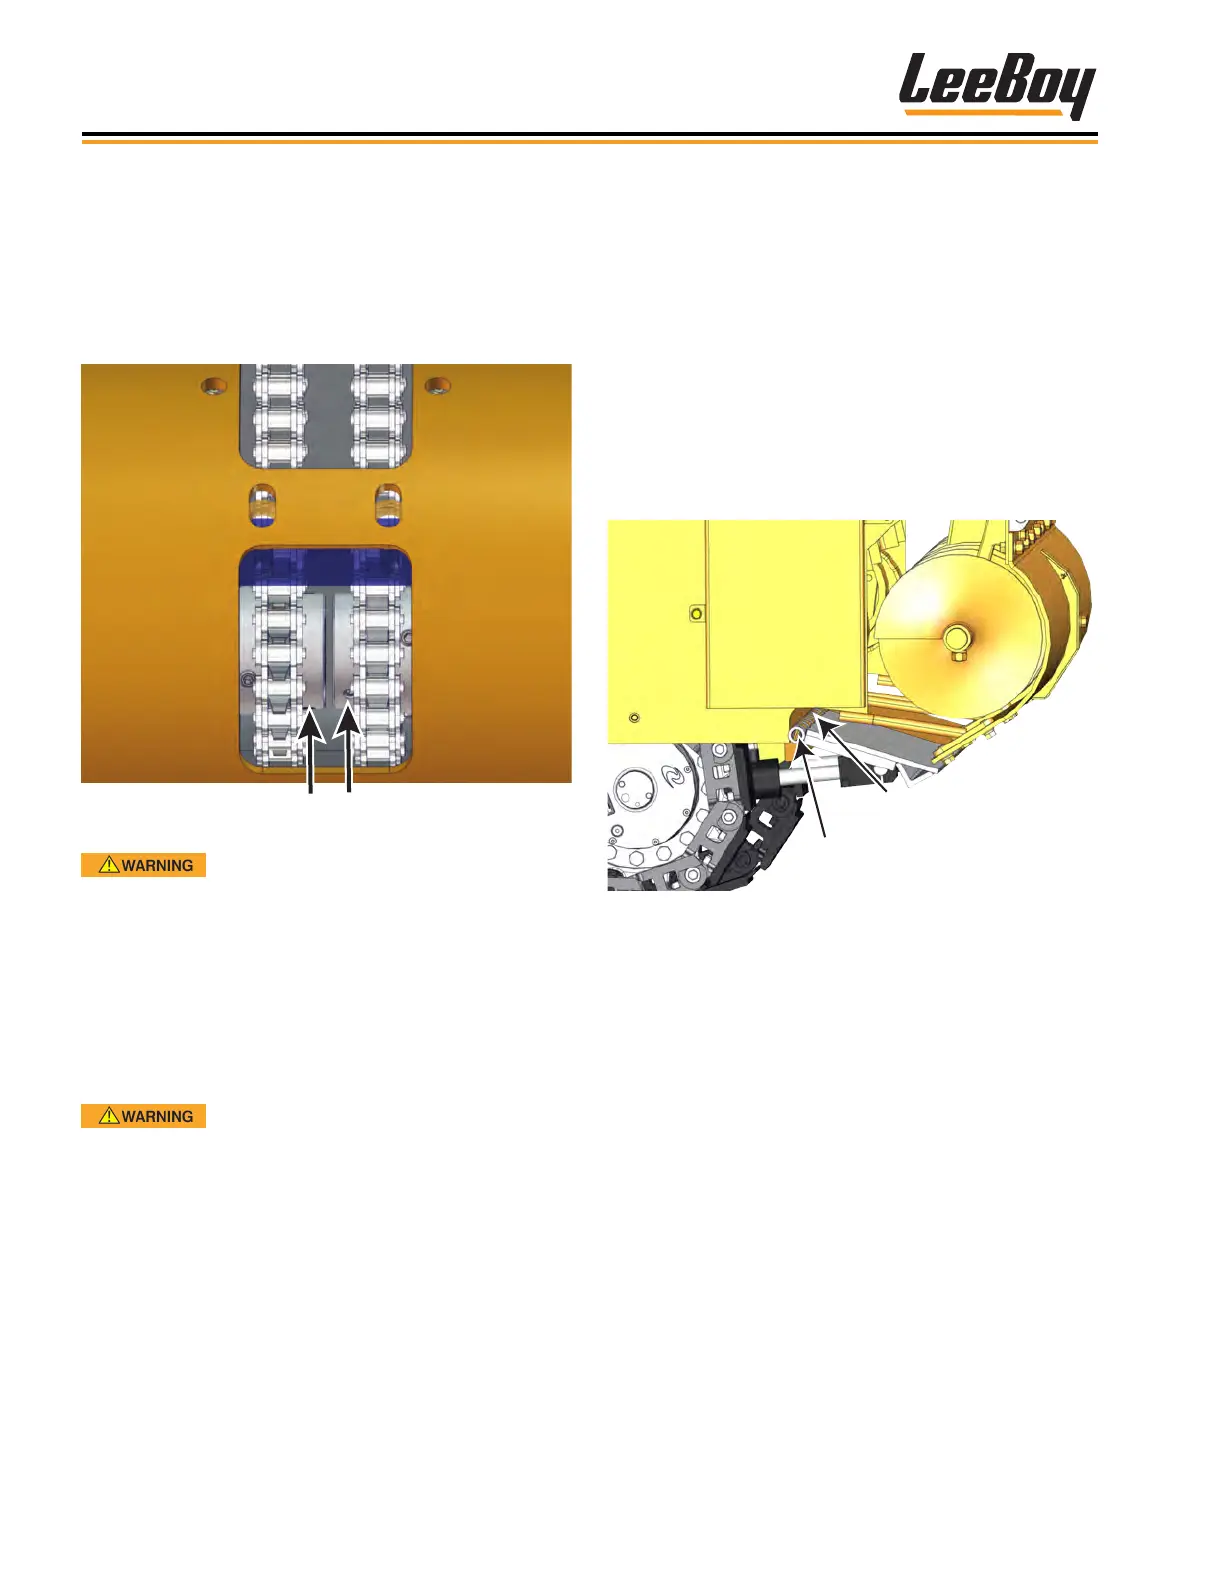
8. Using a small blow torch, heat the inner auger
set screw on the side for replacement for a few
seconds to release the loctite mechanism. (Figure
5-57)
9. Insert an allen wrench into the appropriate set
screw and turn counterclockwise to release the
auger for replacement.
Right Set Screw
Left Set Screw
Figure 5-57. Inner Auger Set Screws
DO NOT perform this procedure
without using a sling to prevent injury. Augers are
heavy and extra care must be taken to remove and
replace.
10. Use a sling to support the inner auger. While
standing beside the paver, rmly grasp the outer
auger end and carefully pull out.
NOTE: The sling will need to be repositioned as you
carefully slide out the auger.
Be extra careful and mindful of the
paver frame and screed endgate position when
moving the auger away from the machine to prevent
falling or tripping while carrying the heavy auger.
11. Reinsert the new auger into place, aligning the inner
auger end with the set screw.
12. Insert allen wrench and turn clockwise to secure
auger into place.
13. Reinstall auger cover and reconnect grease hoses.
(Figures 5-55 and 5-56 on the previous page.)
14. Start the engine and idle for a few minutes, then turn
on the auger and check for proper operation.