5555
LeeBoy 8520C Conveyor Paver 5-45
Maintenance
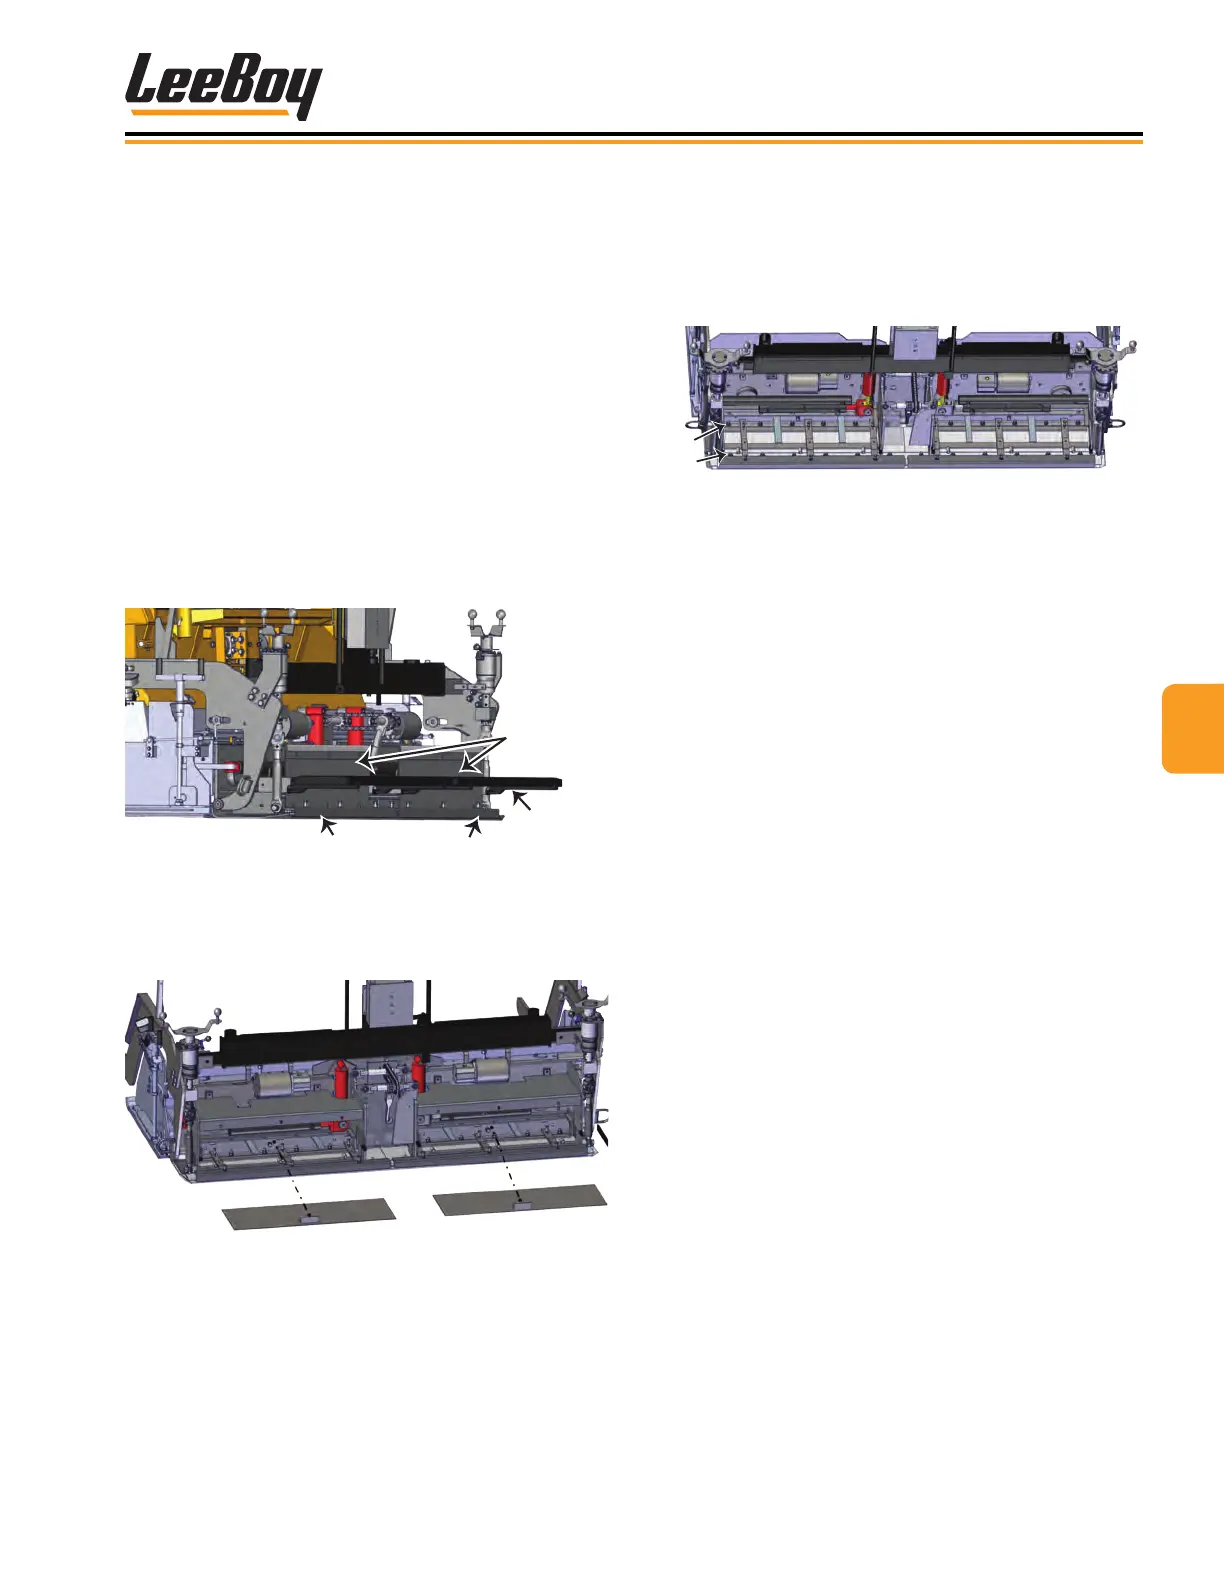
6. Remove both rows of bolts holding the wear plate to
the bottom of the screed. (Figure 5-61)
NOTE: Clamp the center portion of the screed frame
to hold the frame in place before lifting it from
the worn wear plate.
Wear
Plate
Bolts
Figure 5-61. Wear Plate Bolts
7. Raise the screed completely.
8. Slide the worn wear plate from under the screed.
9. Clean all material buildup on the screed frame.
10. Set new wear plate level on three blocks, placing
one block in the center and one at each end.
11. Lower the screed frame down onto the new wear
plate.
12. Install center and side bolts rst (front and rear)
to hold the new wear plate in place, then install
remaining bolts. DO NOT tighten the bolts until all
bolts are installed.
13. Loosen the plate on the slotted side to adjust the
crown. This will move the screed frame in and out
on the wear plate to help align the bolts on the
opposite side.
14. Install the remainder of the front bolts, then install
the rear bolts, ensuring the screed frame and wear
plate are at.
15. Torque bolts (Refer to Torque Tables in Section
2) starting inside, then moving outward, by rotating
from the left to the right side to keep the screed
relaxed.
16. Reinstall the screed covers in reverse order, then
the walk boards.
Main Screed Wear PlateMain Screed Wear Plate
The screed wear plates can wear out over time and must
be replaced if the plate has worn to less than 1/4-inch
thick. Poor maintenance, paver cleaning, asphalt mixes
containing hard aggregate and improper material ow
can contribute to excessive wear on the main screed
and extension wear plates. Correct screed heating also
helps prevent excessive material build-up. An uneven,
worn screed plate will produce an inferior mat
1. Retract screed extension completely.
2. Unbolt and remove the rear walk boards. (Figure
5-59)
3. Unbolt and remove upper and lower screed covers.
4. Remove bolts on the heating element covers and
remove. Disconnect wiring.
Walkboards
Element Covers
Screed
Covers
Figure 5-59. Walk Boards and Covers
5. Grasp handle and slide out inner screed elements
covers as shown in Figure 5-60 to access wear
plate bolts.
Figure 5-60. Inner Screed Element Covers