2. Turn the ocular until the reticle is focussed and appears sharp and
black.
4.4 Startup
To turn the instrument on, press the ON/OFF key for 2 seconds.
To turn off the instrument or set it into standby mode, press the ON/OFF key
and select the appropriate option from the information screen.
After turning on the instrument, you can choose the preferred language. The
language choice screen is only shown if multiple languages are loaded onto
the instrument and Lang.Choice: On is set in the instrument settings. Refer
to 6.2 Regional Settings.
The digital level bubble allows you to precisely level the instrument.
1. Turn on the instrument.
Tap on the Level & Tilt Check icon.
OR
Press the Favourites key , choose the Work tab form within any
program and select Level.
☞
The bubble of the digital circular level and the arrows for
the rotating direction of the footscrews only appear if the
instrument tilt is within the sensors working range. To
roughly level the instrument, centre the bubble of the cir-
cular level on top of the instrument rst. Refer to 4.3
Instrument Setup.
2. Turn the instrument, so that the ocu-
lar is positioned above footscrew C.
3. Turn the footscrews A and B simul-
taneously in opposite directions until
the level bubble is approximately on
the vertical center axis of the digital
level bubble .
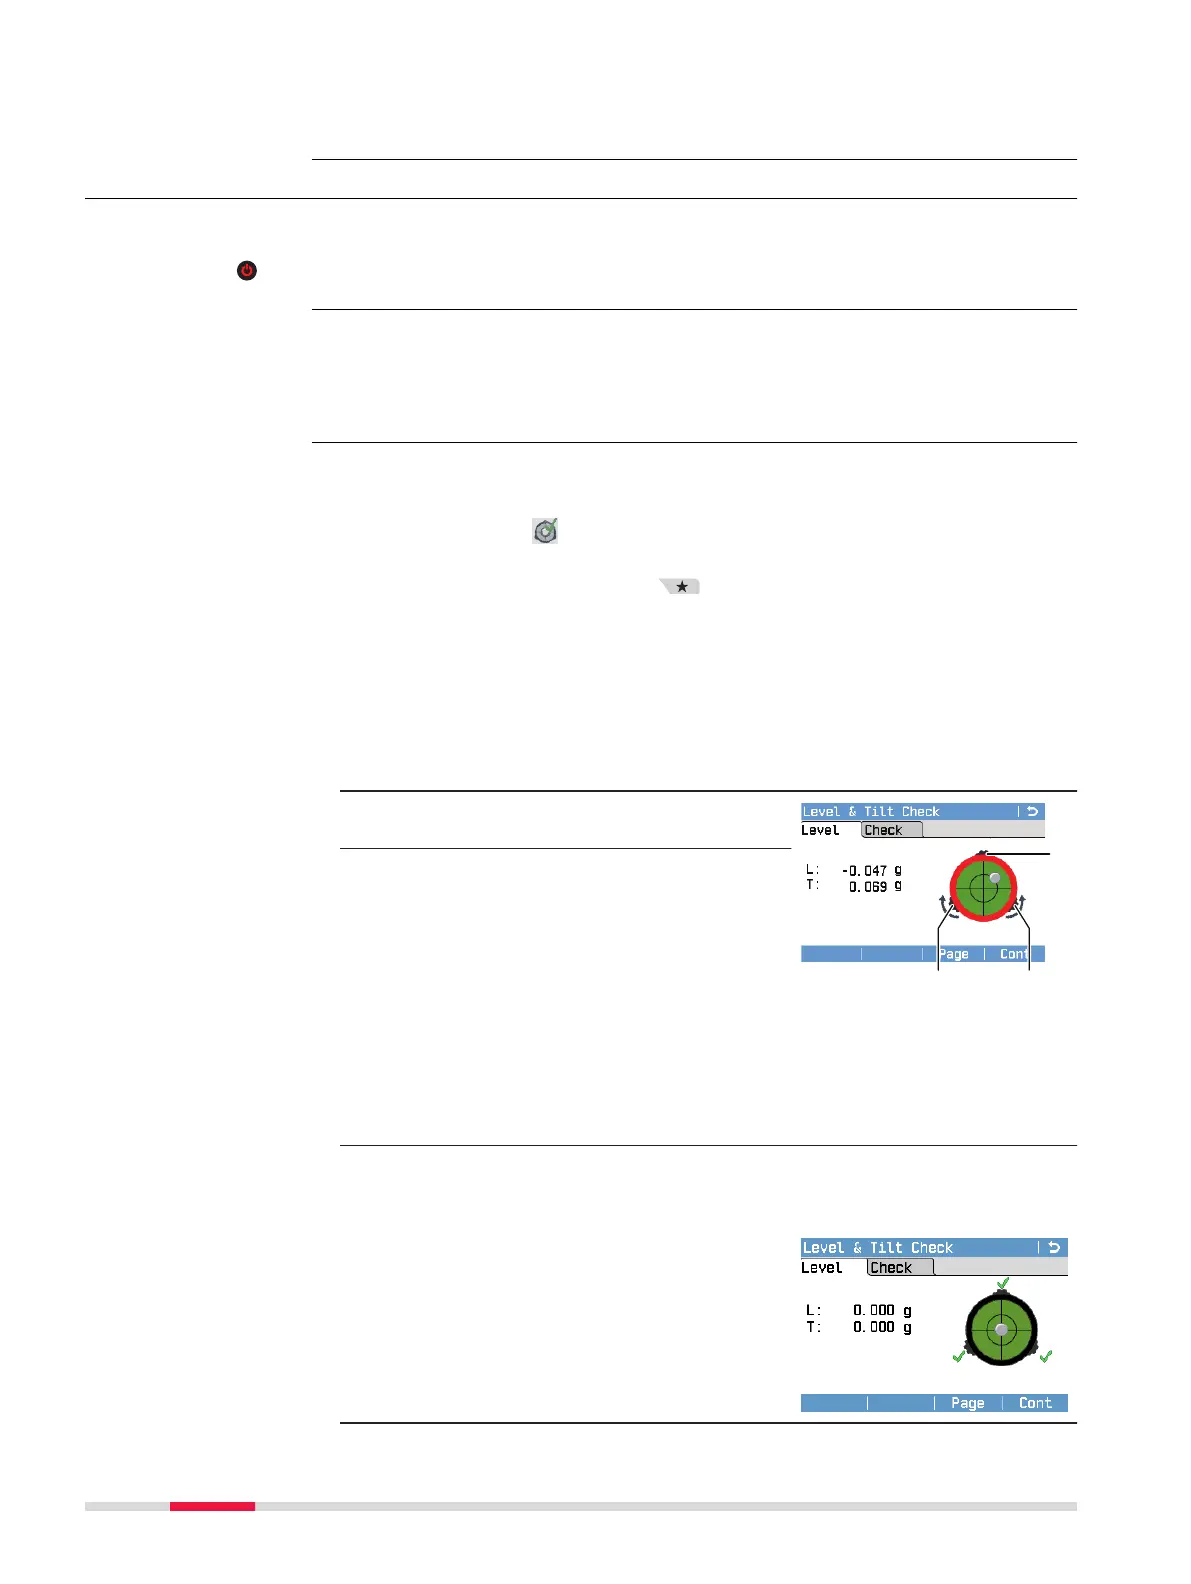
☞
When levelled correctly, check marks are displayed. If the
tilt of the instrument exceeds 0.110 gon/0.099°, the
digital circular level is out of its working range and there-
fore, its frame turns red. Once the level is within the
working range, its frame turns black.
4. Centre the level bubble alongside the perpendicular axis of the
crosshair by turning footscrew C. An arrow shows the direction of
rotation required.
☞
When the bubble is centred
and the check marks are
displayed, the instrument is
perfectly levelled.
Turn Instrument
On/Off or Enable
Standby Mode
Select a Language
For LS15:
Precise levelling with
the digital level
bubble step-by-step
28 Operation