5.
☞
To aim at the levelling staff, you can use the overview
camera within the tab Camera.
•
Aim at staff A and carry out a measurement (A1).
•
Aim at staff B and carry out a measurement (B1).
•
Store the measurements for station 1.
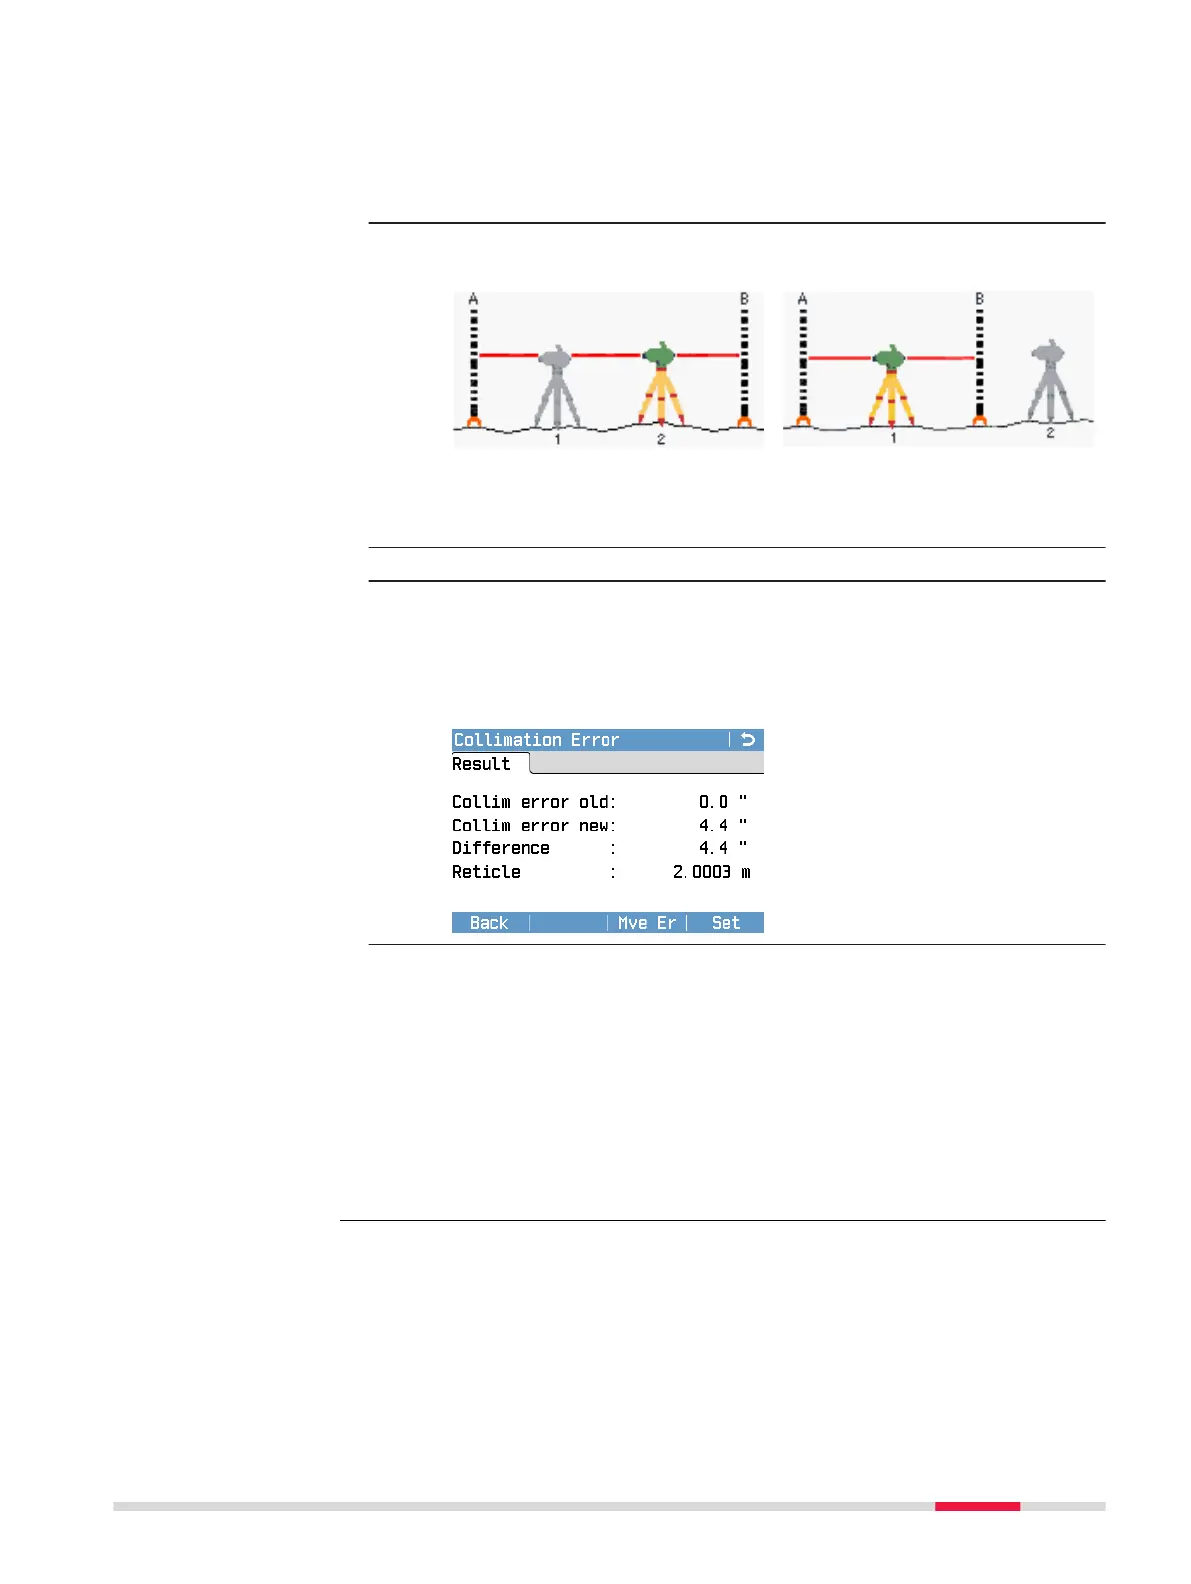
6. An information page displays the correct setup of the station
according to the selected adjustment method.
A x x B method
A x Bx method
Set up the instrument at the second position (station 2) and level
the instrument with the digital bubble.
7. Press F4 or Cont.
8.
•
Aim at staff B and carry out a measurement (B2).
•
Aim at staff A and carry out a measurement (A2).
•
Store the measurements for station 2.
On the page Result, the results of the adjustment procedure are
displayed.
To set the determined collima-
tion error and apply it to all sub-
sequent measurements, press
Set.
9.
☞
For some markets, it may be necessary to add the
determined user collimation error to the factory collima-
tion error. By adding the user collimation error, the cor-
rect collimation error is applied to all measurements and
the reported user collimation error is within the market-
specic tolerance. To add the determined user collimation
error to the factory collimation error, press Mve Er. You
need to conrm this action by pressing Cont. After being
conrmed, the new user collimation error is reported as
0.0".
Check & Adjust 99
 Loading...