• Make sure that the paper size and type are set correctly on the Embedded Web Server or the computer.
Note: Depending on your operating system, access the Paper menu using Local Printer Settings Utility or
Printer Settings.
• Store paper according to manufacturer recommendations.
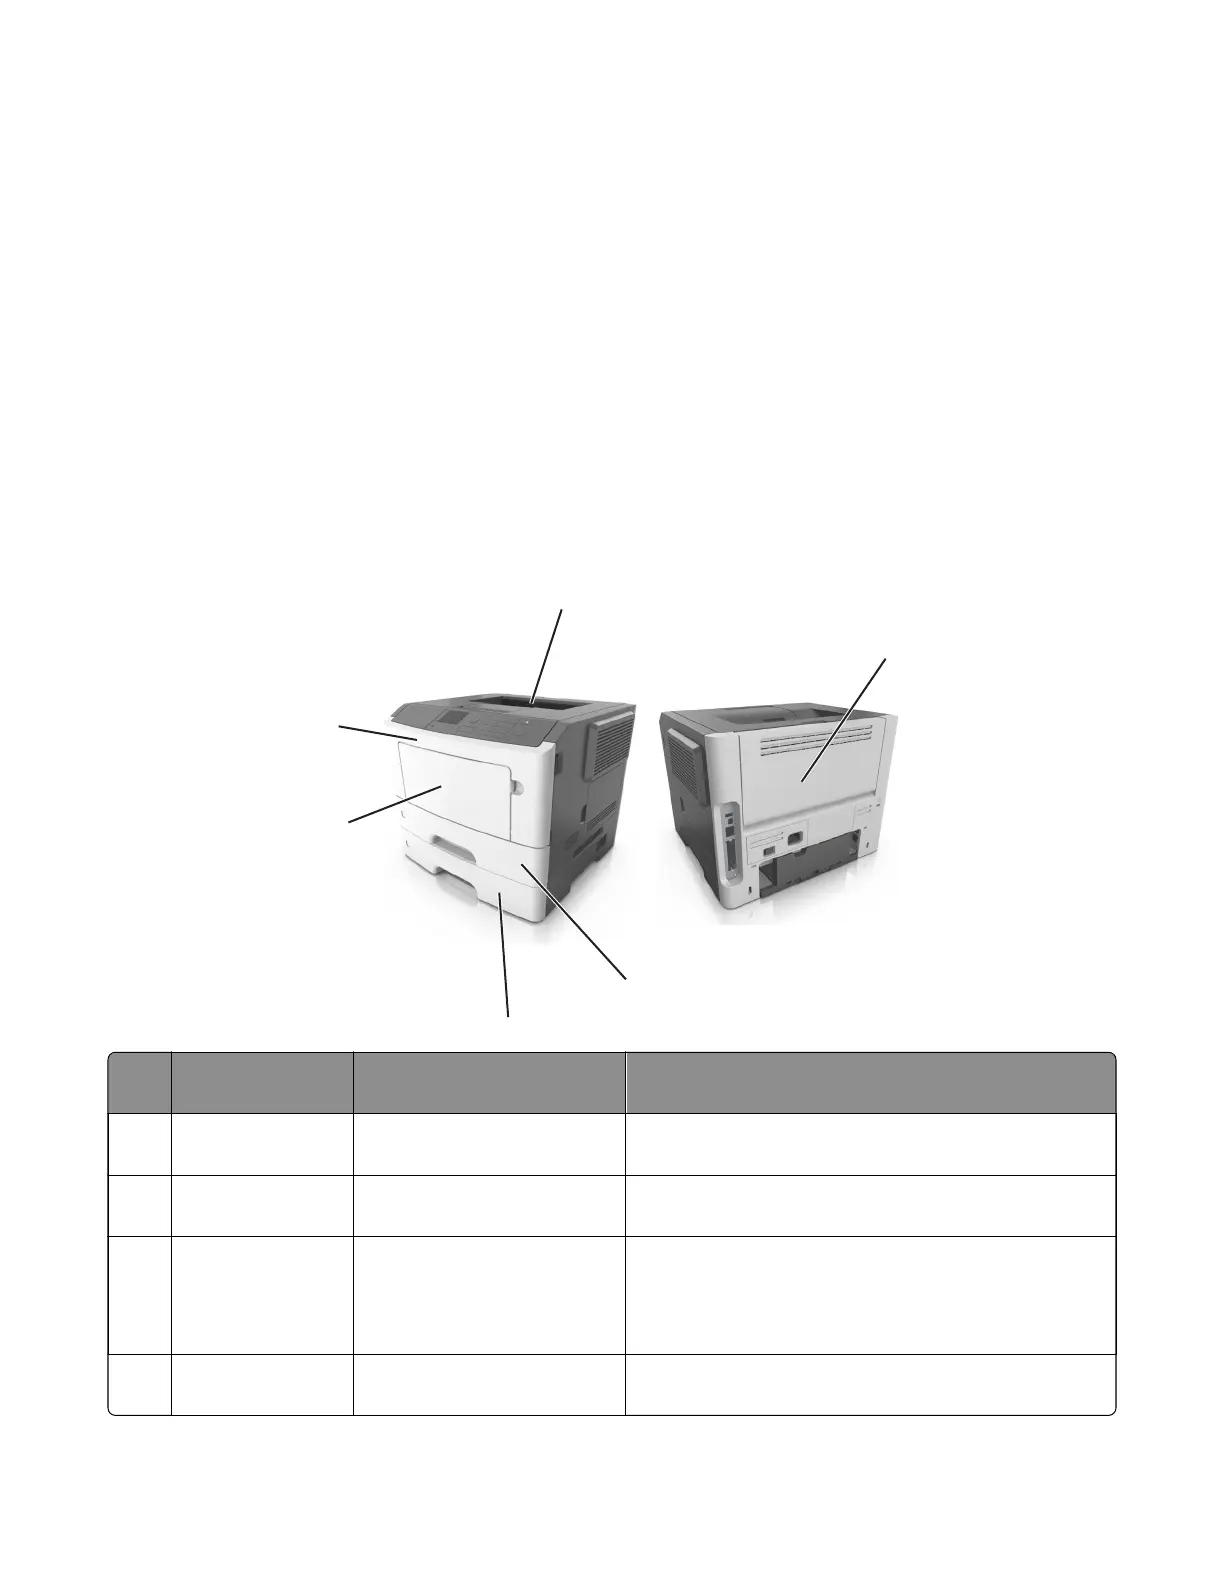
Understanding jam messages and locations
When a jam occurs, a message indicating the jam location and information to clear the jam appears on the
printer display. Open the doors, covers, and trays indicated on the display to remove the jam.
Notes:
• When Jam Assist is set to On, the printer automatically flushes blank pages or pages with partial prints to
the standard bin after a jammed page has been cleared. Check your printed output stack for discarded
pages.
• When Jam Recovery is set to On or Auto, the printer reprints jammed pages. However, the Auto setting
does not guarantee that the page will print.
1
5
6
2
3
4
# Area Printer control panel
message
What to do
1 Standard bin [x]‑page jam, clear standard
bin. [20y.xx]
Remove the jammed paper.
2 Rear door [x]‑page jam, open rear door.
[20y.xx]
Open the rear door, and then remove the jammed
paper.
3 Tray 1 [x]‑page jam, remove tray 1 to
clear duplex. [23y.xx]
Pull tray 1 completely out, then push the front duplex
flap down, and then remove the jammed paper.
Note: You may need to open the rear door to clear
some 23y.xx paper jams.
4 Tray [x] [x]‑page jam, remove tray [x].
[24y.xx]
Pull the indicated tray out, and then remove the jammed
paper.
4514-6xx
Diagnostics and troubleshooting
80