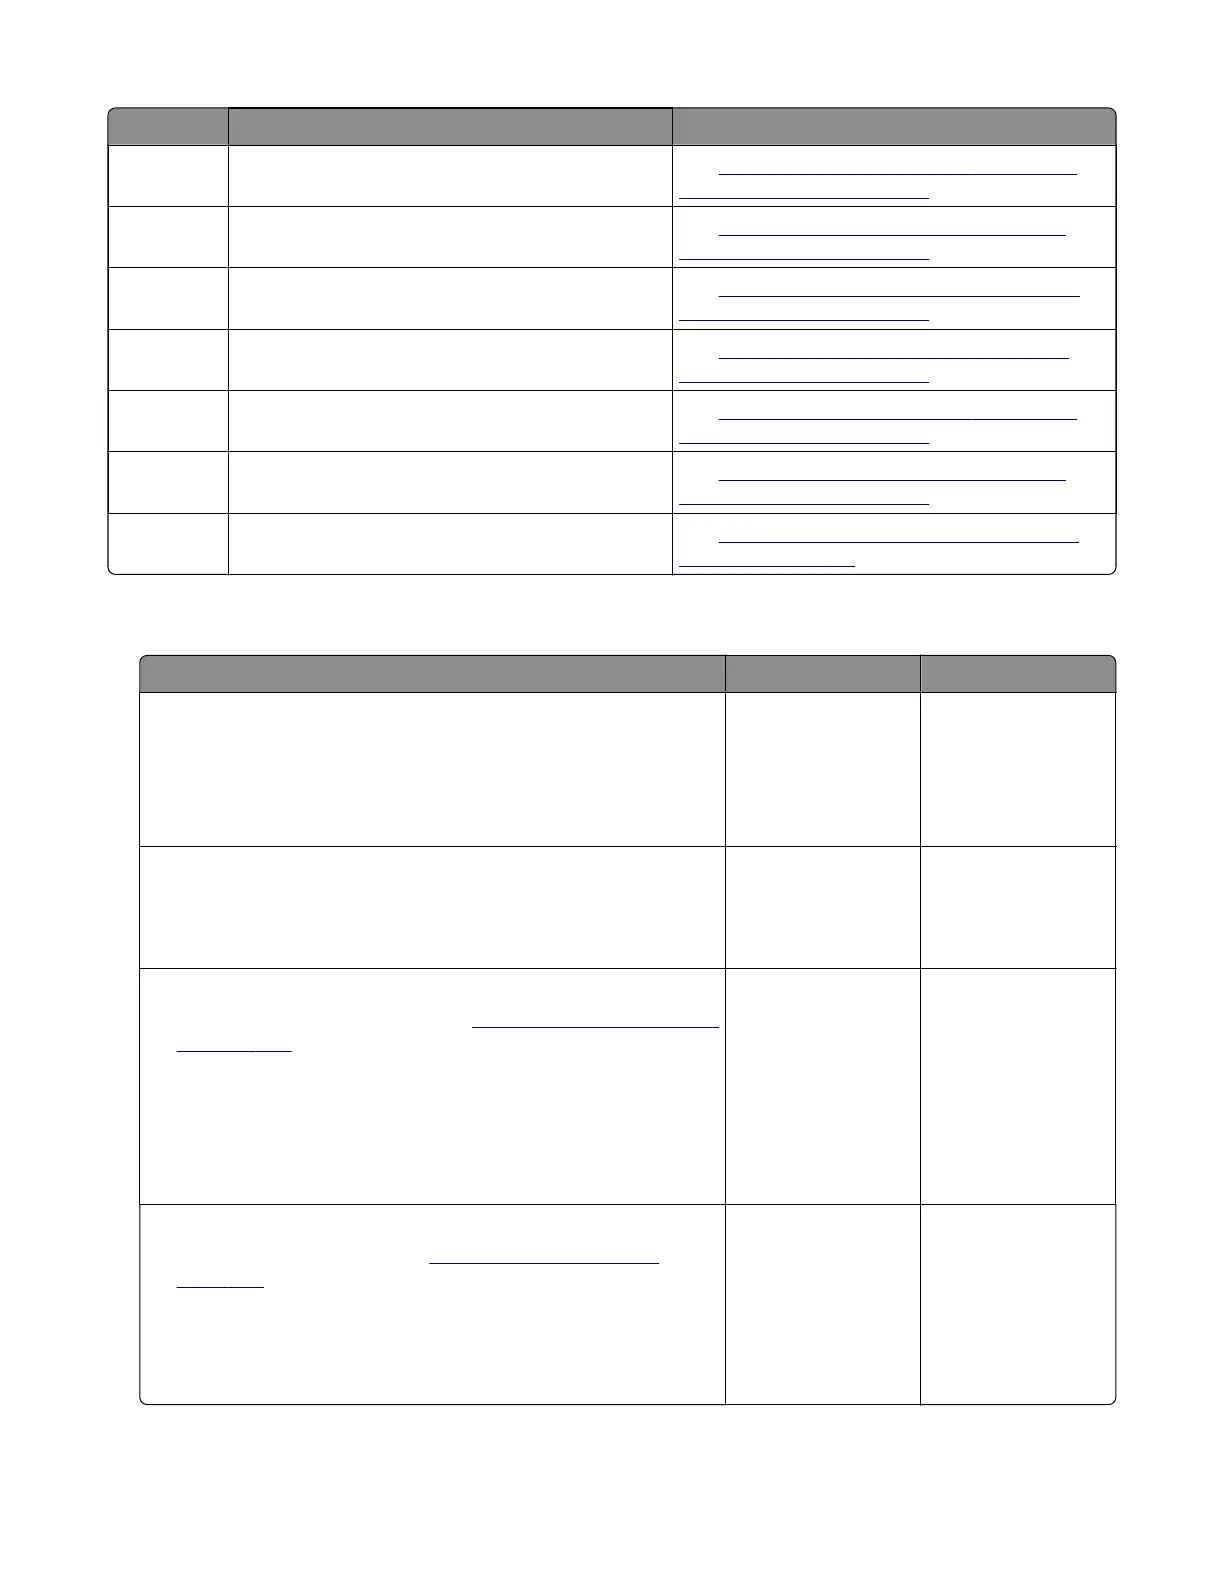
Error code Description Action
230.44 Paper fed from tray 4 cleared the sensor (duplex
path) earlier than expected.
See
“Sensor (duplex path) early‑leaving jam
service check” on page 108.
230.45 Paper fed from tray 4 never cleared the sensor
(duplex path).
See
“Sensor (duplex path) late-leaving jam
service check” on page 108.
230.52 Paper fed from tray 5 was detected earlier than
expected at the sensor (duplex path).
See
“Sensor (duplex path) early-arriving jam
service check” on page 105.
230.53 Paper fed from tray 5 never reached the sensor
(duplex path).
See
“Sensor (duplex path) late-arriving jam
service check” on page 106.
230.54 Paper fed from tray 5 cleared the sensor (duplex
path) earlier than expected.
See
“Sensor (duplex path) early‑leaving jam
service check” on page 108.
230.55 Paper fed from tray 5 never cleared the sensor
(duplex path).
See
“Sensor (duplex path) late-leaving jam
service check” on page 108.
230.91 Paper remains detected at the sensor (duplex
path) after the printer is turned on.
See
“Sensor (duplex path) static jam service
check” on page 110.
Sensor (duplex path) early-arriving jam service check
Action Yes No
Step 1
Check the duplex paper path for jammed paper and obstructions.
Note: Make sure that all paper fragments are removed.
Is the duplex paper path free of jammed paper and obstructions?
Go to step 3. Go to step 2.
Step 2
Remove the jammed paper and obstructions.
Does the problem remain?
Go to step 3. The problem is
solved.
Step 3
a Remove the duplex/MPF tray. See “Duplex/MPF tray removal”
on page 434.
b Enter the Diagnostics menu, and then navigate to:
Printer diagnostics and adjustments > Sensor tests
c Find the sensor (Duplex path).
Does the sensor status change while toggling the sensor?
Go to step 6. Go to step 4.
Step 4
a Remove the right cover. See “Right cover removal” on
page 420.
b Check the sensor cable J27 on the controller board for proper
connection.
Is the cable properly connected?
Go to step 6. Go to step 5.
4064
Diagnostics and troubleshooting
105