Pan/Tilt/Zoom (PTZ) Cameras16
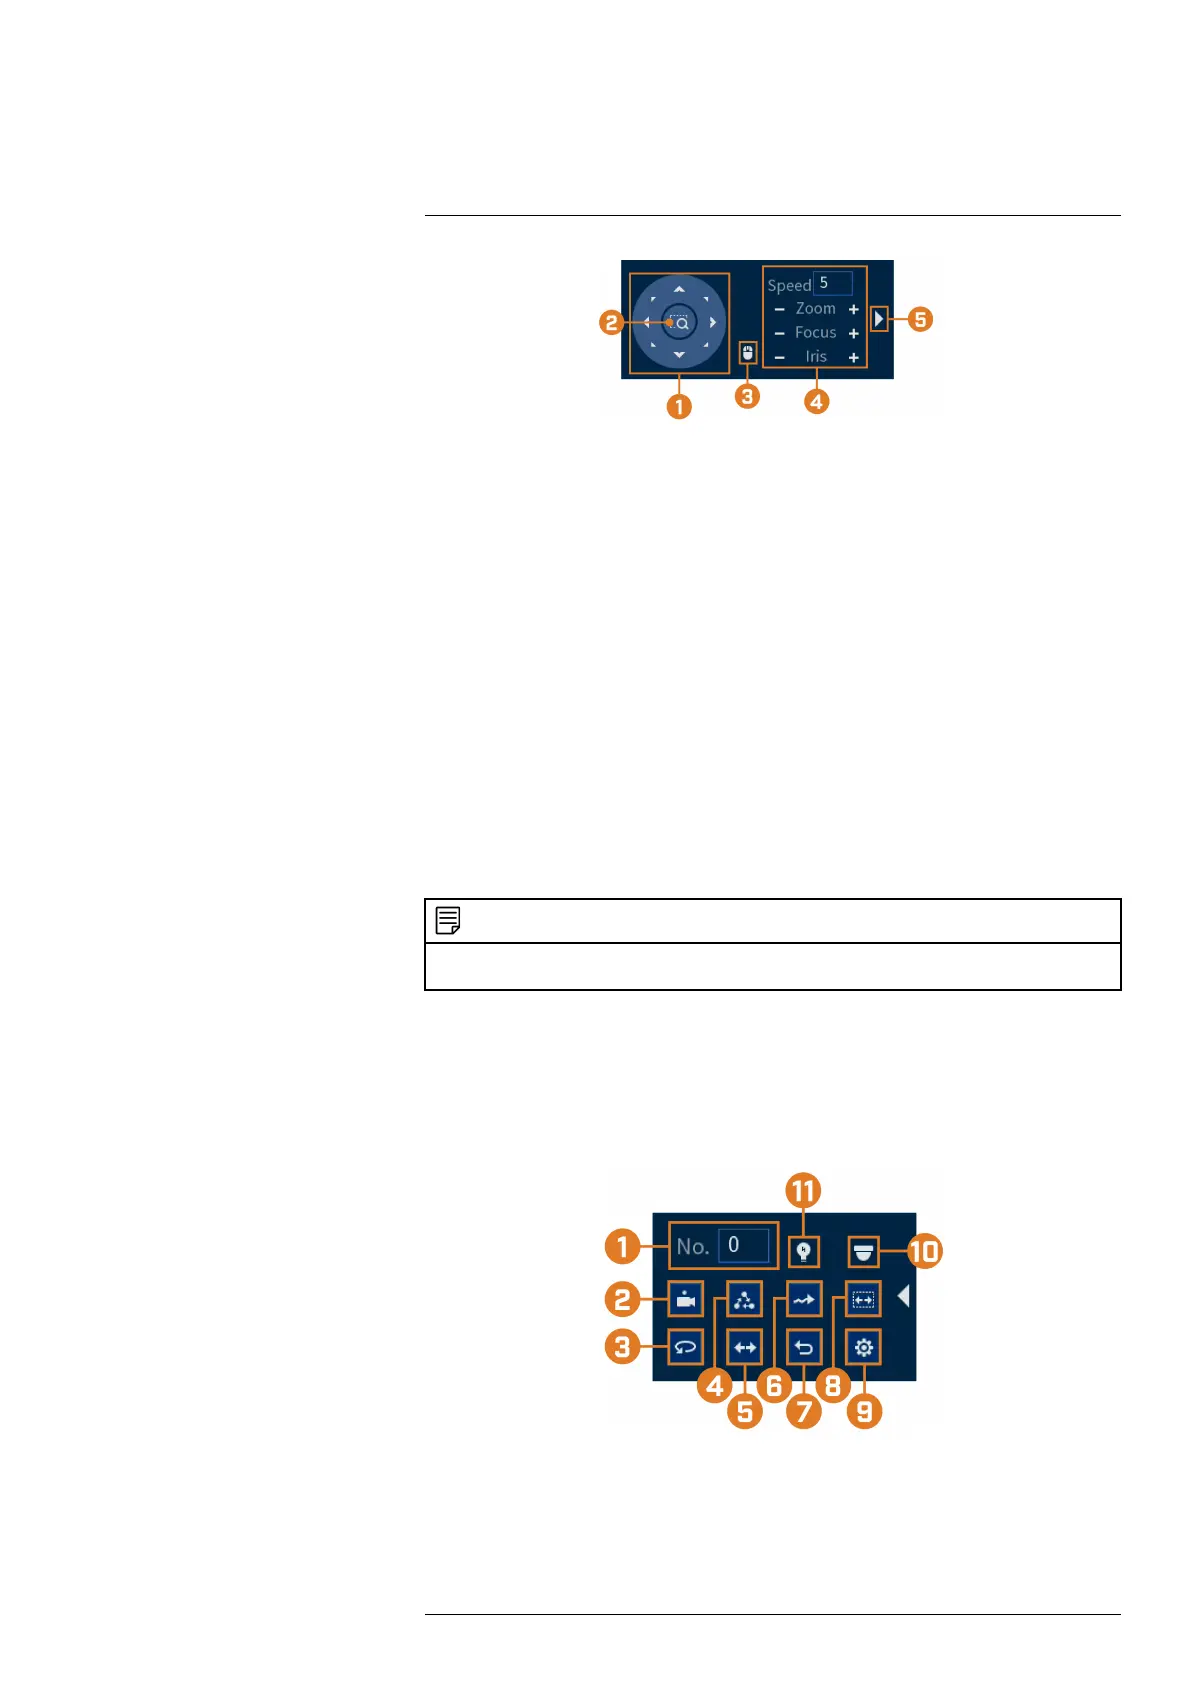
1. Navigation Controls: Click the directional arrows to move the PTZ camera manually.
2. Zoom-to-Area: Click, then click-and-drag to draw a box on the camera image. The PTZ
camera will zoom in to the selected area.
3. Mouse Tracking: Click to enable/disable mouse tracking. When enabled, click-and-drag in
the direction you would like the PTZ camera to move. The camera will follow the path of
the mouse cursor.
4. PTZ Settings:
• Speed: The speed of PTZ camera movement. A higher value means the camera will move
faster.
• Zoom: Optical zoom level. Click + to zoom in, and – to zoom out.
• Focus: Manually control focus level. Click + to focus on objects further from the camera,
or – to focus on objects closer to the camera.
• Iris: Controls the amount of light coming through the lens. Click + to allow more light,
or – for less.
5. Advanced: Expand to show advanced options. For a full overview, see 16.3 Advanced PTZ
Controls, page 76.
16.3 Advanced PTZ Controls
Using advanced options for PTZ cameras, including presets, tours, patterns, etc.
NOTE
Ensure you have completed initial setup of your PTZ camera in order to control the camera using the recorder.
See 16.1 Connecting PTZ Cameras to the Recorder for more details.
To access the advanced PTZ controls:
• Open the Live View screen for your PTZ camera in single-channel view (fullscreen). Right-
click to open the Quick Menu, then click Pan/Tilt/Zoom.
• Click the arrow on the far-right side of the PTZ control panel to access advanced options.
• Right-click again to close PTZ controls.
To use the PTZ controls:
1. No.: Enter the ID number for a preset, tour, or pattern you want to activate.
2. Preset: Move the camera to the preset number specified in the No. field. For instructions on
setting up preset locations, see 16.4 Presets, page 77.
3. AutoPan: Set the camera to rotate 180° back and forth.
#LX400111; r. 3.0/56507/56507; en-US 76