Connecting Audio Devices17
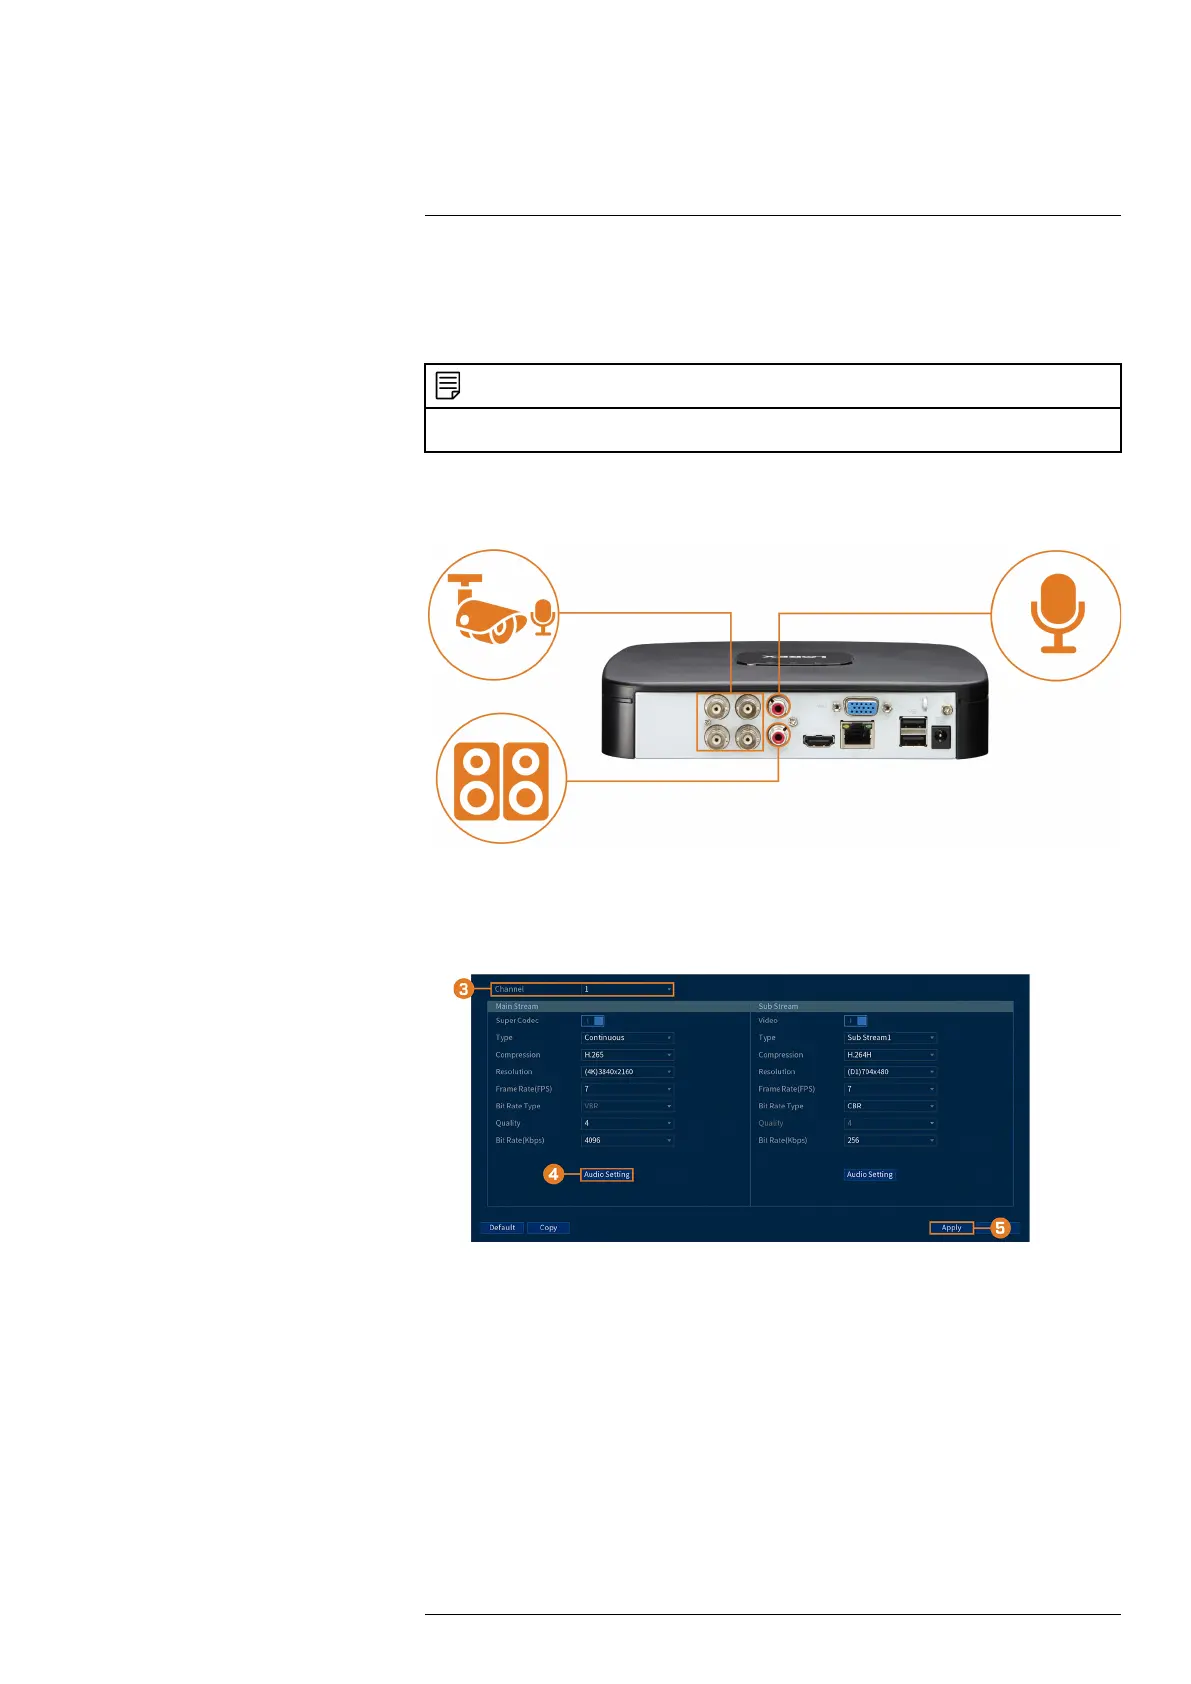
The system supports Lorex HD audio cameras, which transmit audio through the same coax ca-
ble used for video connection. The system can also record one audio channel using the AUDIO
IN port on the rear panel. You must have a self-powered microphone or an audio camera with an
RCA–type audio connection to use this port.
NOTE
Use of an external microphone allows you to record audio on Channel 1 of the system. It cannot be moved to a
different channel.
The second RCA-type connector on the back panel is the AUDIO OUT port, which can be used
to connect a self-powered speaker that will play audio from the system (requires audio-capable
camera or self-power microphone).
To enable audio recording using a Lorex HD audio camera:
1. From the Live View display, right-click to open the Quick Menu, then click Main Menu.
2. Click CAMERA. Click the RECORDING tab on the side panel, then Recording on the top
panel.
3. Select the channel where the audio camera is connected.
#LX400111; r. 3.0/56507/56507; en-US 79