136
Configuring Camera Settings using a Web Browser
• Use the following DNS server address: Select and then manually enter DNS server
information.
3. Click Save & Apply.
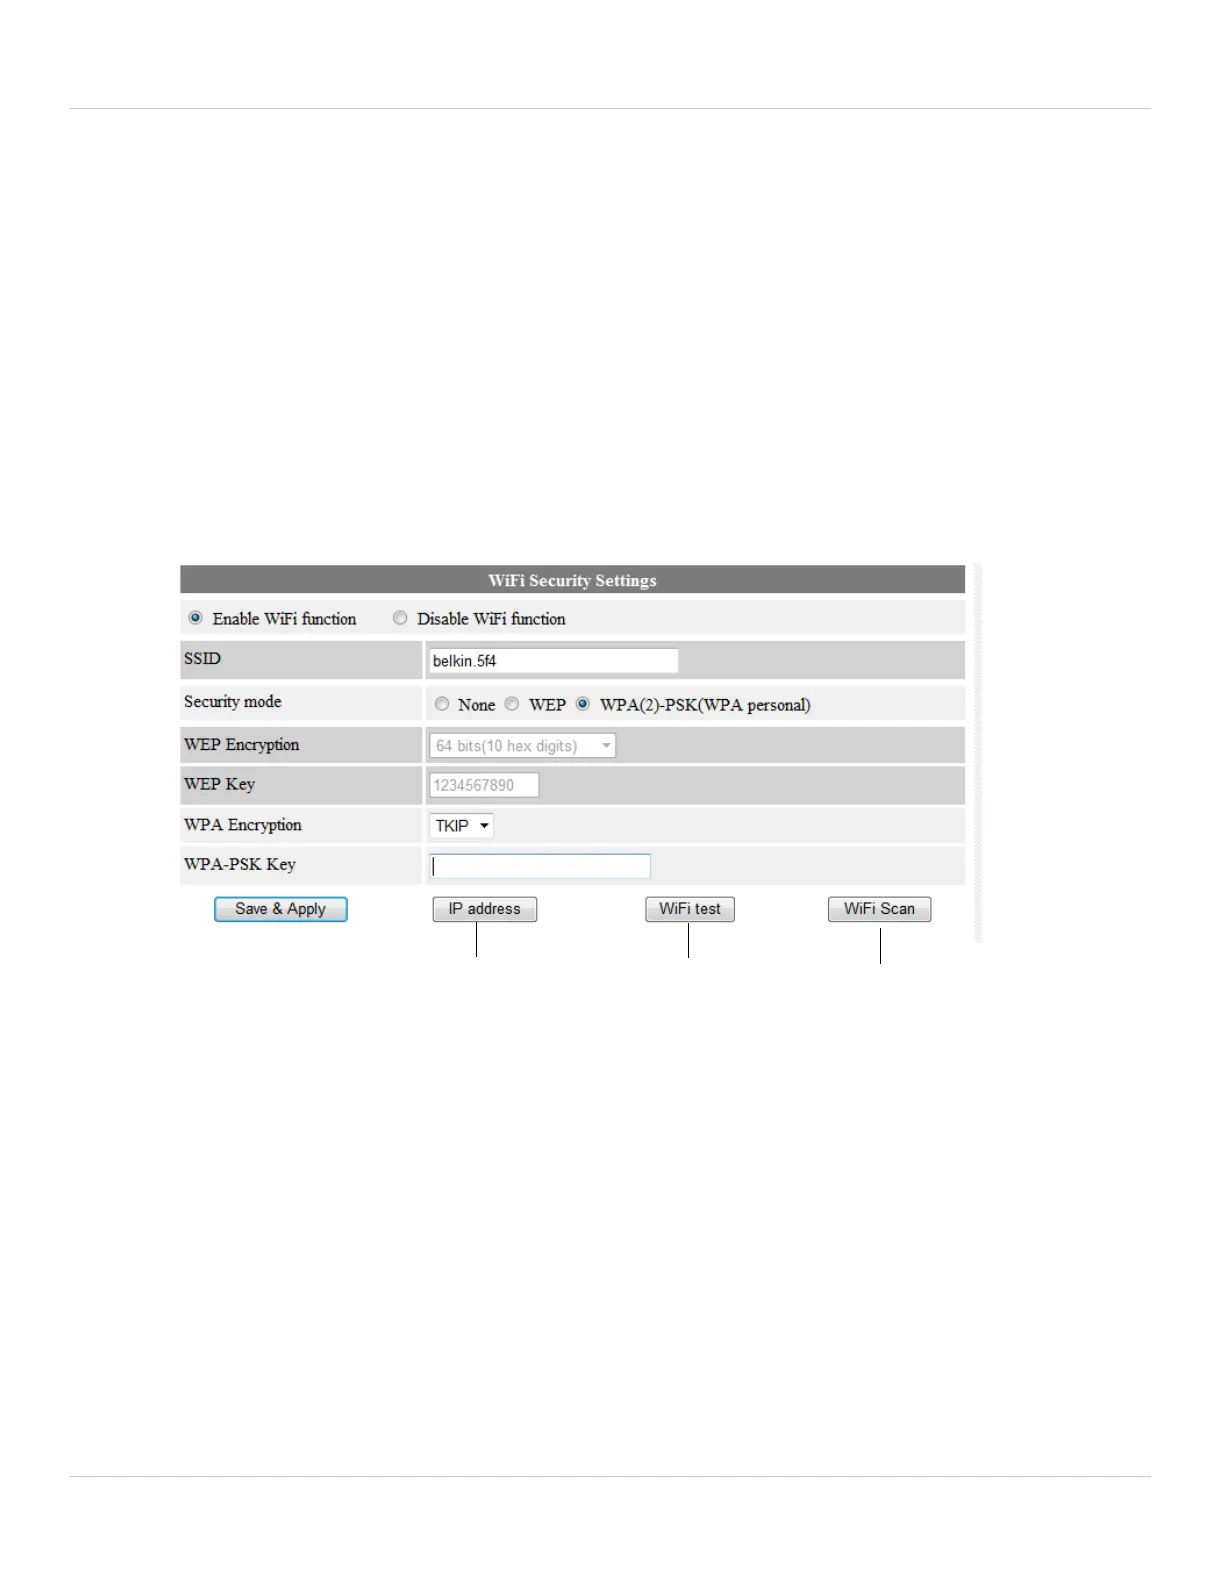
8.2.2 WIFI SECURITY (CONFIGURING WIFI SETTINGS)
Configure the camera to connect to a WiFi network and configure WiFi settings.
To configure WiFi Settings:
NOTE: For instructions on connecting your camera to a WiFi network, see “WiFi Setup”
on page 21.
1.
Configure WiFi
IP address
Test WiFi
configuration
Scan WiFi
networks
Perform one of the following:
• To Scan available WiFi networks, click WiFi Scan.
• To
connect to a hidden WiFi network, select Enable Wifi function, and manually fill
out the SSID, Security mode (i.e. encryption type), and the WEP or WPA-PSK Key.
Click Save & Apply. Refresh the page and select WiFi test. When the test is
successful, disconnect the camera from Ethernet.
• To configure a fixed IP address for the camera when connected over WiFi, click IP
address, configure the settings as needed, and click Save & Apply.
• To test configured WiFi settings, click WiFi test.

 Loading...