Using FLIR Cloud™ Client for PC or Mac
16
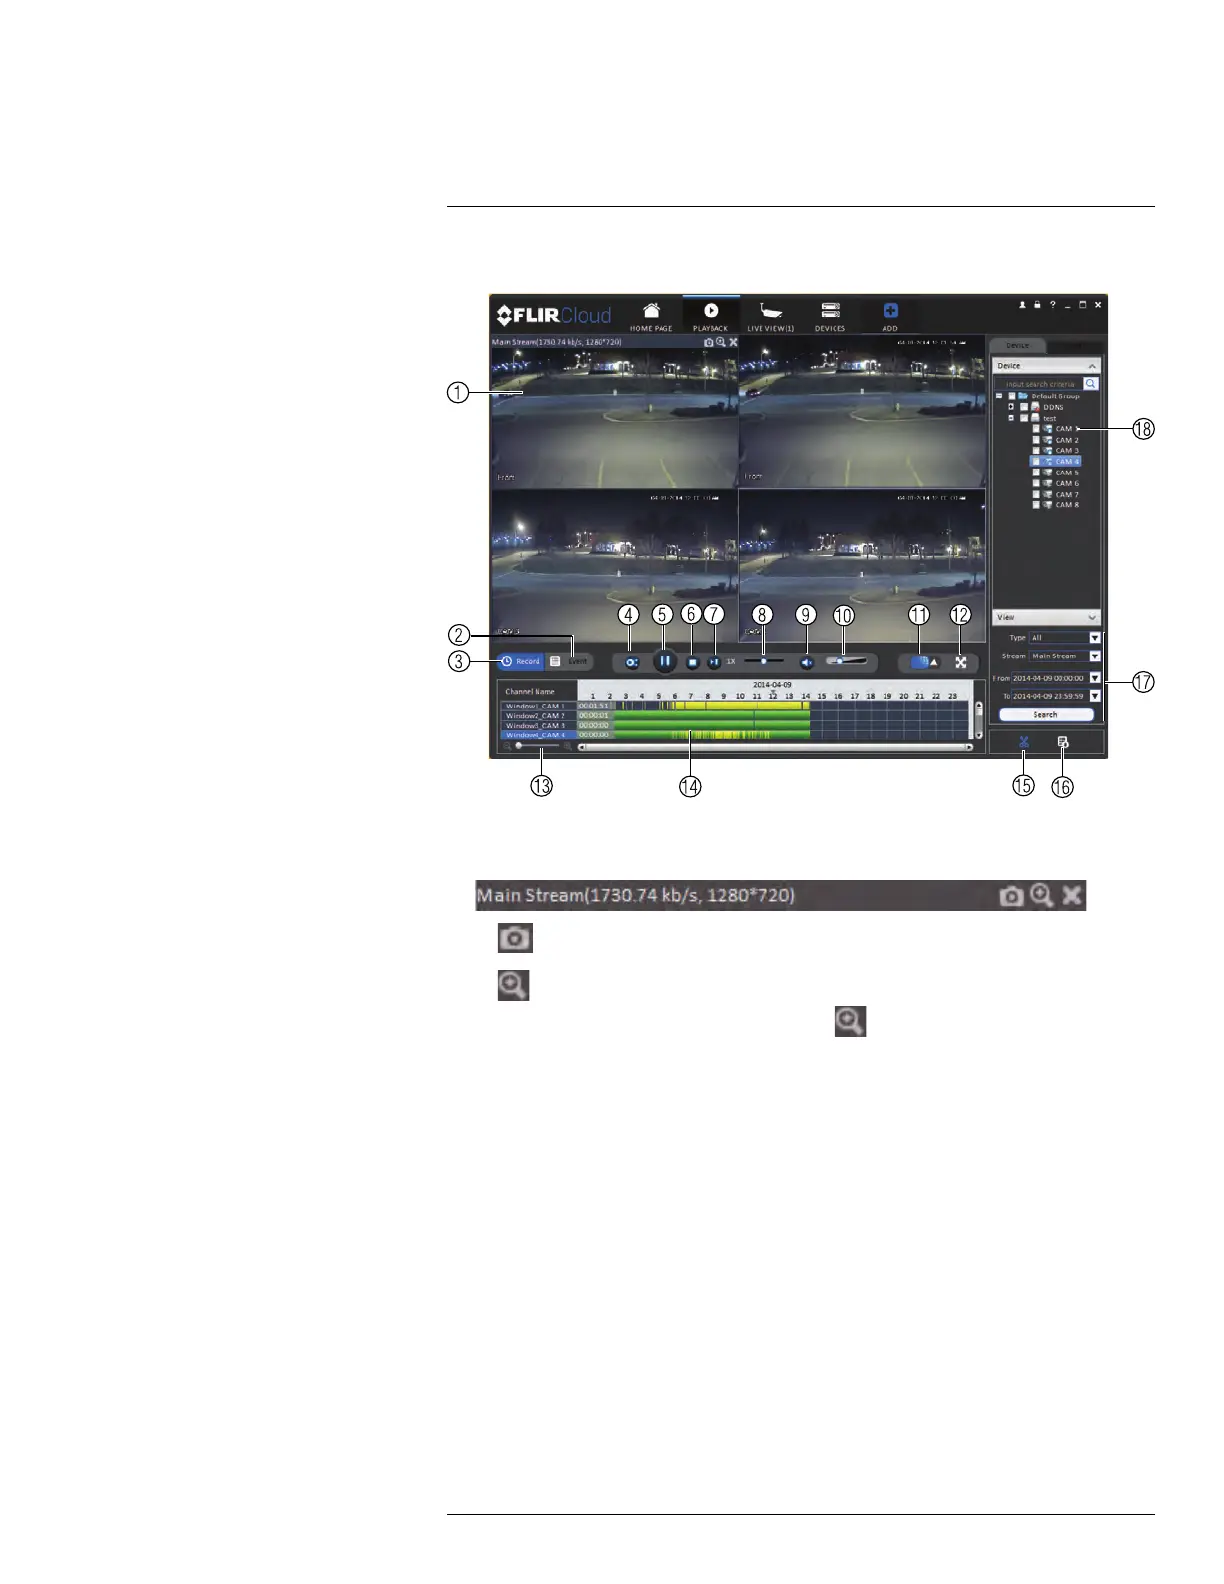
16.5 Playback Controls
1. Display area: Double-click to expand/return to split-screen mode. Hold the mouse
over the display area to open the camera toolbar.
• Snapshot: Click to save a snapshot.
•
Digital zoom: Click to enable digital zoom mode. Then, click and drag to zoom
in. Click and drag to pan the camera. Click
again to zoom out.
2. Event: Click to view recordings based on a list of events and files.
3. Record: Click to view recordings on a timeline.
4. Sync: Click to sync playback between channels. This forces all channels to playback
from the same time.
5. Pause/play.
6. Stop.
7. Frame-by-frame: Click to advance the video by a single frame.
8. Playback speed: Use the slider to adjust the playback speed.
9. Mute.
10. Volume.
11. Split-screen: Select split screen configuration.
12. Full-screen: Click to open playback in full-screen. Press ESC to exit full-screen.
13. Timeline zoom: Use the slider to zoom in/out on the timeline.
14. Playback timeline: Shows recordings from the selected channels on a timeline. Click
inside the timeline to start playback or select a playback time. Each type of recordings
is shown in a different color. Continuous recordings are green, motion recordings are
yellow, and alarm recordings are red.
15. Video clip: Click to start a video clip. You can download video clips to your hard drive.
#LX400078; r.36882/36882; en-US
92
 Loading...