Using the System
8
3. Click OK to save changes.
NOTE
You must save changes to apply settings changes. It is recommended to adjust one setting at a time
so you can see the results of each change. Click Default to reset the camera to default image
settings.
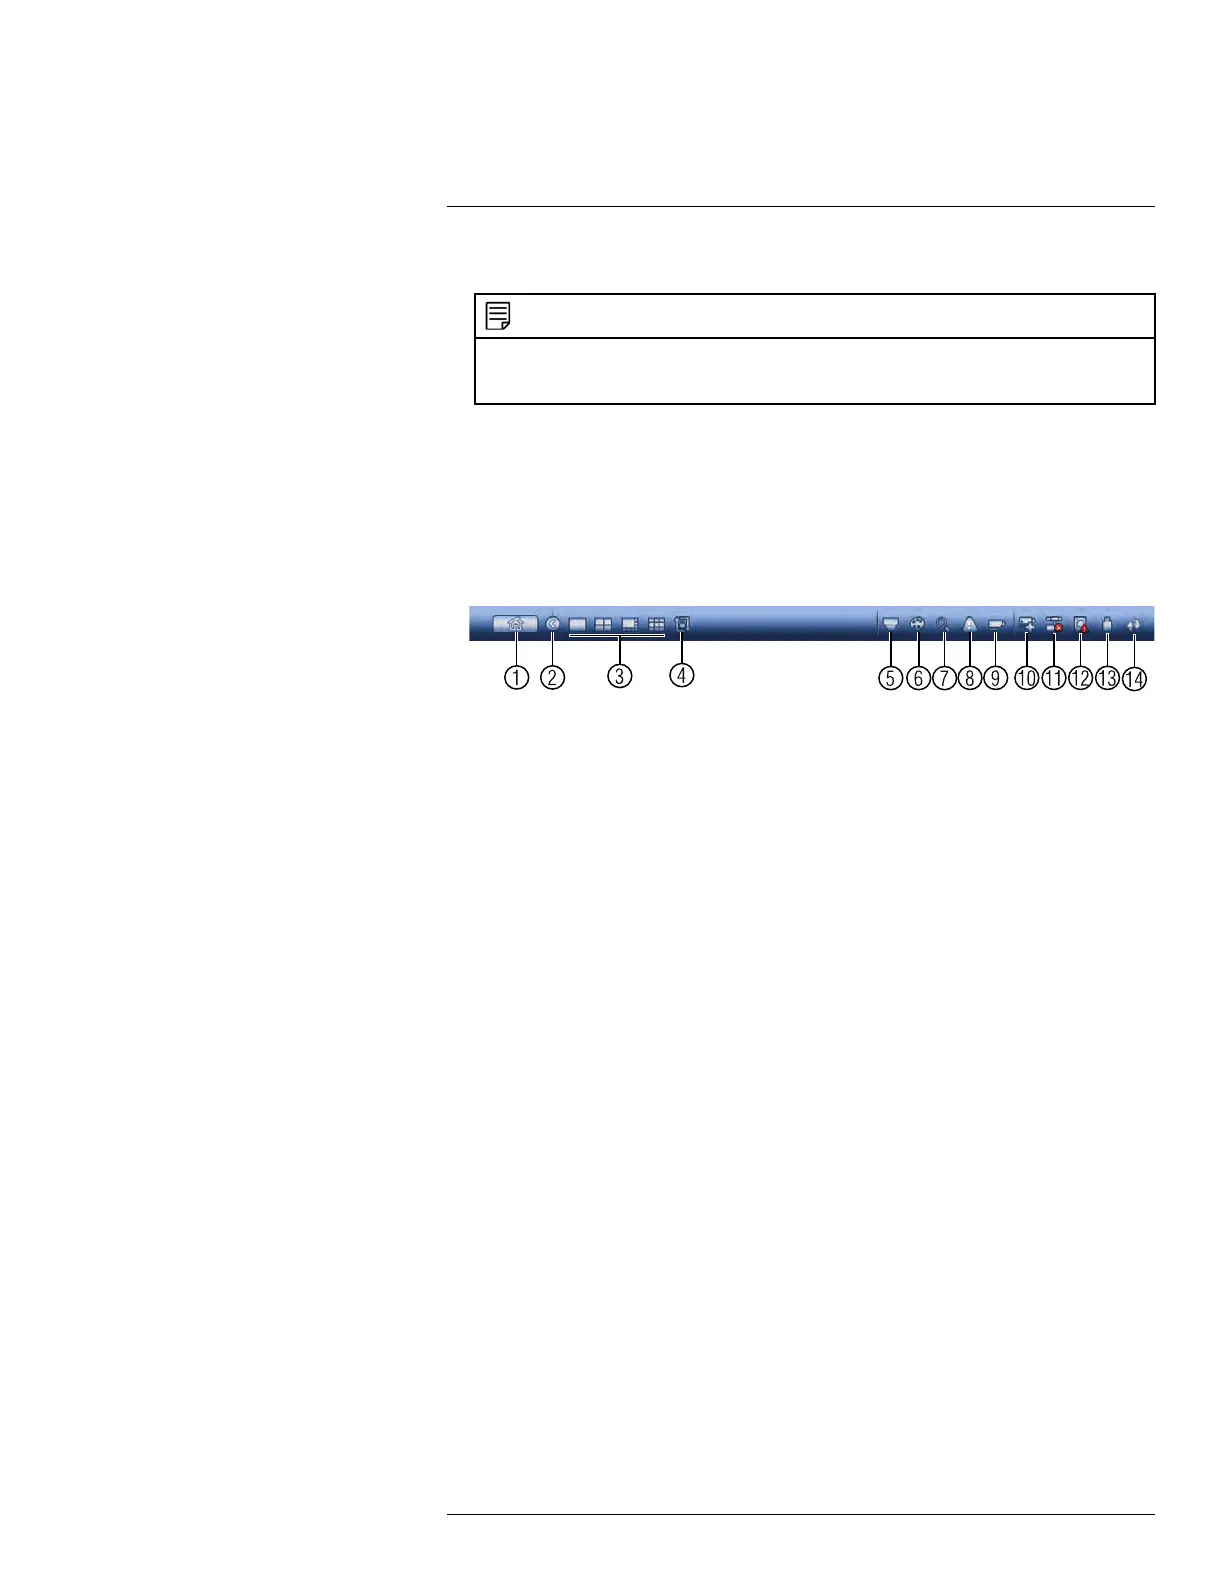
8.4 Using the Navigation Bar
The Navigation Bar gives quick access to certain functions and menus.
To open the Navigation bar:
• In live view, hover the mouse cursor over the bottom of the screen to open the Naviga-
tion Bar. Move the mouse cursor away from the bottom of the screen to close the navi-
gation bar. The Navigation Bar has the following options:
1. Main Menu.
2. Collapse.
3. Select display layout.
4. Sequence Control: Click to start/stop sequence mode.
5. PTZ: Click to open PTZ controls.
6. Camera: Click to open camera image settings.
7. Search: Search and playback recorded video. See 16.4 Playback, page 90.
8. Alarm Status: View alarms in progress. See 14.2.4 Event Info, page 50.
9. Channel Info: Click to access status information about connected cameras.
10. Remote Device Search: Manage IP cameras over the network.
11. Network: Configure network settings for your system. See 14.3.1 Network, page 53.
12. HDD Manager: Manage hard drives connected to the system. See 14.3.21 Format-
ting the Hard Drive, page 69.
13. USB Manager: Click to access options for connected USB thumb drives (not in-
cluded). You can backup video, logs, or system configurations and install firmware
upgrades.
14. System Upgrade: Check for firmware upgrades. The system must be connected to
the Internet to check for or receive updates.
8.5 Using the Camera Toolbar
The Camera Toolbar is used to perform actions on a specific channel.
To access the Camera Toolbar:
• Move the mouse to the top of the channel display. The Camera Toolbar has the follow-
ing options:
#LX400078; r.36882/36882; en-US
19
 Loading...