DDNS Setup (Advanced)
18
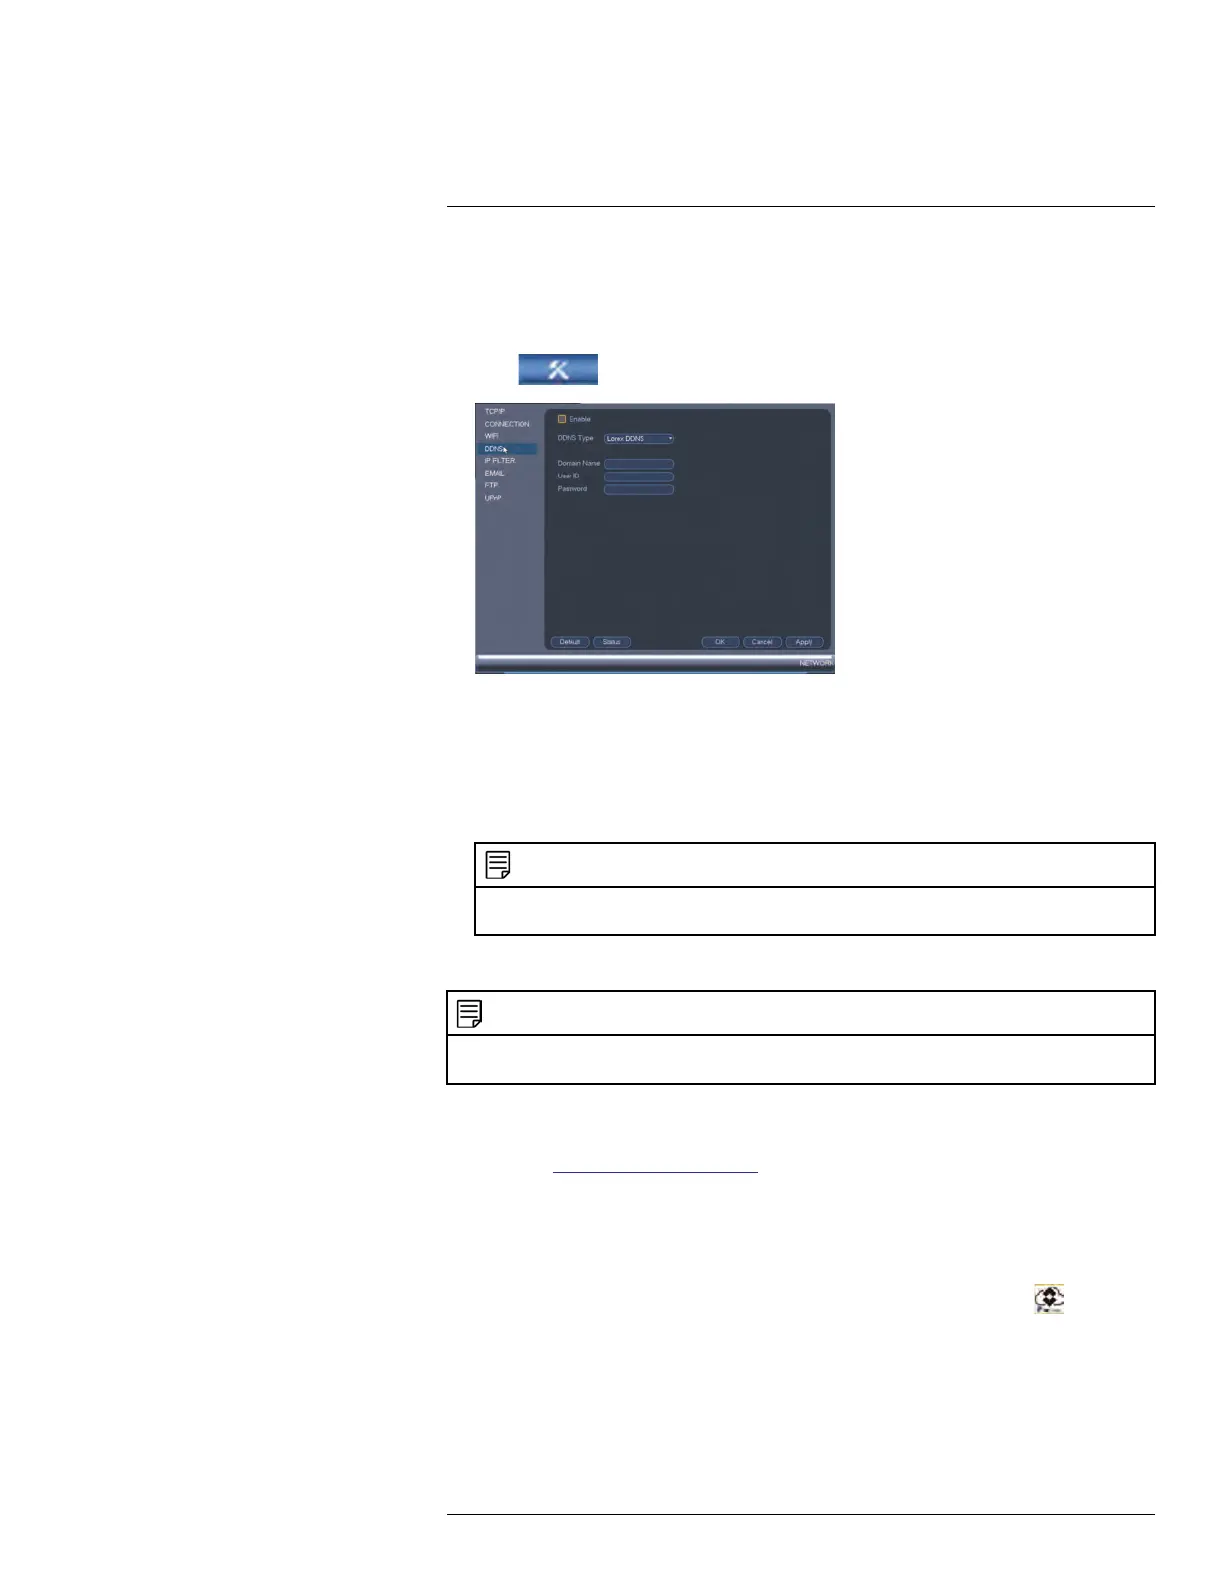
18.2.3 Step 3 of 4: Enable DDNS on the System
To enable DDNS in your System:
1. Right-click and click Main Menu. Enter the system password if prompted.
2. Click
and then click Network>DDNS.
3. Check Enable.
4. Under Domain Name, enter the Domain Name/URL Request your received in the
email after registering for DDNS.
5. Under User Name, enter your DDNS User Name.
6. Under Password, enter your DDNS Device password.
7. Click OK to save your settings.
NOTE
Please allow 10~15 minutes for the DDNS servers to update with your new DDNS address before at-
tempting to connect.
18.2.4 Step 4 of 4: Connect to the System’s DDNS Address
NOTE
Please allow 10~15 minutes for the DDNS servers to update with your new DDNS address before at-
tempting to connect.
To connect using the system’s DDNS address:
1. Download and install the client software on a remote computer. To find the client soft-
ware visit www.lorextechnology.com, search for the model number of your product,
click on your product in the search results, and click on the Downloads tab.
• PC Users: Download and install the Client Software for PC.
• Mac Users: Download and install the Client Software for Mac. Double click to ex-
tract the software. Drag the software to Applications.
2. Once installation is finished, double-click the FLIR Cloud™ Client icon (
) from the
desktop.
#LX400078; r.36882/36882; en-US
137
 Loading...