p/n 18603-001, Rev. C LTV
®
1200/1150 Ventilator Service Manual Page 8-29
Back Panel, Reinstallation
Parts required for replacement: Tools required:
Replace if damaged:
• 1/4" Flat head Screw (3) P/N 10430
• 1/2" Flat head Screw (6) P/N 10338
• Finish Washer (6) P/N 10191, or 19119-001,
or 19119-002
• Grounding Clips (3) P/N 10752
• Thermo Conductive Pad P/N 11441
• Conductive Silicon Gasket P/N 10882
• Loctite 4541 Adhesive P/N 10773
• Back Panel
38
• Phillips screwdriver with torque
meter
• Grounded anti-static wrist strap
• O
2
Sampling Tube, P/N 10544
39
NOTE
If you have not performed the calibrations shown in Chapter 6 you will need to measure the
turbine speed as shown on page 6-21 before replacing the back panel. This is required in
order to complete the Final Checkout tests in Chapter 9.
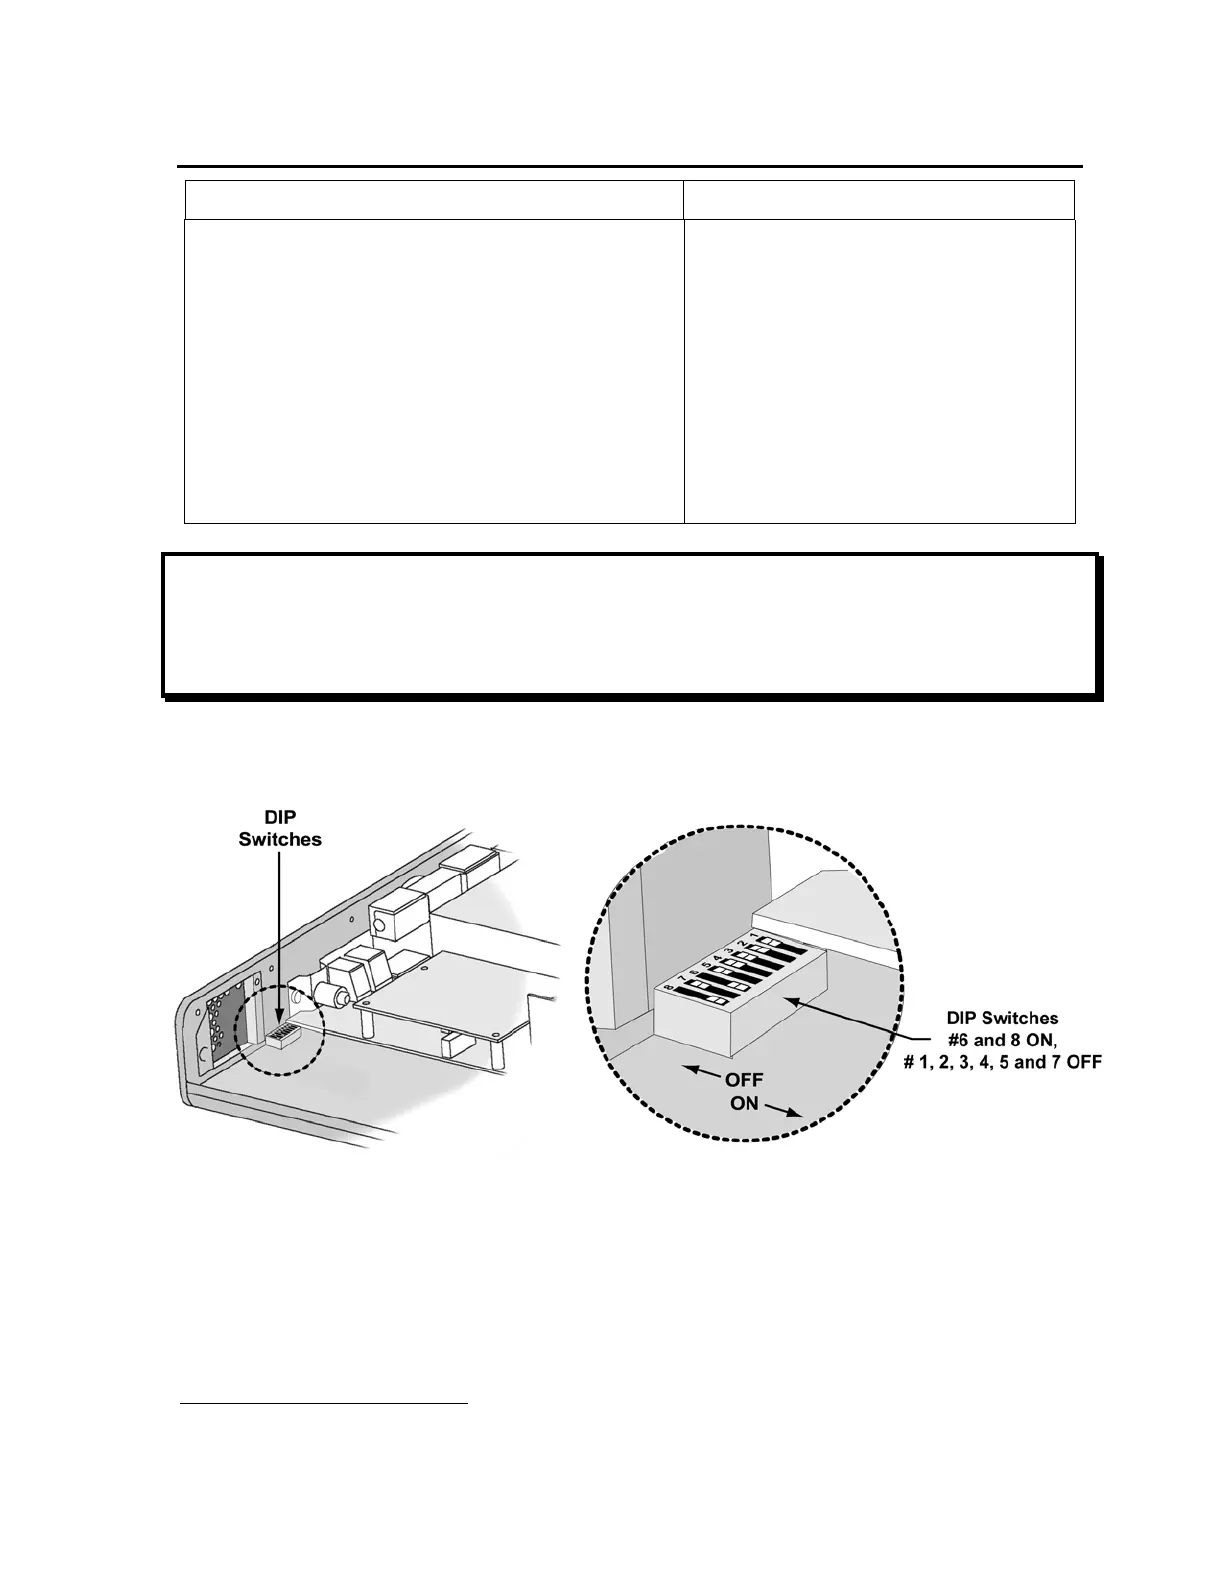
1) Before replacing the back panel, verify that any DIP switch settings have been restored
to their correct positions as shown below.
2) Turn the ventilator face down.
3) Check the serial number on the back of the ventilator to ensure it matches the number
found on the inside of the ventilator near the fan assembly. If the serial numbers do not
match, locate the correct back panel for the ventilator before continuing.
38
Contact Pulmonetic Systems for back panel replacement information.
39
O
2
Sampling Tube, P/N 10544, ~10.0” long, 0.125” O.D. X 0.079 I.D. clear polycarbonate tubing.