p/n 18603-001, Rev. C LTV
®
1200/1150 Ventilator Service Manual Page 8-81
Internal Inlet Filter
The interior inlet filter should be removed and cleaned every 2 years or 10,000 hours. If the
filter is damaged or can not be thoroughly cleaned, it should be replaced.
Parts required for replacement: Tools required:
Replace if damaged:
• Interior Inlet Filter P/N 10629
• Phillips screwdriver with torque meter
• Flat tip screwdriver or dental pick
• Grounded anti-static wrist strap
• Mild cleanser
• Soft cleaning brush
To clean or replace the interior inlet filter:
1) Remove the back panel of the ventilator and set it on its side beside the ventilator (see
instructions on page 8-28).
2) Remove the internal inlet filter by lifting the edge carefully using your fingers or a flat tip
screwdriver or dental pick if necessary. Be careful not to damage the edge of the filter, as it
must seal against the adjacent surfaces.
3) Clean the filter using a gentle cleanser and a soft brush. Dry the filter completely.
4) Inspect the filter for damage. If the filter screen is not intact, shows signs of damage or if the
edge is damaged, replace with a new filter.
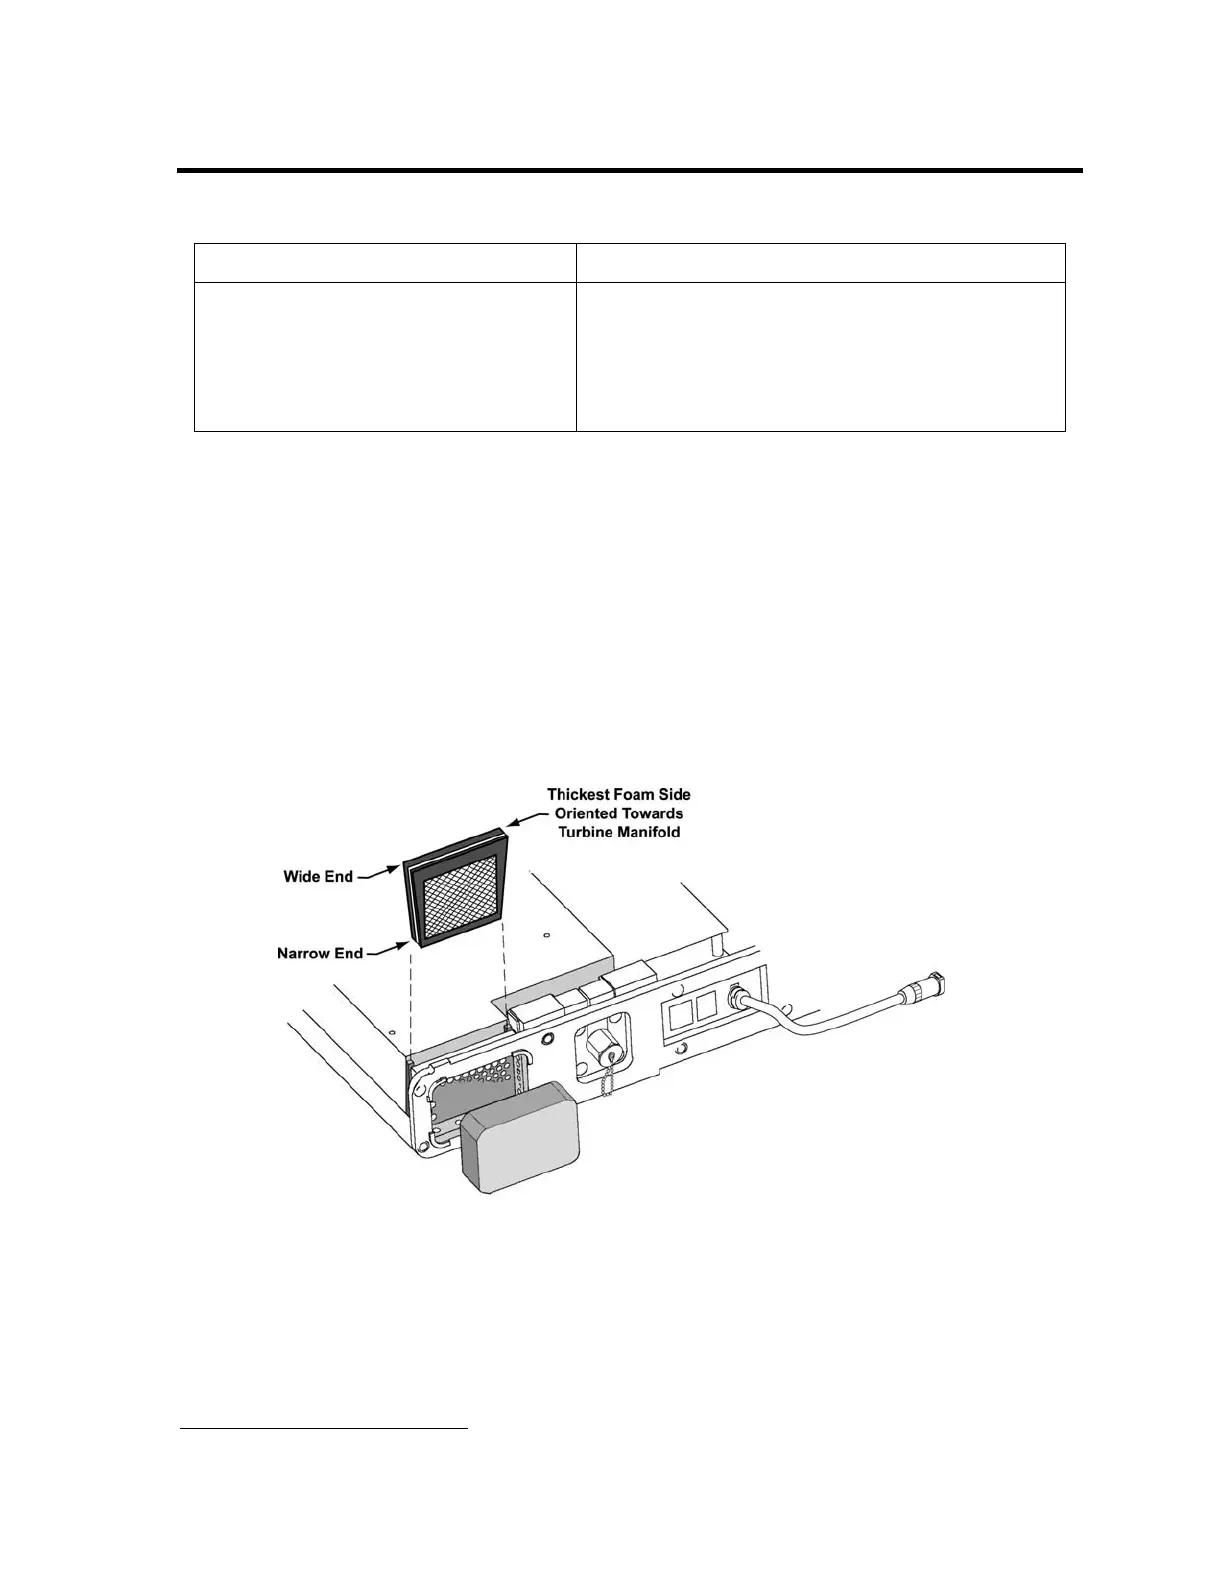
5) Orient the filter as shown (with the thickest foam side facing in, toward the turbine manifold),
and install the filter by sliding it narrow end first in between the External Inlet filter housing
and the turbine manifold. The filter must seat completely so the top surface is flush with the
turbine manifold
.
6) Install an O
2
Sampling Tube
49
. See Back Panel, Reinstallation in Chapter 8 – Component
Removal and Replacement for detailed instructions.
7) Reconnect the internal battery (if disconnected) and replace the back panel (see instructions
on page 8-29).
49
O
2
Sampling Tube, P/N 10544, ~10.0” long, 0.125” O.D. X 0.079 I.D. clear polycarbonate tubing.