Page 8-32 LTV
®
1200/1150 Ventilator Service Manual p/n 18603-001, Rev. C
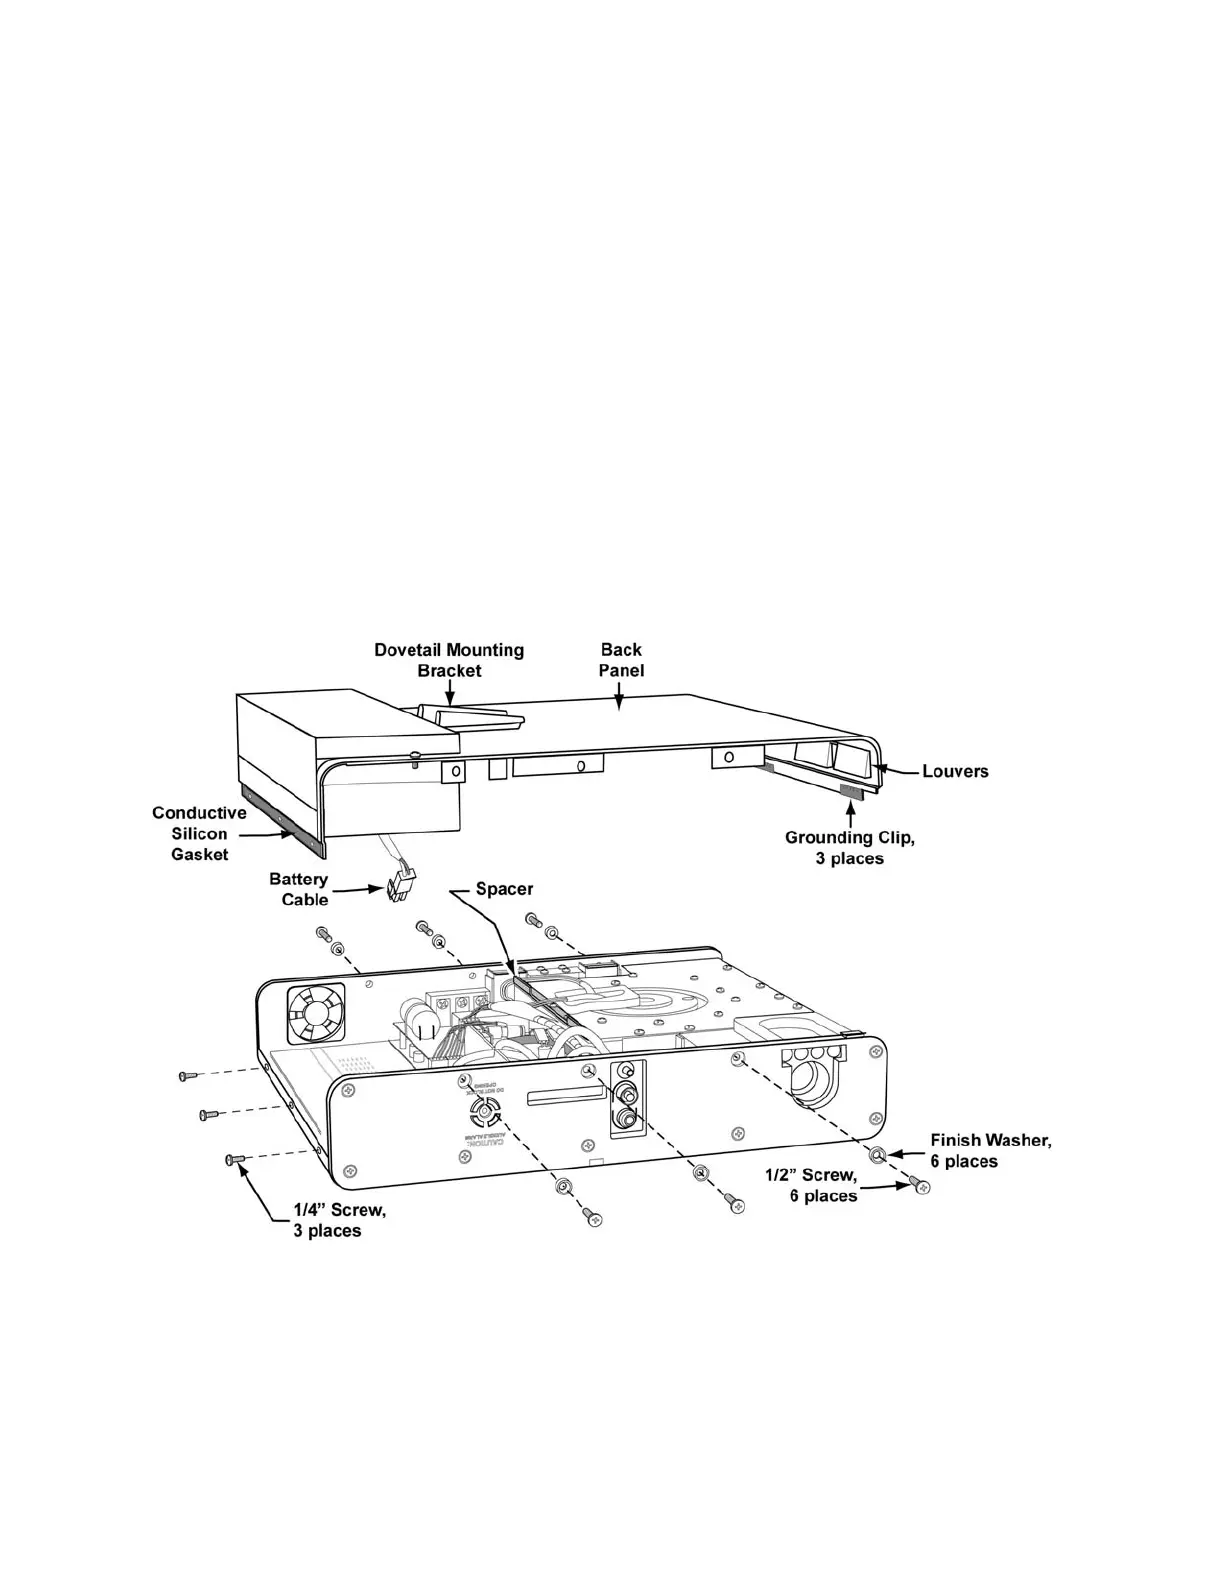
13) Inspect the conductive silicon gasket located on the outside surface of the top of the
back panel where the three 1/4” screws secure the back panel to the ventilator. If the
gasket is damaged or missing, replace it with a new one.
14) If the internal battery cable is disconnected, reconnect the battery cable to the power
board. To do so, place the back panel on its side with the battery cable facing down and
the battery compartment indexed towards the open area in the top of the ventilator.
15) While supporting the back panel, connect the male 2-wire lead connector from the
battery assembly to the 2-wire female connector on the power board. Be sure to
correctly orient the keyed latch on the connector. When correctly connected, the
connector will snap into place.
16) Position the back panel over the ventilator. Slide the bottom edge of the back panel
beneath the connecting upper-Weldment edge at the bottom of the case. Be sure that
the louvers in the bottom edge of the back panel are hooked under the bypass tube
from the turbine to the flow valve.
17) Align the back panel so the long tab over the oxygen blender lines up correctly. Check
that the battery leads are clear of the motor board heat sink and the side of the
ventilator. Be careful not to pinch the flexible tubes or the battery leads while sliding the
back panel into place.
18) Replace the three 1/4” flat-head screws in the top of the ventilator as shown. Torque to
60 in-oz (0.42 Nm).
19) Replace the 6 x 1/2” flat-head screws and gray finish washers in the right and left sides
of the ventilator as shown (3 in each side). Torque to 20 in-oz (0.14 Nm).
20) If previously installed, replace the LTV
®
Protective Boots (see instructions on page 8-10)
and the LTM
Mounting bracket (see instructions beginning on page 8-16).