11. Repeat Step 10 to remove the disk drives from the replacement AW. Label these
drives as “Spare Disk”.
12. Install the disk drives, removed from the AW being replaced, into the
replacement AW.
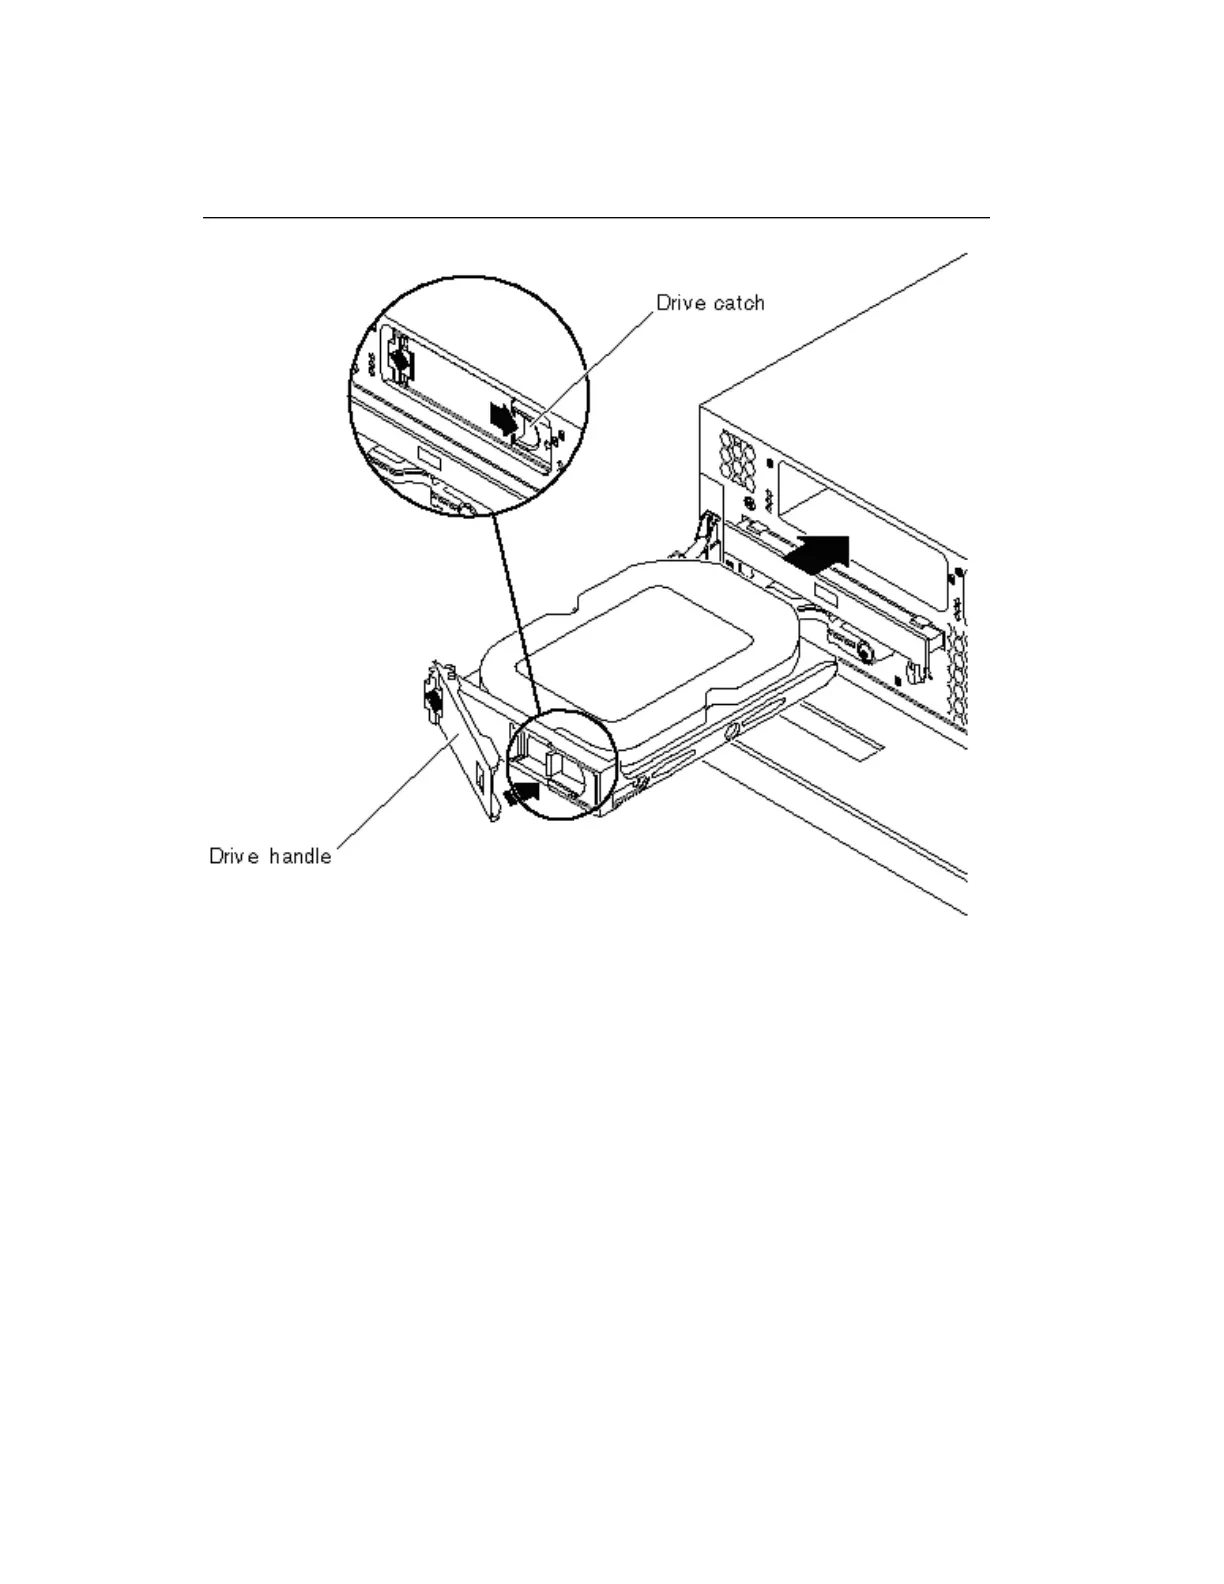
(a) Slide the catch on the front of the disk drive to the right (see Figure “Netra
240 Disk Drive”, 4.13-2).
(b) Slide the disk drive into its bay at the front of the server.
(c) Push the metal lever until the drive clicks into place.
(d) Close the bezel until it is locked in place.
13. Install the mounting brackets that were removed in Step 9 onto the replacement
AW.
14. Slide the AW into the mounting brackets on the frame.
15. Secure the AW to the frame using the mounting screws that were removed in
Step 7.
Figure 4.13-2 — NETRA 240 Disk Drive
235-200-150
October 2005
ADMINISTRATIVE WORKSTATION MAINTENANCE
Procedure 4.13
Issue 3.00B Page 4.13-3