5. Remove the DAT tape drive unit from the bracket attached to the frame by
sliding the unit forward.
6. Slide the replacement DAT tape drive unit onto the mounting bracket attached to
the frame.
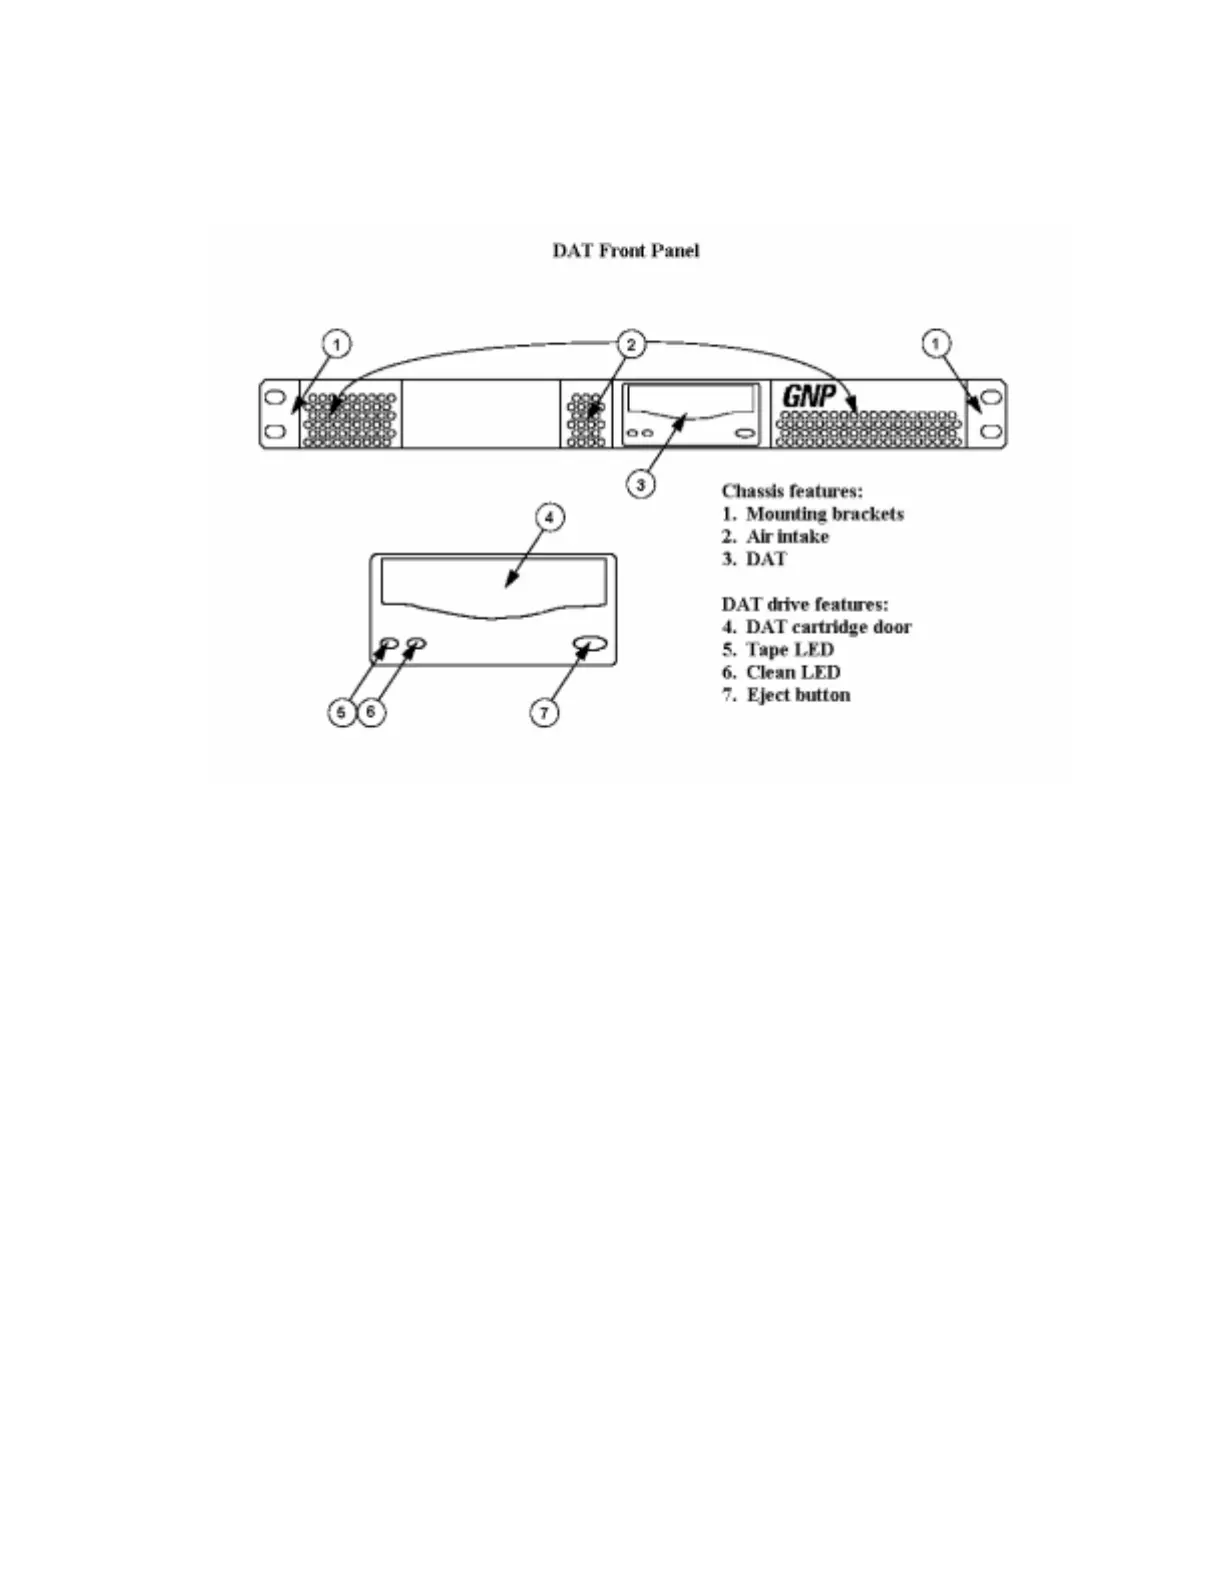
7. Secure the replacement DAT tape drive unit to the mounting bracket using the
mounting screws that were removed in Step 4. See Figure 4.14-2 (Netra 240 DAT
Front Panel).
8. Reconnect the SCSI cable to SCSI port A at the rear of the replacement DAT tape
drive unit. See Figure 4.14-1 (Netra 240 DAT Rear Panel).
9. Restore power to the DAT tape drive unit (see "Restore Power to DAT Tape Drive
Unit (Netra 240)", Procedure 4.16).
10. Restore the AW (see Restore Administrative Workstation", Procedure 4.3).
Result:
The AW will automatically boot on the 3B21 Emulator and Operating System
software.
Figure 4.14-2 — NETRA 240 DAT Front Panel
ADMINISTRATIVE WORKSTATION MAINTENANCE
Procedure 4.14
235-200-150
March 2006
Page 4.14-2 Issue 3.00C