THIS PRODUCT IS INACTIVE!
Please contact Mathers Controls for support information.
Page 12
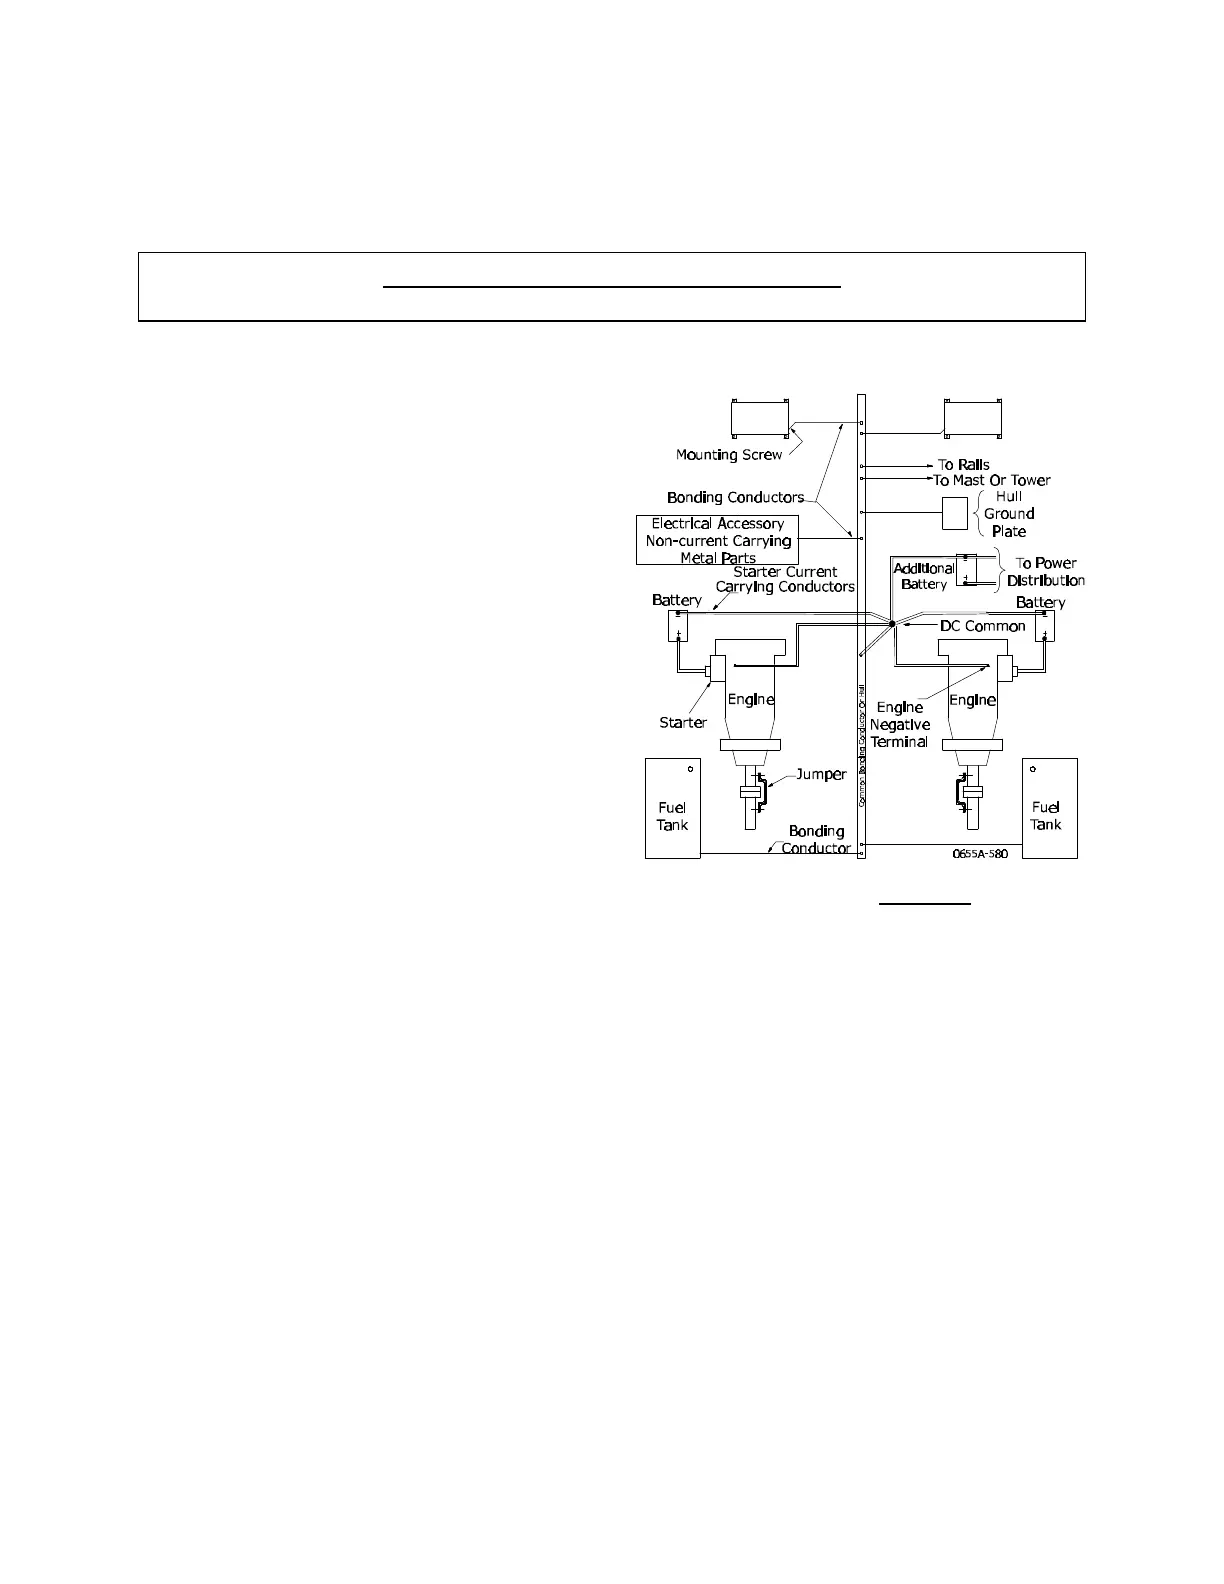
4.8 BONDING A.B.Y.C. E-1 46 CFR 111.05
All boats equipped with a
permanently installed
electrical system shall be
equipped with a bonding
system. The negative
terminal of all batteries
should be connected at only
one (1) point, the DC
common, and from DC
common to bond system or
hull.
Metal - Hull Vessels
The hull of a metal - hull
vessel may serve as the
common bonding conductor.
Any item to be bonded not
in contact with the hull
requires a bonding
conductor to the hull.
4.9 ACTUATOR
Remove the Actuator cover and connect your anti-static wrist
strap to the Actuator frame and your wrist. Remove the cable
hole plugs as required. (See Figure 8) Install the watertight
cable grip that is packaged with the control head. Station No. 1
will connect through 'Station 1' as shown in Figure 7. Strip the
PVC jacket and shielding back approximately 2" (50,8mm). The
wire leads can be staggered for length to match the Station 1
terminal strip, and must not come in contact with the frame.
Strip the wire 3/8" (9,5mm) on each lead. It is also recommended
that the wire be LIGHTLY tinned. Connect colors as shown on
Circuit Dwgs, Sections 13. and 14. A WAGO Tool, No. 236-332,
Actuator
Figure 10 - Bonding