Comet Executive Gas Repair
7-33
Temperature Sensor Contact Shoe
Replacement
A contact shoe will eventually wear out
because it is constructed of softer material than
the ironing cylinder that it rides against.
When this occurs, the shoe must be replaced
immediately to ensure correct operation of the
ironer.
CAUTION
Use only factory tested
replacement parts for
temperature sensors and
contact shoes. Parts should
be order from your CHICAGO
authorized dealer or from
Chicago Dryer Company.
Overnight shipment of parts
is available.
Required Tools
Pliers
Screwdriver
Perform only when the unit is OFF
with power disconnected and COOL.
1. Turn power OFF at the main disconnect
switch.
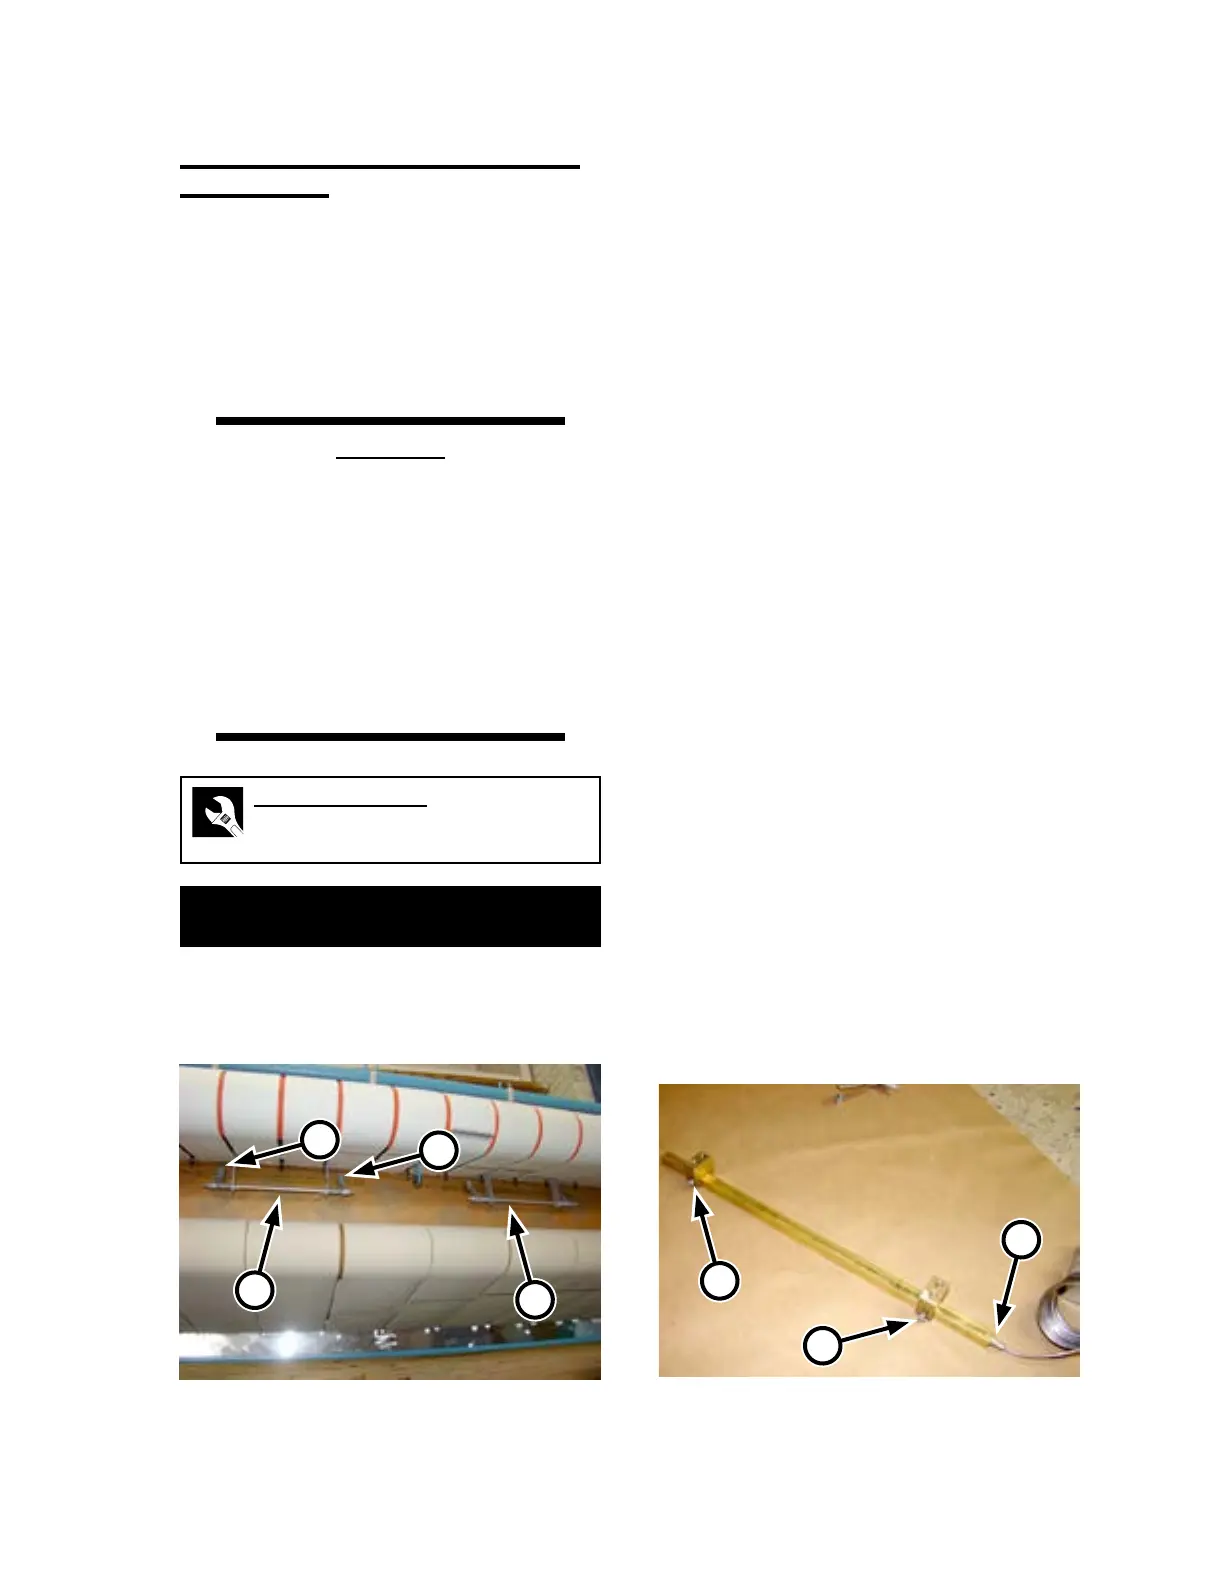
2. Locate the appropriate contact shoe as-
sembly (Figure 7-29). The temperature
control sensor is located toward the center
of the ironing cylinder (A) while the high
temperature limit sensor is located toward
the left end of the cylinder (B).
3. Remove the mounting screws which
secure the contact shoe brackets to its as-
sembly (Figure 7-29, C).
4. Loosen the screws which secure the con-
tact shoe to its brackets (Figure 7-30, A/B).
5. Carefully slide the capillary tube out of the
left end of the contact shoe (Figure 7-30,
C). Extreme care is required to accomplish
this because the tube leading to the uid
bulb breaks easily.
6. Finish loosening the screws so the contact
shoe can be removed from its brackets.
Note that the left screw (Figure 7-30, A) is
noticeably longer than the right screw (B).
7. Install the new shoe in the brackets and
partially install the screws. Make sure the
longer screw goes into the left end of the
bracket.
Figure 7-30: Be careful when removing and
inserting the sensor tube.
B
A
C
Figure 7-29: The two temperature sensors are
located under the feed ribbons.
B
A
C
C