Repair Comet Executive Gas
7-8
Feed Ribbon Drive Roll Friction
Material Replacement
The friction material on the feed ribbon drive
roll must be replaced if the feed ribbons slip in
place when the tension is adjusted correctly.
NOTE: This procedure requires
at least two workers: One to turn
the roll and apply the cement, and
one to apply the friction material. It
is preferable to use three workers,
each performing a single task.
Required Tools
Chain puller
Clean cloth
Contact cement: 3M #10 or
equivalent
Filament tape
Marker
Masking tape
Paint brush: natural bristle
Pliers
Protective clothing
Protective covering
Scraper/sandpaper/steel brush
Screwdriver
Solvent (low VOC)
Utility knife
Wrenches:
3/8”
9/16”
11/16”
1-3/8” or Crescent
Perform only when the unit is OFF
with power disconnected and COOL.
1. Verify the correct replacement parts are
available, including the friction material,
cement, and lament tape. See Rolls and
Ribbons on page PL-6.
2. Turn power OFF at the main disconnect
switch.
3. Open both endframe doors.
4. Locate the feed ribbons drive roll tension
adjustment bolts (Figure 7-2, A). There is
one on each side of the machine.
5. While holding each adjustment bolt in
place, loosen its locknut (Figure 7-2, B).
6. Turn each bolt the same number of turns
counterclockwise until the ribbons are
easily moved by hand.
7. Pull the feed ribbons around their tracks
until all the lacing clips are accessible and
aligned at the front of the unit.
8. Remove all the connecting pins from the
feed ribbons. Position the feed ribbons
away from the drive roll.
9. The friction material must be applied
while the feed ribbon drive roll turns
freely:
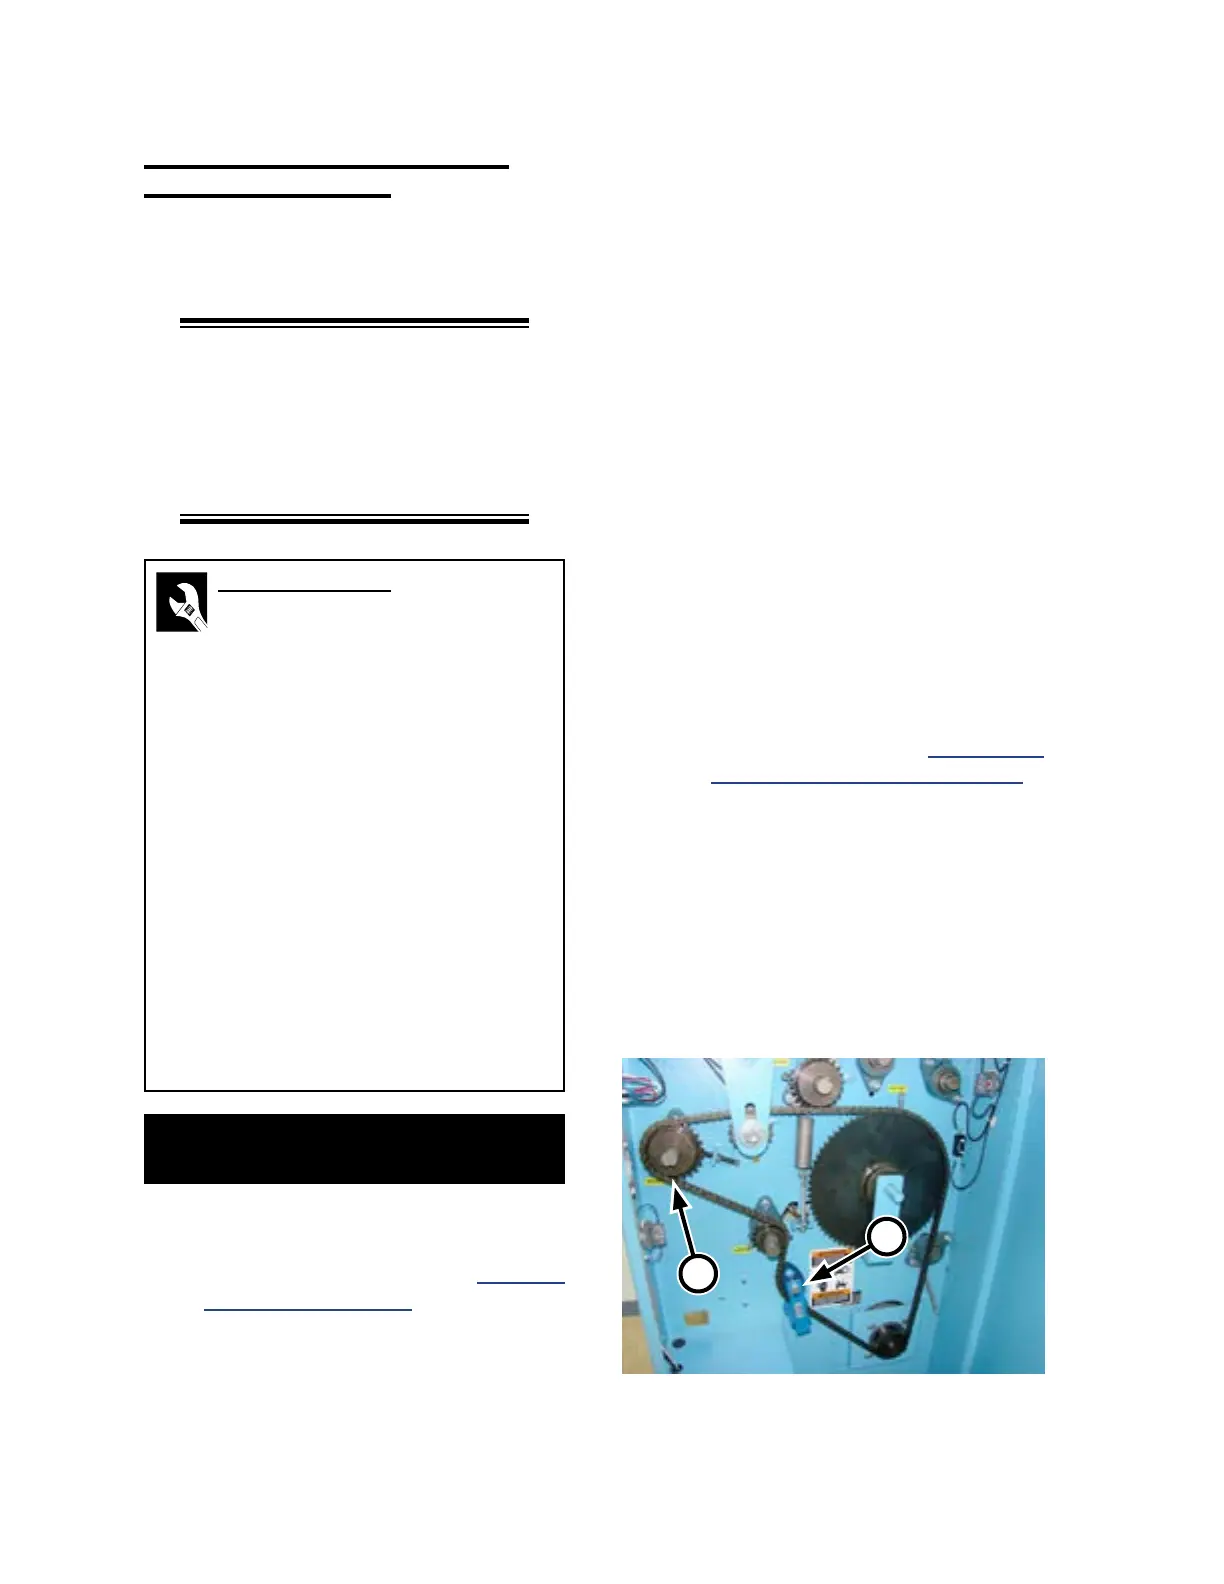
a) Release tension on the drive chain
(Figure 7-3, A); refer to Drive Chain
Tension Adjustment on page 7-23.
b) Locate the clips that secure the ends of
the drive chain together.
c) Use a chain puller to relieve tension at
the site of the clips and remove them.
d) Remove the chain from the feed ribbon
drive roll sprocket (B).
Figure 7-3: Remove the drive chain from the feed
ribbon drive roll.
A
B