Comet Executive Gas Repair
7-9
10. Place a tarp, plastic drop cloth, heavy pa-
per, or another temporary protective cover-
ing over the ironing cylinder, compression
roll, return ribbons, and receiving shelf.
11. Cut and remove the lament tape located
at each end of the drive roll.
12. Pull or cut o the old feed ribbon drive
roll friction material.
13. Remove old cement from the drive roll
with a scraper, coarse sandpaper, or a
steel brush.
14. Wipe away remaining residue with a clean
cloth.
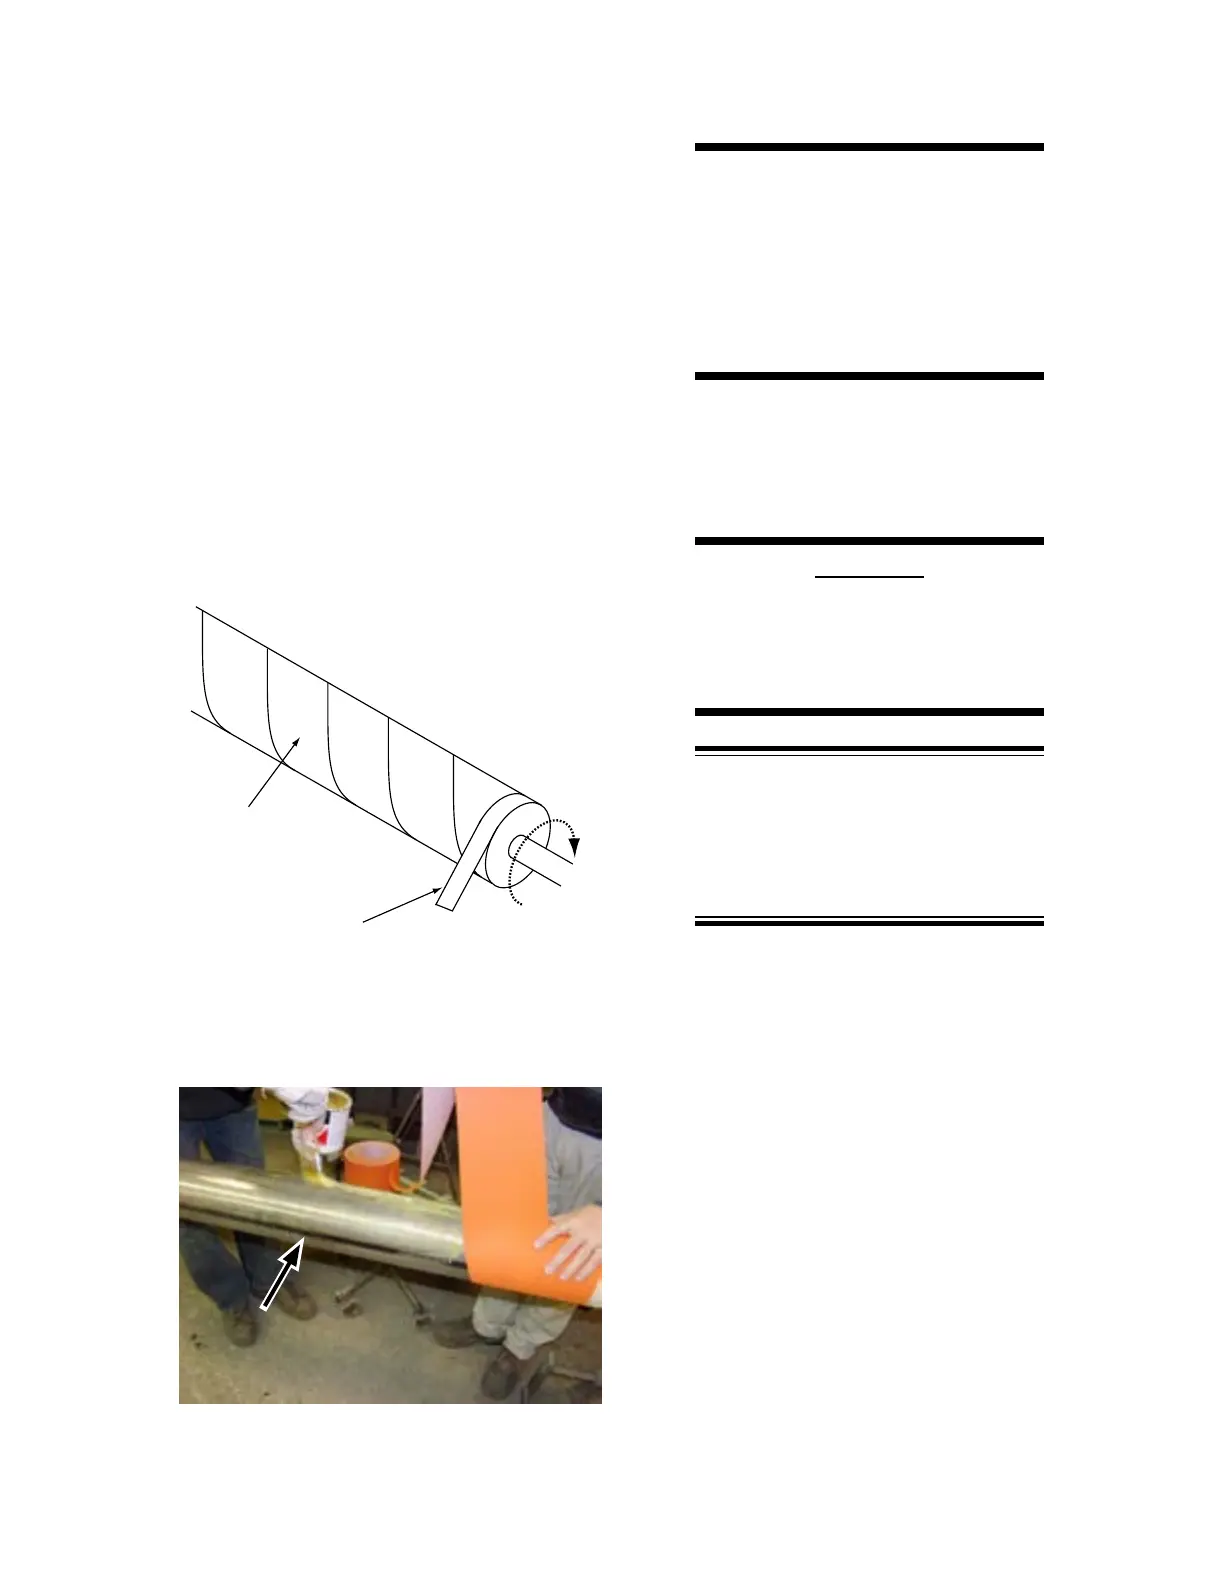
Wound
Filament Tape (B)
Figure 7-4: Friction material is secured with glass
lament tape.
Figure 7-5: Apply an even coat of cement.
WARNING
Make sure there is adequate
ventilation and wear
protective clothing before
working with any solvent.
Follow manufacturer’s
directions for safe usage.
15. Wipe the entire surface of the compression
roll with a solvent (low VOC). Make sure
the roll’s surface is down to bare metal,
and that it is completely clean and dry.
CAUTION
You must be down to bare
metal before installing the
new cover or it may not
adhere properly.
NOTE: Spiral-wind the friction
material at a 45° angle (Figure 7-4,
A). To ensure this, the material
edges must be aligned with no
gaps.
16. Spiral wind the new cover over the roll
without cement to make sure there is
enough material to cover the roll. Put it on
in the same spiral pattern as before.
17. Starting from the drive side of the ma-
chine, dry t two or three full turns of the
material to establish the correct angle.
Make sure the material edges align with
no gaps. Secure with masking tape.
18. Use a paint brush to apply an even coat of
cement over a short section of the exposed
roll (about two turns worth), making sure
the entire surface is covered (Figure 7-5).
19. Carefully continue to turn the roll, making
sure the material goes on smoothly without
any gaps.