CONTROLS, CONNECTORS, INDICATORS AND MENUS
AVTM246004 BITE 2/2P Rev 4 July 2011
17
Indicator Lamps:
RECEIVER CHARGER ON/OFF—Illuminates when the
receiver is plugged into J4 and the receiver charger is
energized. It also indicates the state-of-charge of the receiver
battery.
CURRENT READY—Illuminates after the coupling capacitors
in the transmitter have been charged to the bus voltage. A
delay timer allows current flow to the battery under test.
OVER VOLTAGE—Indicates that the voltage across the
current source leads is greater than 275 V dc. (When an
over-voltage condition occurs, the CURRENT READY light will
go out and the current will stop being applied to the battery.)
J1 receptacle—The standard power cord supplied with the
instrument is inserted into this 120 V (230 V) receptacle for ac
power.
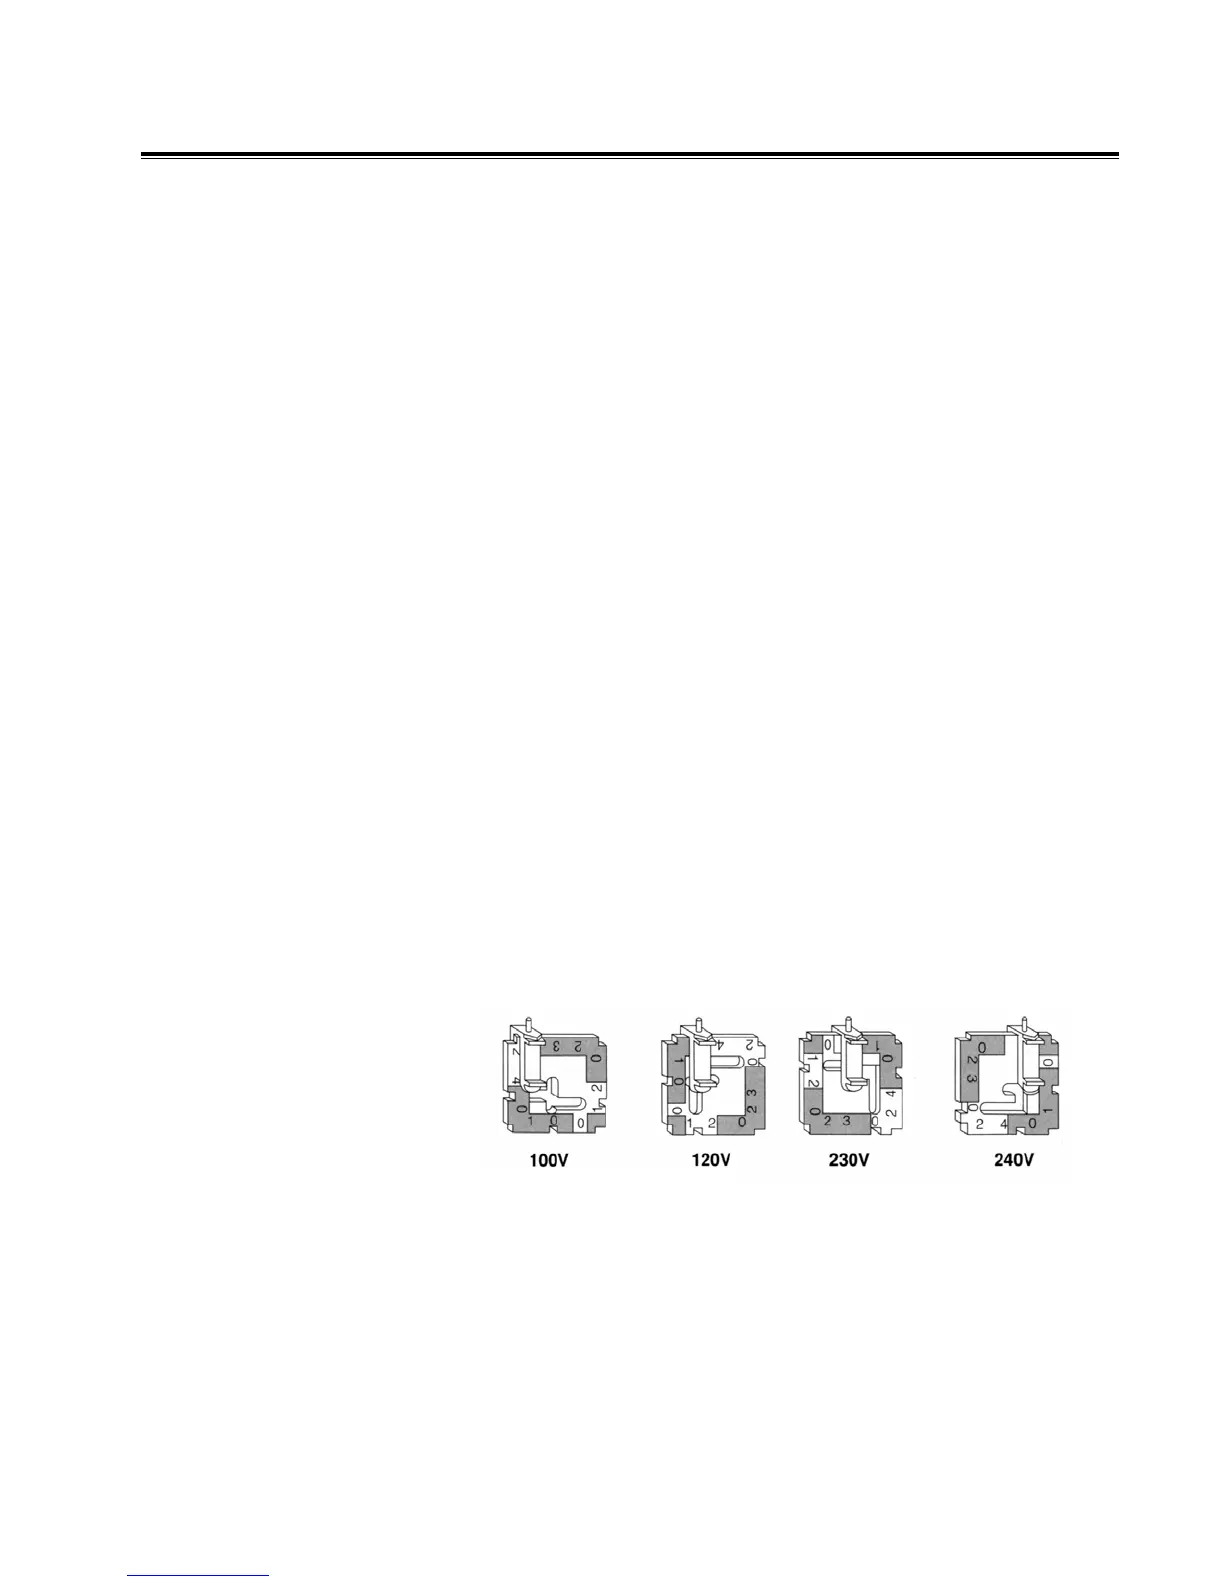
Note: Use only the 120V or
240V setting. The 100V and
230V will blow fuses.
F1 Fuse carrier/voltage selector—The fuse carrier is
removed as needed to replace fuses.
To change selected voltage: open fuse cover, using small blade
screwdriver or similar tool. Pull voltage selector card straight
out of housing, using indicator pin. Orient indicator pin to
point up when desired voltage is readable at bottom. Insert
voltage selector card into housing with printed side of card
facing forward toward IEC connector and edge containing the
desired voltage first. Replace cover, and verify that indicator
pin shows the desired voltage.
Figure 3-3: Voltage Selector Card Orientation
J2 connector—The transmitter current source leads are
connected from this connector to the battery under test.
J3 connector—The printer cable from the receiver is
connected to print test data.
J4 connector—The receiver battery is charged from the on
the BITE 2P transmitter when the J4 connector on the
transmitter is connected to the J3 connector on the receiver.
www.GlobalTestSupply.com
Find Quality Products Online at: sales@GlobalTestSupply.com