Page | 16
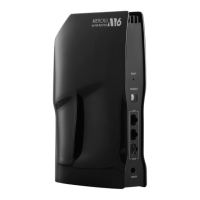
3.1 Tips When Installing Your M6 Router or Nodes
The following factors may affect connectivity during installation and between your mesh
nodes: housing structure, indoor obstacles, interference emitted by electronic appliances,
and distance between mesh nodes relative to the M6 router. Here are some tips to ensure
that your coverage is optimized within your home:
• The router should be placed in a dry place without exposure to excessive heat.
• Make sure the cables and power cord are safely placed out of the way, as to not
create a hazard.
• For optimized performance and coverage, the M6 should be placed in an open and
unobstructed area
• Keep the router away from devices with strong electromagnetic interference such as
microwave ovens, 2.4 GHz wireless mouse, 2.4 GHz wireless phones or other
electrical appliances that use the 2.4 GHz band.
• Do not place nodes in a straight line
• Wi-Fi signals are weakened by concrete walls and floors, metal and glass. Please
ensure you place your router in an open location.
3.2 Installing Your M6 Using the Mercku App/Portal
1. Plug in the M6 and connect the one end of the provided ethernet cable to the WAN
port of the M6 and the other end to the LAN port of your modem. Once connected
via ethernet cable, a white light in front of the M6 will light up, confirm ing a
successful connection.
2. Connect to the Open Mercku network: MERCKU-X XXX
3. Use the Mercku App or Mercku Portal (http://mywifi.mercku.tech) and follow the
instructions to set up your SSID.
4. Once your network is set up, please upgrade the firmware on your Mercku devices.
Refer to Chapter 14 for instructions on how to upgrade your firmware.
Did you know?
Walls and materials impact Wi-Fi strength. When placed in an open area, the optimal
distance between nodes is within 23 ft (7 m), but can be reduced by the following types of
materials:
• Wood or plastic: 16.5 ft (5 m)
• Glass: 6.5 ft (2 m)
• Cement or metal: 3.3 ft (1 m)