DIRECT FUEL INJECTION
Page 3B-30 90-855347R1 JANUARY 1999
2. Secure bracket assembly to vapor separator with 4 screws. Torque screws to 100 lb.
in. (11.5 Nm).
a
a
b
c
a-Screws – Torque to 100 lb. in. (11.5 Nm)
b-Sta-strap securing pump to bracket
c-Ground lead – attach to air plenum
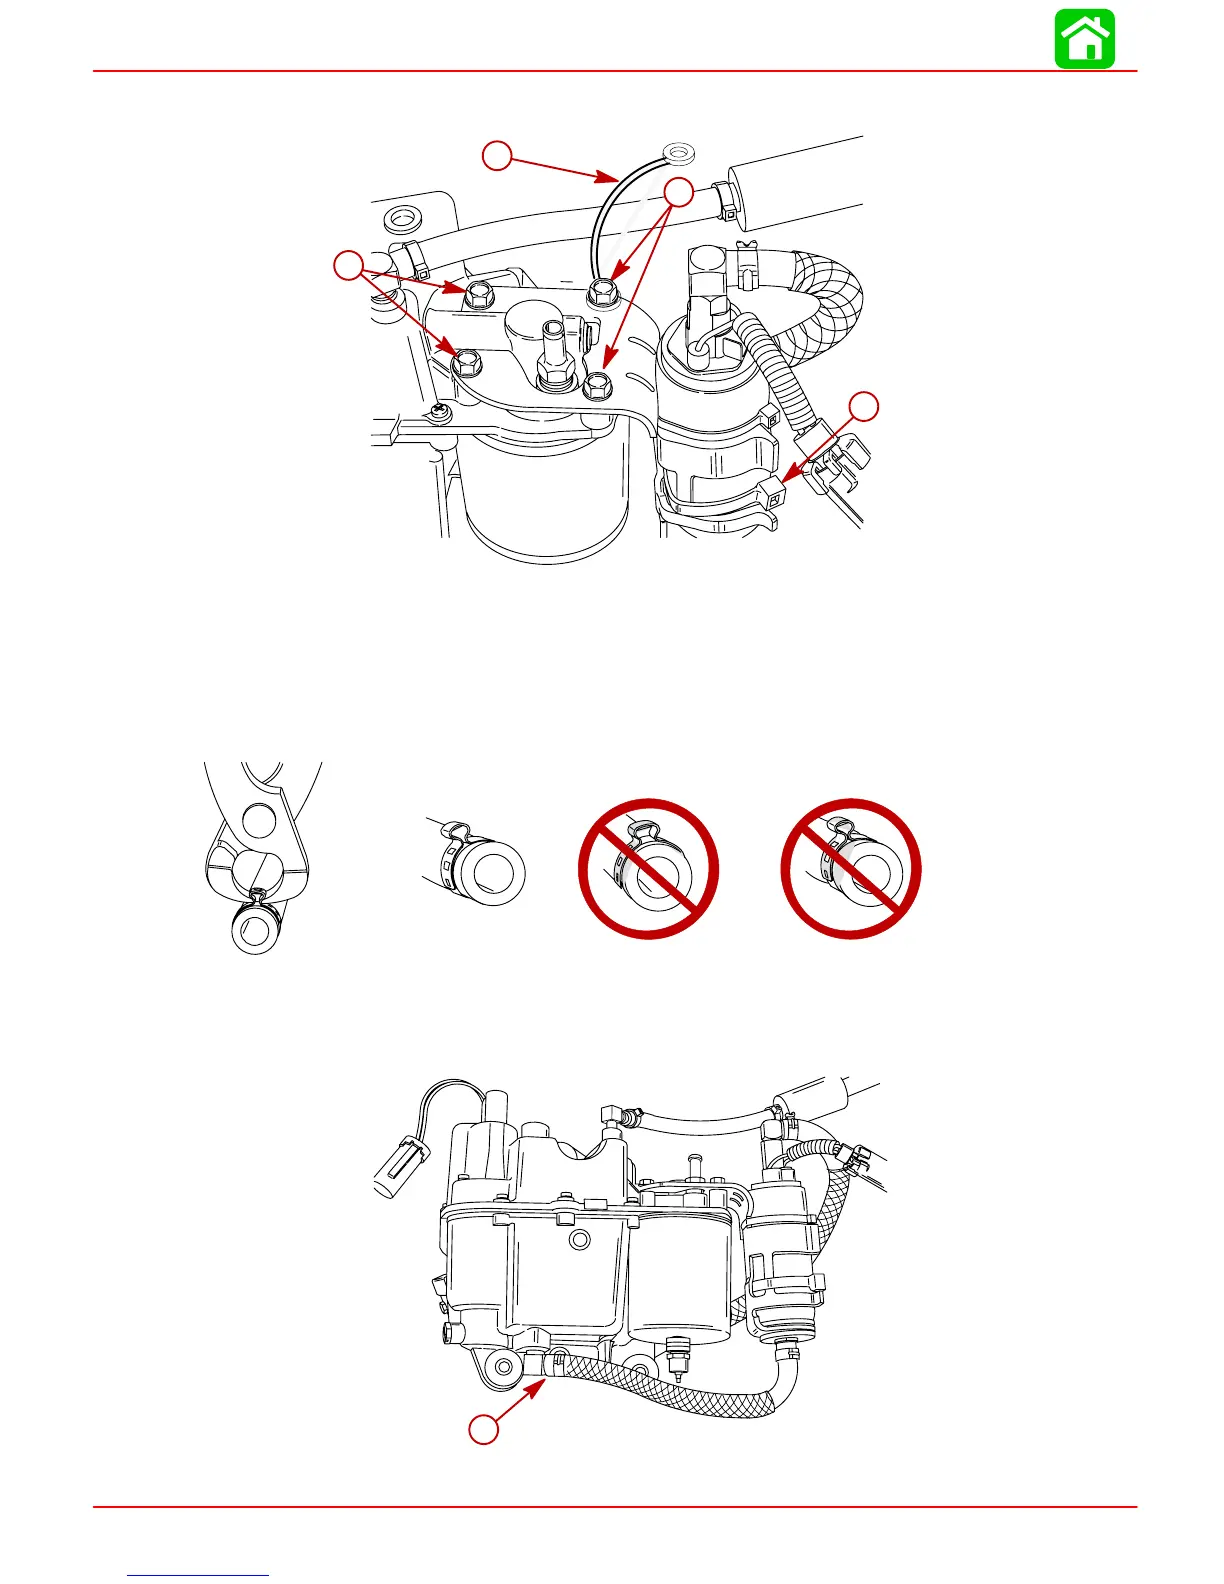
IMPORTANT: Only use tool 91-803146T (or Snap-On equivalent YA3080) to crimp
full circle clamps. Using a different tool could result in a crimp that is too loose, or
too tight. Do not use screw type metal hose clamp as it may damage hose.
3. Connect fuel hose from bottom of low pressure fuel pump to 90° elbow in bottom of
vapor separator. Secure hose with 16.2 mm full circle clamp (54-855697) using crimp-
ing tool 91-803146T.
a
27291
a-Secure Fuel Hose with 16.2 mm Full Circle Clamp (54-855697)

 Loading...


