CHARGING & STARTING SYSTEM
Page 2B-18 90-855347R1 JANUARY 1999
IMPORTANT: The regulator, rectifier and brush assembly are the only components
individually replaceable on this alternator. If the rotor or stator is defective, the en-
tire rotor, stator and housing must be replaced as an assembly.
IMPORTANT: Clean anti-corrosion paint from electrical connections prior to reas-
sembly. Coat all electrical connections with LIQUID NEOPRENE (92-25711-1).
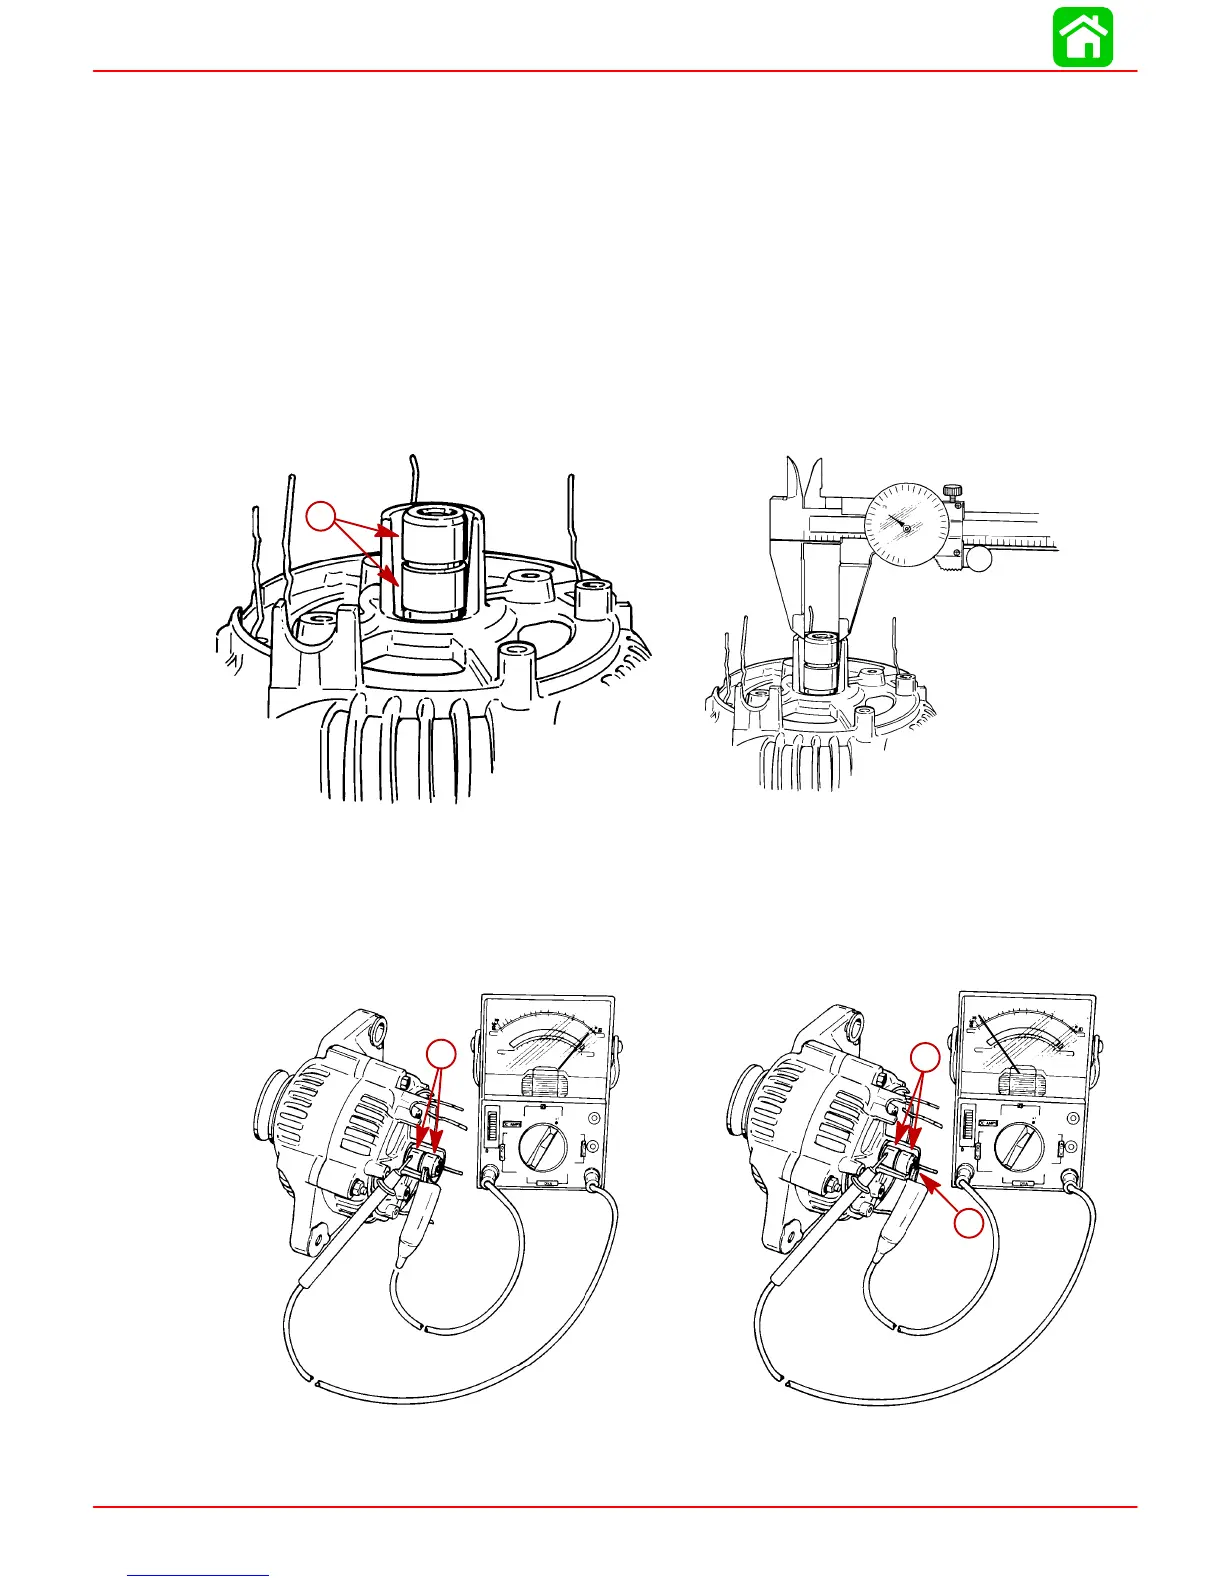
Rotor Test
1. Inspect slip ring surface for roughness, abnormal wear and/or burning. If such condi-
tions exist, rotor is not considered serviceable and alternator should be replaced.
2. Measure the outer diameter of the slip rings using vernier calipers. STANDARD DI-
AMETER: 0.567 in. (14.4 mm); MINIMUM DIAMETER: 0.551 in. (14 mm). If slip ring
diameter is less than minimum, rotor is not considered serviceable and alternator
should be replaced.
51680
51684
a
a
a-Slip Rings
3. Inspect rotor for an open circuit. Using an ohmmeter, check for continuity between slip
rings. Resistance should not exceed 3 ohms. If no continuity exists, rotor is defective.
4. Check rotor for short to ground. NO CONTINUITY should exist between slip rings and
rotor shaft. If CONTINUITY exists, rotor is defective.
51683
a
b
51682
a
a
a
b
a-Slip Rings
b-Rotor Shaft