DIRECT FUEL INJECTION
Page 3B-40 90-855347R1 JANUARY 1999
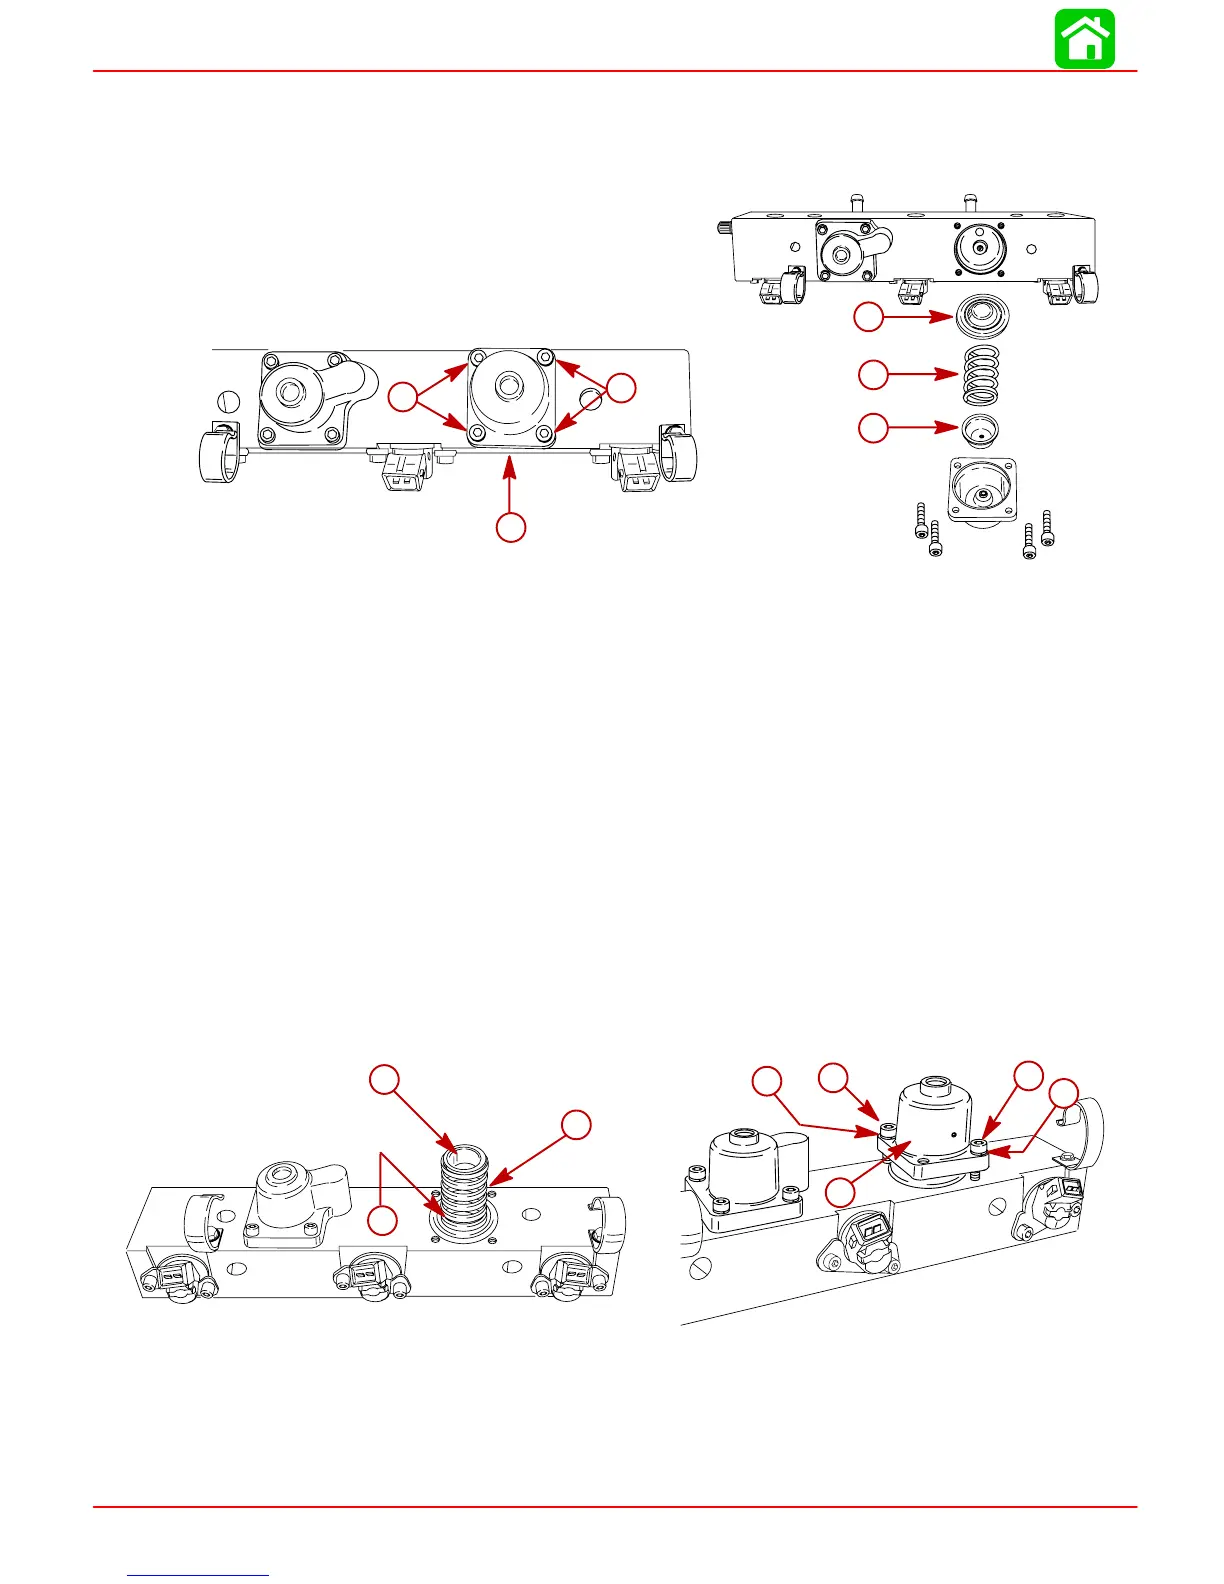
AIR REGULATOR REMOVAL
1. Remove 4 screws securing regulator and remove regulator.
2. Inspect regulator diaphragm for cuts or tears. Replace as required.
56130
a
b
c
c
d
e
56129
b
a
a
a
a
b
a-Screws
b-Air Regulator
c-Diaphragm
d-Spring
e-Cup
AIR REGULATOR INSTALLATION
NOTE: Apply a light coat of 2-4-C w/Teflon to diaphragm surface to aid in the retention
of diaphragm on fuel rail during reassembly.
1. Position diaphragm, spring and cup onto fuel rail with fuel rail in horizontal position.
NOTE: Apply anti-seize grease (obtain locally) or 2-4-C w/Teflon to regulator attaching
screw threads.
NOTE: Due to the stiffness of the regulator spring, it is recommended that 2 longer screws
(5mm x 25mm long) (10-40073 25) and 2 flat washers (12-30164) be installed through
cover first to begin compression. This will allow 2 shorter screws (5mm x 15mm long) to
be installed. Remove 2 long screws w/flat washers and install remaining 2 short screws
(5mm x 15mm). Torque screws to 70 lb. in. (8.0 Nm).
56132
a
c
b
b
c
d
e
e
f
f
56131
c
b
a
a
b
c
a-Cup
b-Spring
c-Diaphragm
d-Cover
e-Screws (5mm x 25mm) (10-40073 25)
f-Flat Washers (12-30164)

 Loading...


