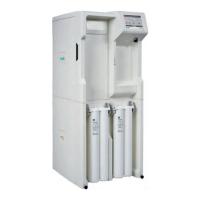
Milli-Q® Direct 8/16 System 27
Installing the Progard® Cartridge
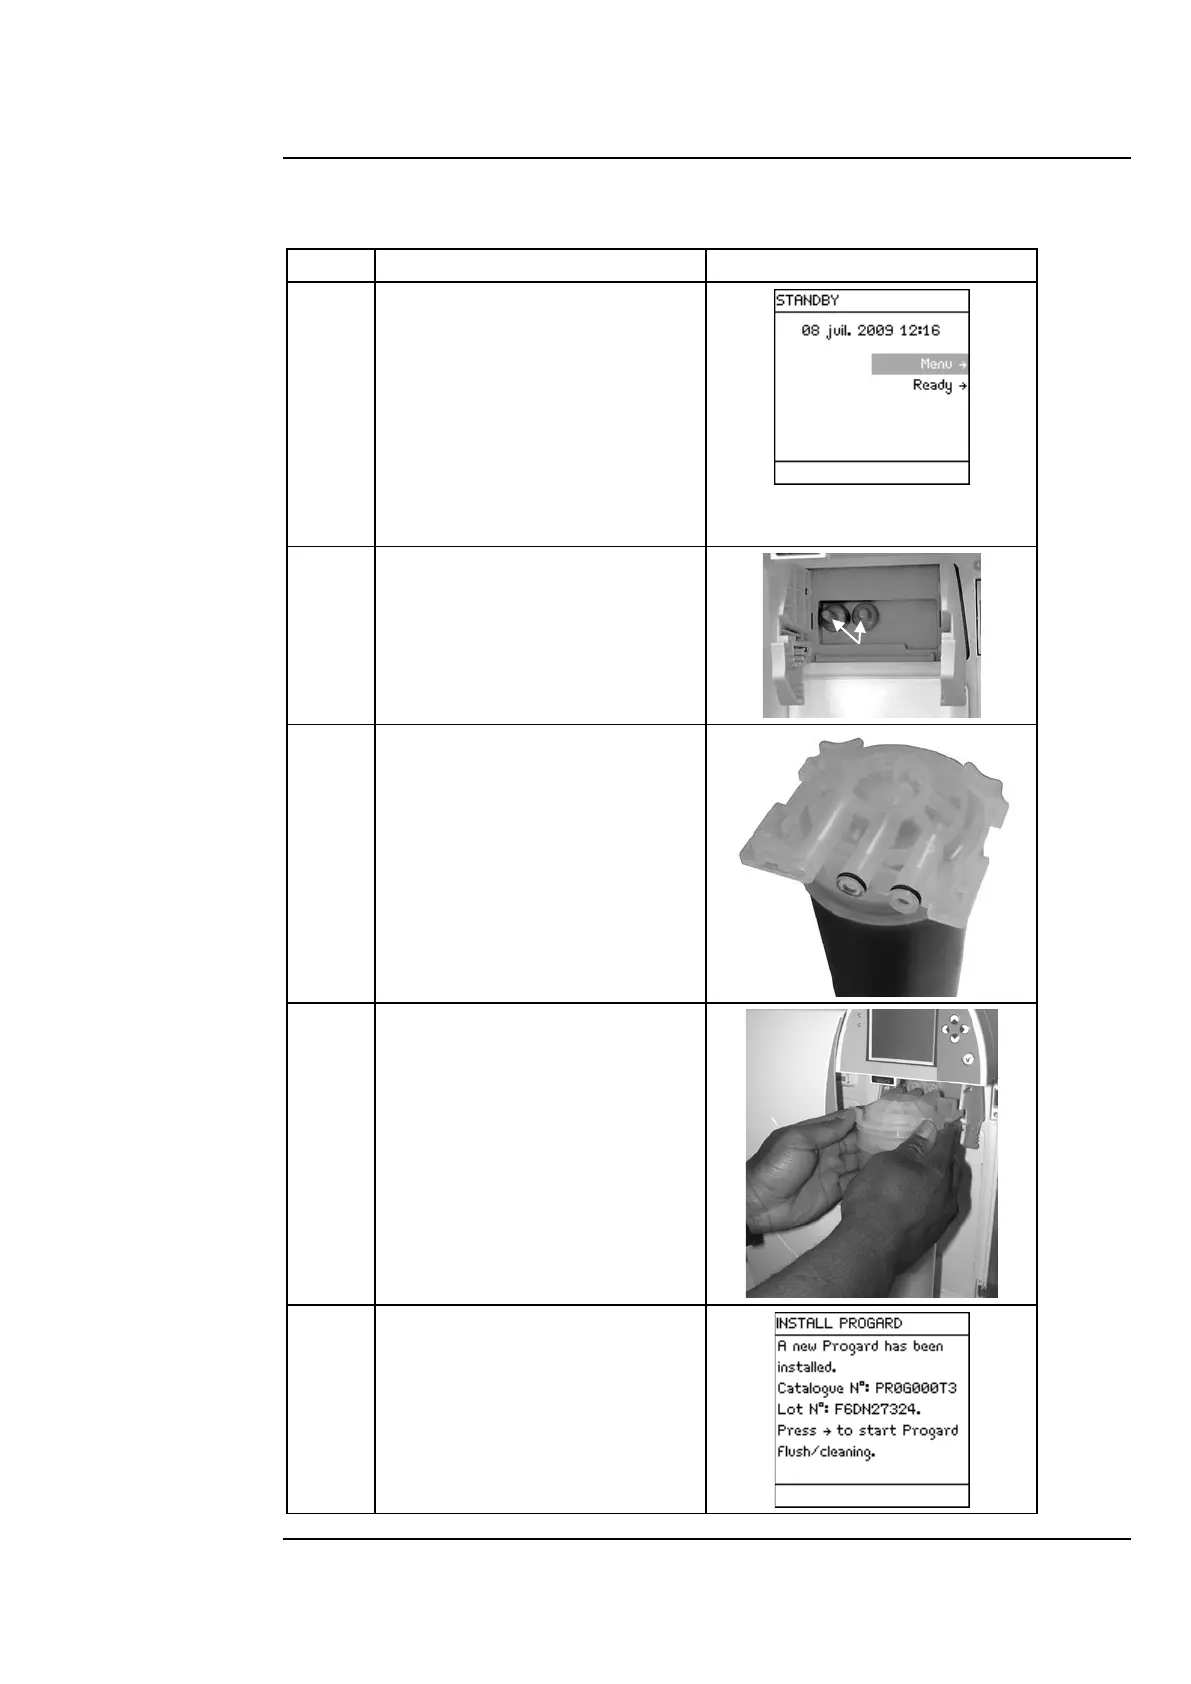
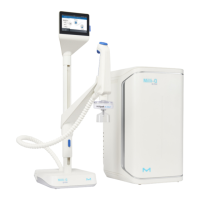
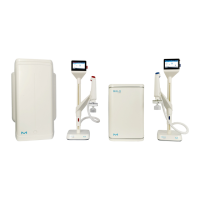
Follow the steps below to install a new Progard® Cartridge.
NOTE:
The PROGARD CARTRIDGE OUT
Alarm message is not shown at
this time. By following the
instructions earlier in this
manual, the alarm was
cancelled.
Open the right door of the
System Cabinet.
• Remove the 2 protective caps
located on the ports inside.
Remove the covers on the 2
ports of the Progard®
Cartridge.
• Wet the O-rings with water.
Install the Progard® Cartridge
until it is fully seated.
• Close the right door.
One minute later, the Main LCD
shows that a new Progard®
Cartridge is installed.
Continued on next page