EasyManuals Logo

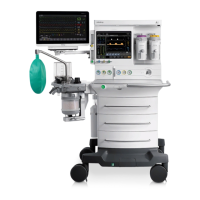
Mindray A9 Operating Instructions

Mindray A9
288 pages
To Next Page IconTo Next Page
To Previous Page IconTo Previous Page
Page #53 background imageLoading...
Page #53 background image
Operator’s Manual of Anesthesia System 3 - 7
Installation and Disassembly High-flow Nasal Cannula Oxygen (HFNC) Tube
3.6 High-flow Nasal Cannula Oxygen (HFNC)
Tube
1. Hang the humidifier on the bracket on the side of the anesthesia system.
Figure 3-4 Install the humidifier
2. Connect the gas inlet of the humidifier and the HFNC outlet of the anesthesia system with a
breathing tube. Connect the gas outlet of the humidifier and the patient with a breathing tube.
Figure 3-5 Connection hoses
3. To disassemble the humidifier, draw out the breathing tube and lift the humidifier upward.
Bracket
Humidifier
HFNC outlet
Breathing tubes
Humidifier gas outlet
Humidifier gas inlet

Table of Contents

Other manuals for Mindray A9

Questions and Answers:

Question and Answer IconNeed help?

Do you have a question about the Mindray A9 and is the answer not in the manual?

Mindray A9 Specifications

General IconGeneral
TypeAnesthesia Workstation
Integrated Gas AnalysisYes
Backup BatteryYes
Operating Temperature10°C to 40°C
Storage Temperature-20°C to 55°C
Battery TypeLithium-ion
Ventilation ModesVolume Control, Pressure Control, SIMV, Manual Ventilation
DisplayTouchscreen
Patient MonitoringECG, SpO2, NIBP, EtCO2, Temperature
ConnectivityEthernet, USB
PortabilityMobile (with wheels)
Battery LifeMinimum 90 minutes (typical)
AltitudeUp to 3000 meters
Power Supply100-240 VAC, 50/60 Hz
Charging TimeApproximately 4 hours
StorageInternal storage for patient data and system logs
Supported LanguagesMultiple languages
CertificationsCE, FDA

Related product manuals