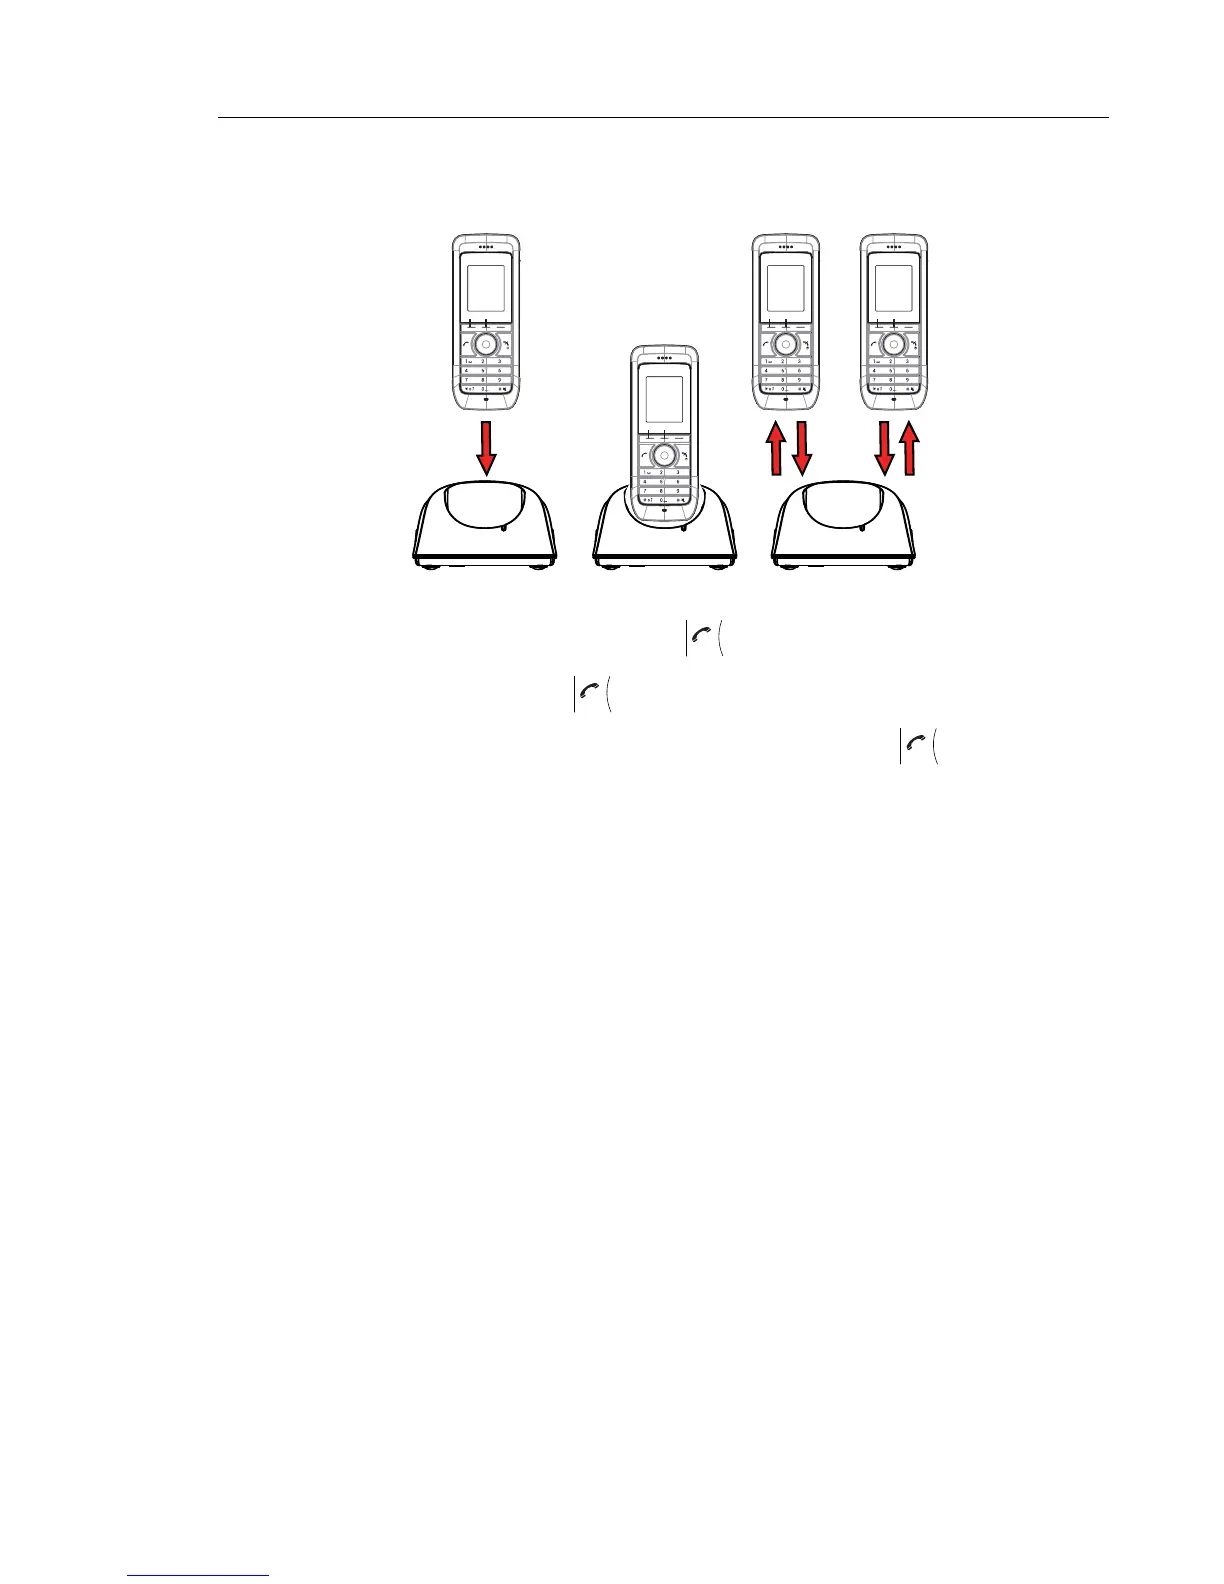
Figure 4: Easy Replacement Procedure via the DC4 Advanced Desktop Charger
1 On the new handset, press and hold
NOTE: Do not release until you are instructed to do so.
2 Put the new handset in the charger.
3 When the text "Start phone replacement?" is displayed, release .
Press "Yes" (left soft key).
The text "Follow the instructions. Each step can take several minutes." appears in the
display. Press "OK" (left soft key).
4, 5 When the text "Please insert old phone in charger" is displayed, replace the new handset
with the old handset. The handset can either be switched on or off.
NOTE: The left charging slot in the CR3 Charging Rack has to be used for both handsets.
The handset will be restarted and after a few seconds, the text "Saving settings. Do not
remove phone from charger" appears. The charger LED changes to slow orange flashing.
It might take several minutes.
IMPORTANT: If the old handset cannot communicate with the charger, put the new
handset in the charger to restore its settings (that is, the handset’s IPDI). If this step
is not performed, the new handset must be sent for service. The old handset’s
settings might be transferred to the new handset by using WinPDM. Refer to the
Configuration Manual for the handset; see
Related Documents on page 74).
6, 7 When the text "Please insert new phone in charger" is displayed, replace the old handset
with the new handset. The text "Restoring settings" is displayed.
IMPORTANT: Do not remove the handset while the text "Restoring settings" is displayed.
2
New New Old
New
4, 8 5 67
GHI
PQRS TUV WXYZ
JKL
ABC DEF
MNO
GHI
PQRS TUV WXYZ
JKL
ABC DEF
MNO
GHI
PQRS TUV WXYZ
JKL
ABC DEF
MNO GHI
PQRS TUV WXYZ
JKL
ABC DEF
MNO