▪ Use Scene mode to create, select and manage Scenes to prepare them for assignment to
Sections in the Arranger. During playback, you can switch Scenes for quick on-the-fly ar-
rangement by pressing the pads; half-lit pads show existing Scenes, while fully lit pads
show the selected Scene. When you are satisfied with a Scene you can append it to the
Arranger.
▪ Use Section mode to create, select, and manage Sections in order to create an arrange-
ment. Here you can create Sections, assign a Scene to Section, position a Section on the
Timeline, and set the length of a Section.
Press SHIFT + SCENE to quickly toggle between Ideas view and Arranger view.
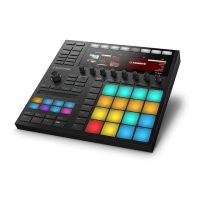
Pads and Pad Input Mode Buttons
The Pad Input Mode buttons (10) to (14) allow you to choose from various behaviors for the
pads (9) when it comes to trigger your Sounds. The four buttons directly above the pads (PAD
MODE (10), KEYBOARD (11), CHORDS (12) and STEP (13)) control the four main pad input
modes, while the FIXED VEL button (14) controls additional options for the modes:
(9) Pad 1–16: The sixteen velocity-sensitive pads can be used to play and select your Sounds.
Their behavior can be configured by the Pad Input Mode buttons (10) to (14) described below.
The pads also have many functions depending on the controller mode that is currently select-
ed.
(10) PAD MODE button: Press PAD MODE to switch the pads to Group mode (the default mode).
In Group mode each pad represents one Sound of the Group. Group mode is typically used for
drum kits. You can adjust various parameters of the mode via the displays and the surrounding
Buttons and Knobs. The right display shows you the Sound triggered by each pad. You can use
Buttons 5–8 to adjust the Base Key, which sets the key (pitch) triggered for each Sound in the
Group, and Knobs 1–4 under the left display to set the Choke and Link group settings. Please
refer to the MASCHINE Manual for more information on these features. By pressing PAD
MODE again, you can hide its parameters from the displays and return to your previous work-
flow while keeping Group mode enabled on your pads; as a reminder, the PAD MODE button
will stay lit as long as your pads are in Group mode. Press SHIFT + PAD MODE to switch your
pads to Group mode without switching the displays to the mode parameters.
(11) KEYBOARD button: Press KEYBOARD to switch the pads to Keyboard mode. In Keyboard
mode the pads represent 16 pitches of the chromatic scale for the selected Sound, ascending
from the selected Root Note; this way you can play the selected Sound like a melodic instru-
Quick Reference
MASCHINE Hardware Overview
MASCHINE - Getting Started - 200

 Loading...