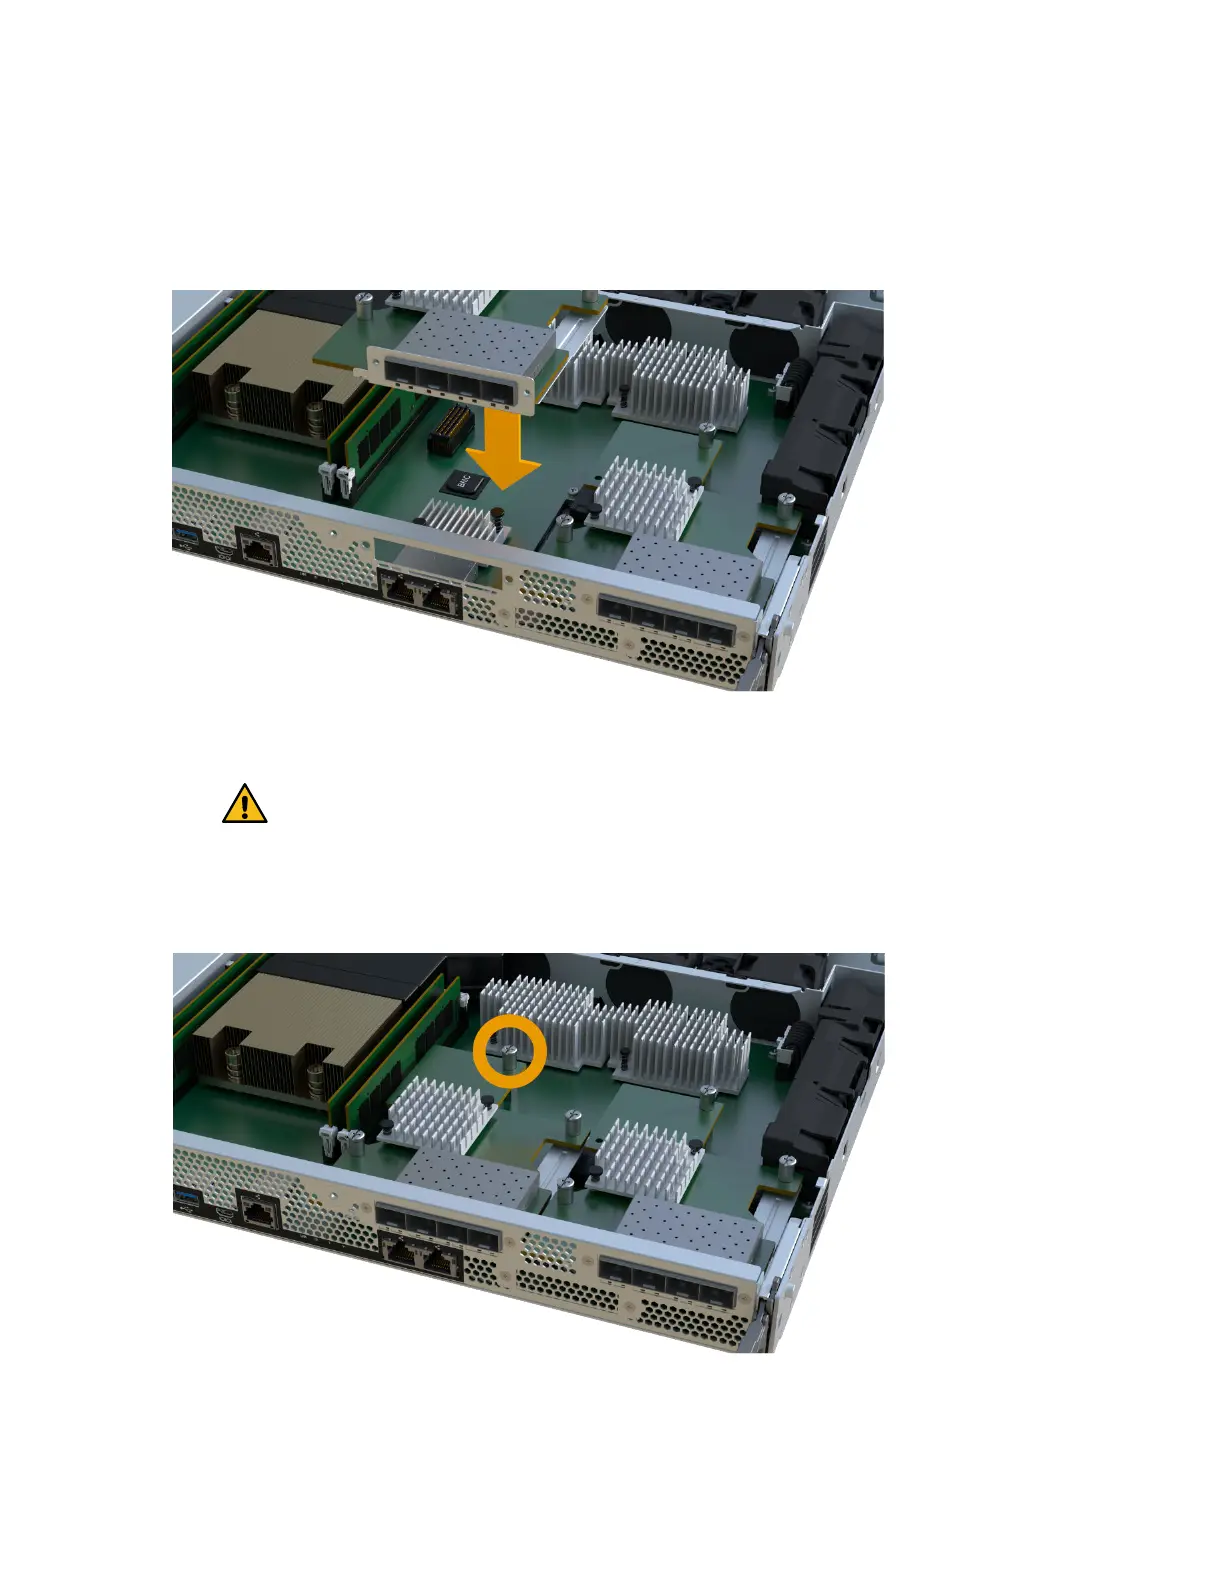
2. Align the single thumbscrew on the HIC with the corresponding hole on the controller, and
align the connector on the bottom of the HIC with the HIC interface connector on the
controller card.
Be careful not to scratch or bump the components on the bottom of the HIC or on the top of the
controller card.
Note: The image above is an example, the appearance of your HIC may differ.
3. Carefully lower the HIC into place, and seat the HIC connector by pressing gently on the HIC.
Attention: Possible equipment damage – Be very
careful not to pinch the gold ribbon connector for the
controller LEDs between the HIC and the
thumbscrew.
4. Hand-tighten the HIC thumbscrew.
Do not use a screwdriver, or you might over tighten the screw.
Note: The image above is an example, the appearance of your HIC may differ.
5. Using a #1 Phillips screwdriver, attach the HIC faceplate you removed from the original
controller canister to the new controller canister with the two screws.
Maintaining EF300 and EF600 Hardware
25
Controllers
 Loading...


