GS716Tv2 and GS724Tv3 Software Administration Manual
Configuring Switching Information 3-11
v1.0, July 2009
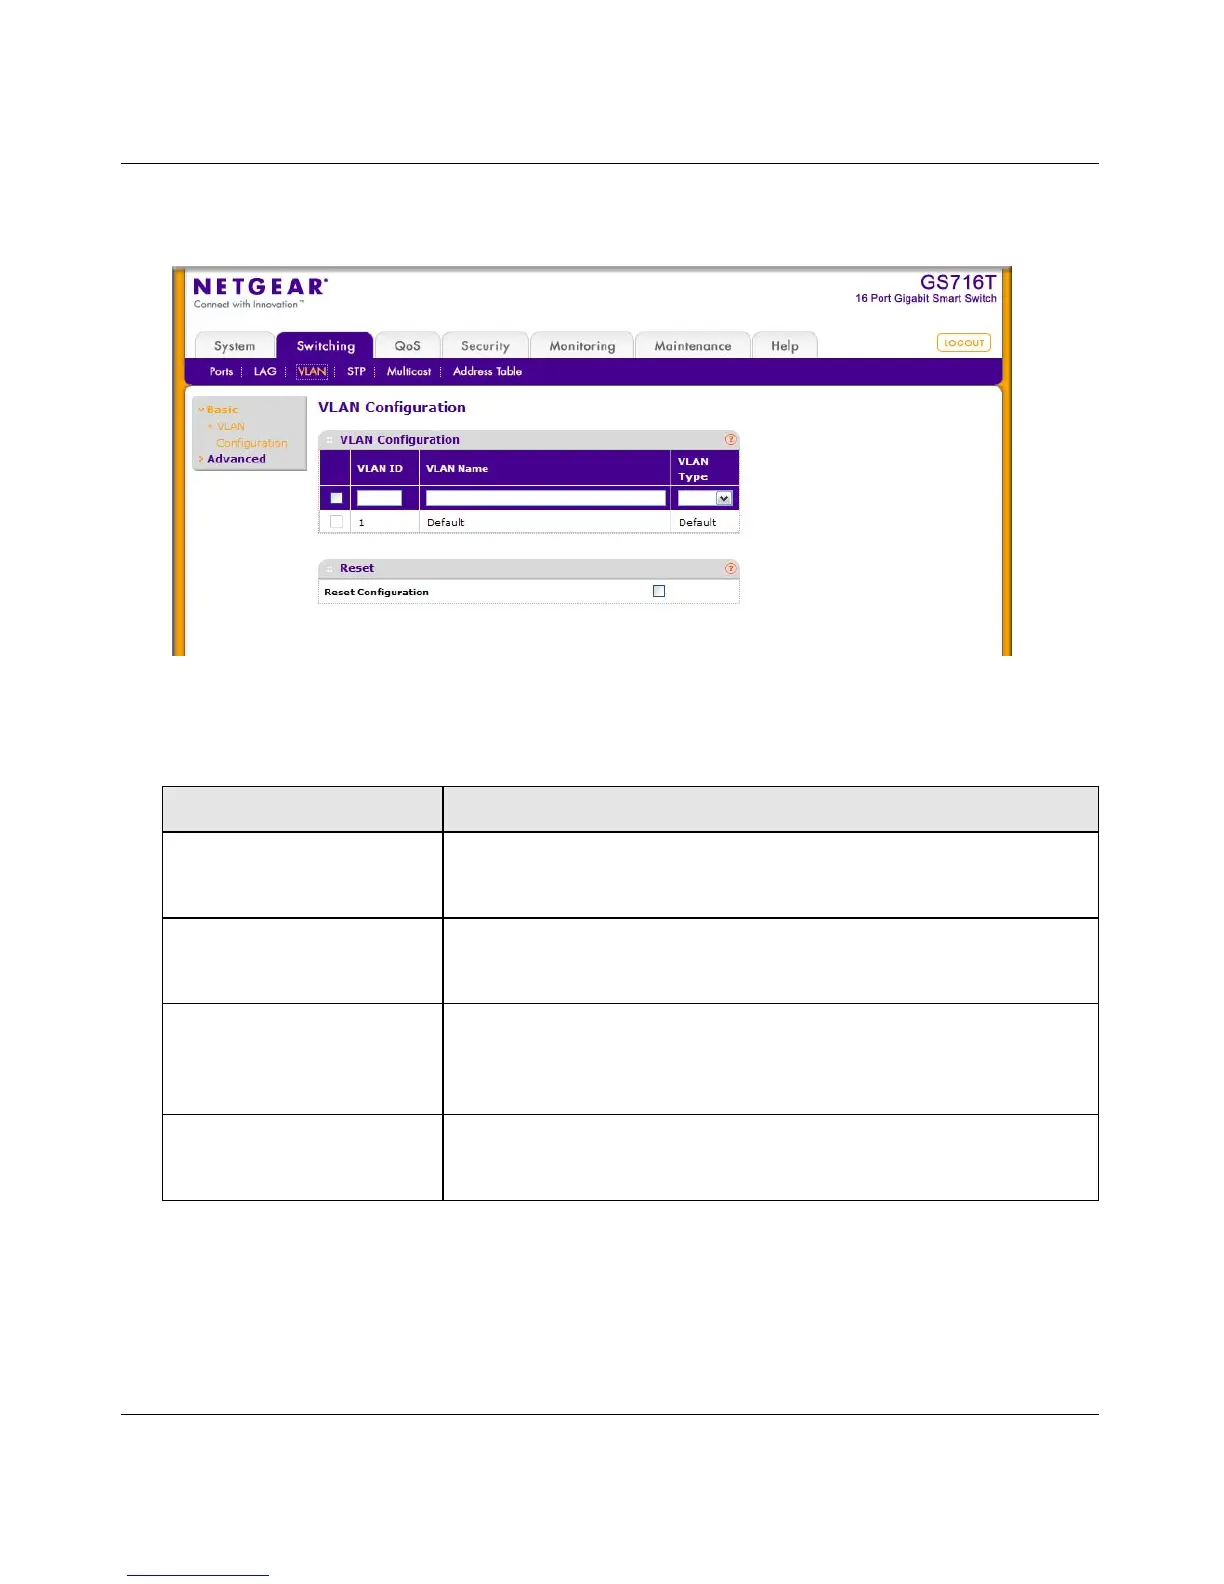
1. Click Switching VLAN Basic VLAN Configuration in the navigation tree.
2. Click Add to add a new VLAN to the switch.
3. Click Delete to delete a selected VLAN from the switch.
4. Click Cancel to cancel the configuration on the screen and reset the data on the screen to the
latest value of the switch.
Figure 3-7
Table 3-7. VLAN Configuration Fields
Field Description
VLAN ID Specify the VLAN Identifier for the new VLAN. (You can only enter data
in this field when you are creating a new VLAN.) The range of the VLAN
ID is 1–4093.
VLAN Name Use this optional field to specify a name for the VLAN. It can be up to 32
alphanumeric characters long, including blanks. The default is blank.
VLAN ID 1 is always named “Default.”
VLAN Type This field identifies the type of the VLAN you are configuring. You
cannot change the type of the default VLAN (VLAN ID = 1) because the
the type is always Default. When you create a VLAN on this page, its
type will always be Static.
Reset Configuration This resets all the VLAN configurations. If the Management VLAN is set
to a non-default VLAN (VLAN 1), it is automatically set to 1 after a Reset
Configuration.

 Loading...