5 Connecting to the Internet with Nokia IP40 Security Platform
72 Nokia IP40 Security Platform User’s Guide v1.1
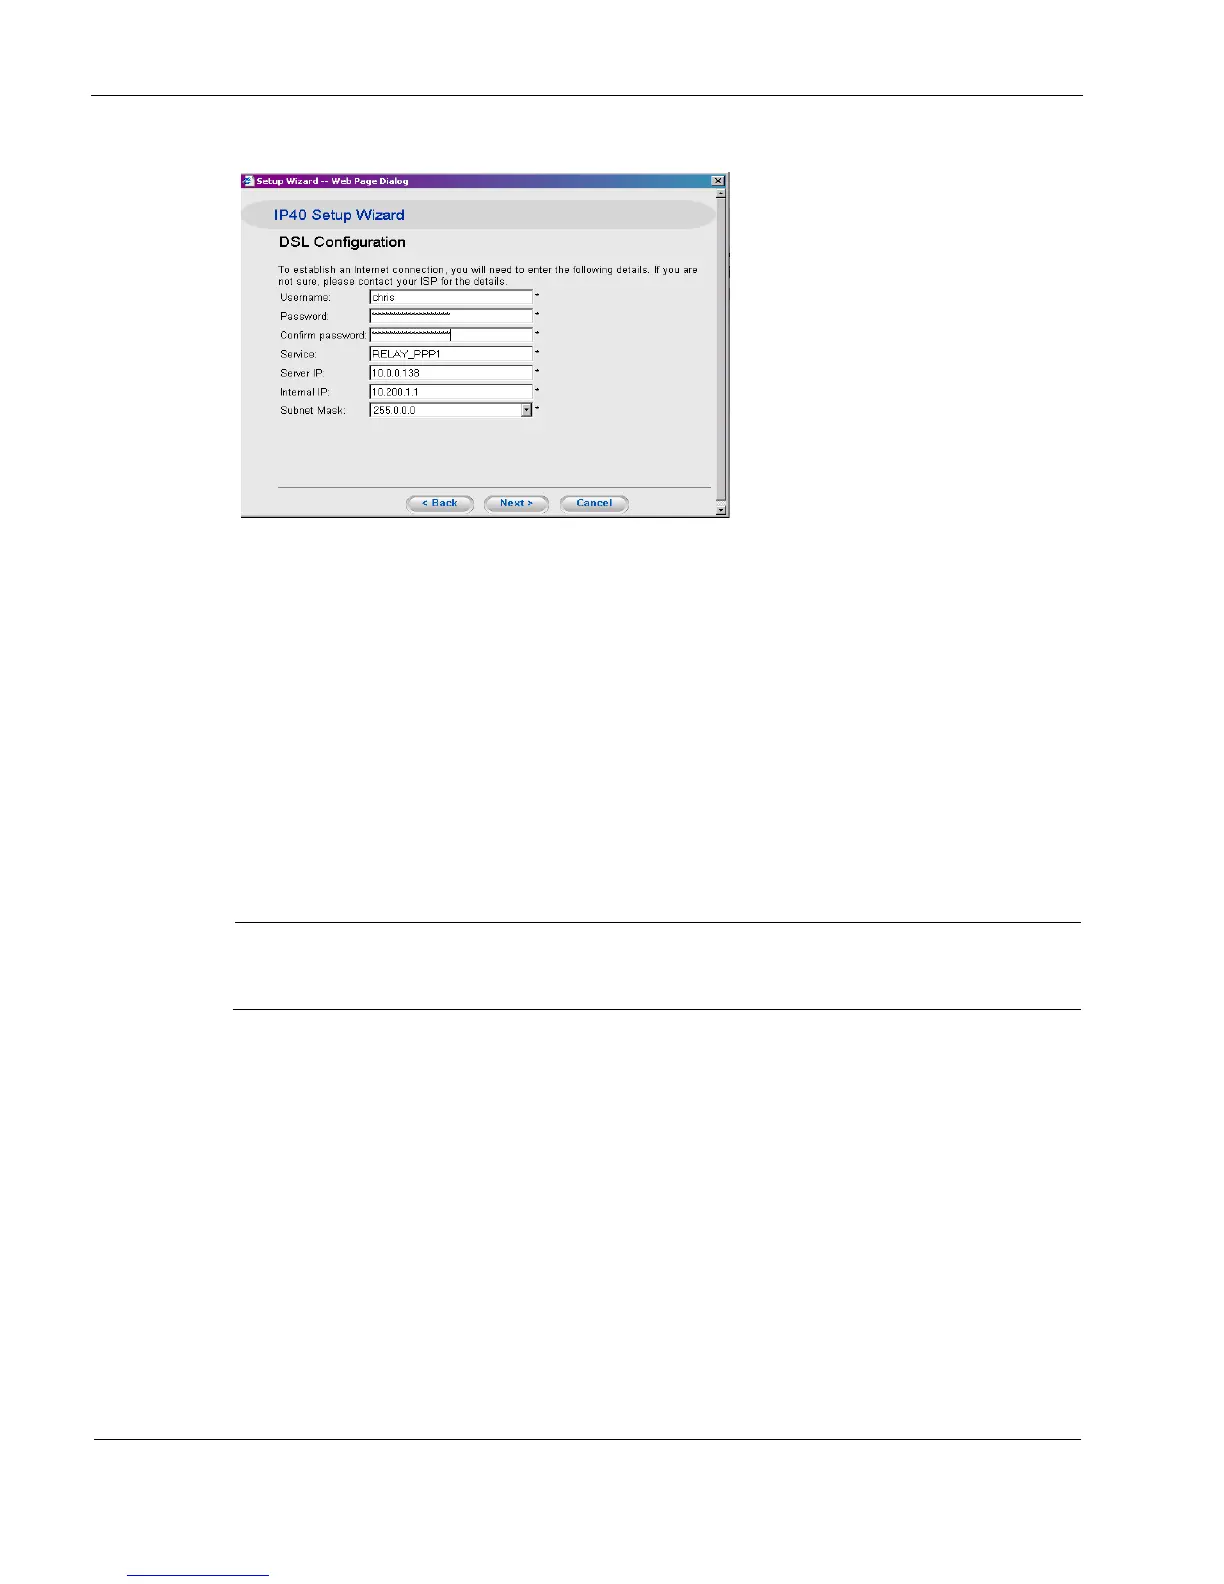
1. Enter the following information:
Username and Password, and confirm the password.
Service name.
IP address of the DSL modem in the Server IP field.
Internal IP address (The IP address required to access the DSL modem).
Subnet mask of the DSL modem.
2. Click Next.
The Connecting message appears while the system attempts to connect to the Internet
through the DSL connection. At the end of the connection process, the Connected message
appears.
Note
If you enabled automatic DHCP, no further settings are required. The Confirmation message
appears.
To connect by using the automatic DHCP method
1. In the DSL Connection type window, select Automatic DHCP.
2. Click Next.
The system attempts to connect to the Internet through the selected connection. The
Connecting message appears. At the end of the connection process, the Connected message
appears.
When you are connected, the wizard prompts you to register your details, install the product
key, and set up your subscription options, which can vary from product to product.
3. Follow the instructions until the wizard is done, and then click Finish.