EasyManuals Logo

Oracle Database Appliance X6-2-HA Service Manual

Oracle Database Appliance X6-2-HA
300 pages
To Next Page IconTo Next Page
To Previous Page IconTo Previous Page
Page #216 background imageLoading...
Page #216 background image
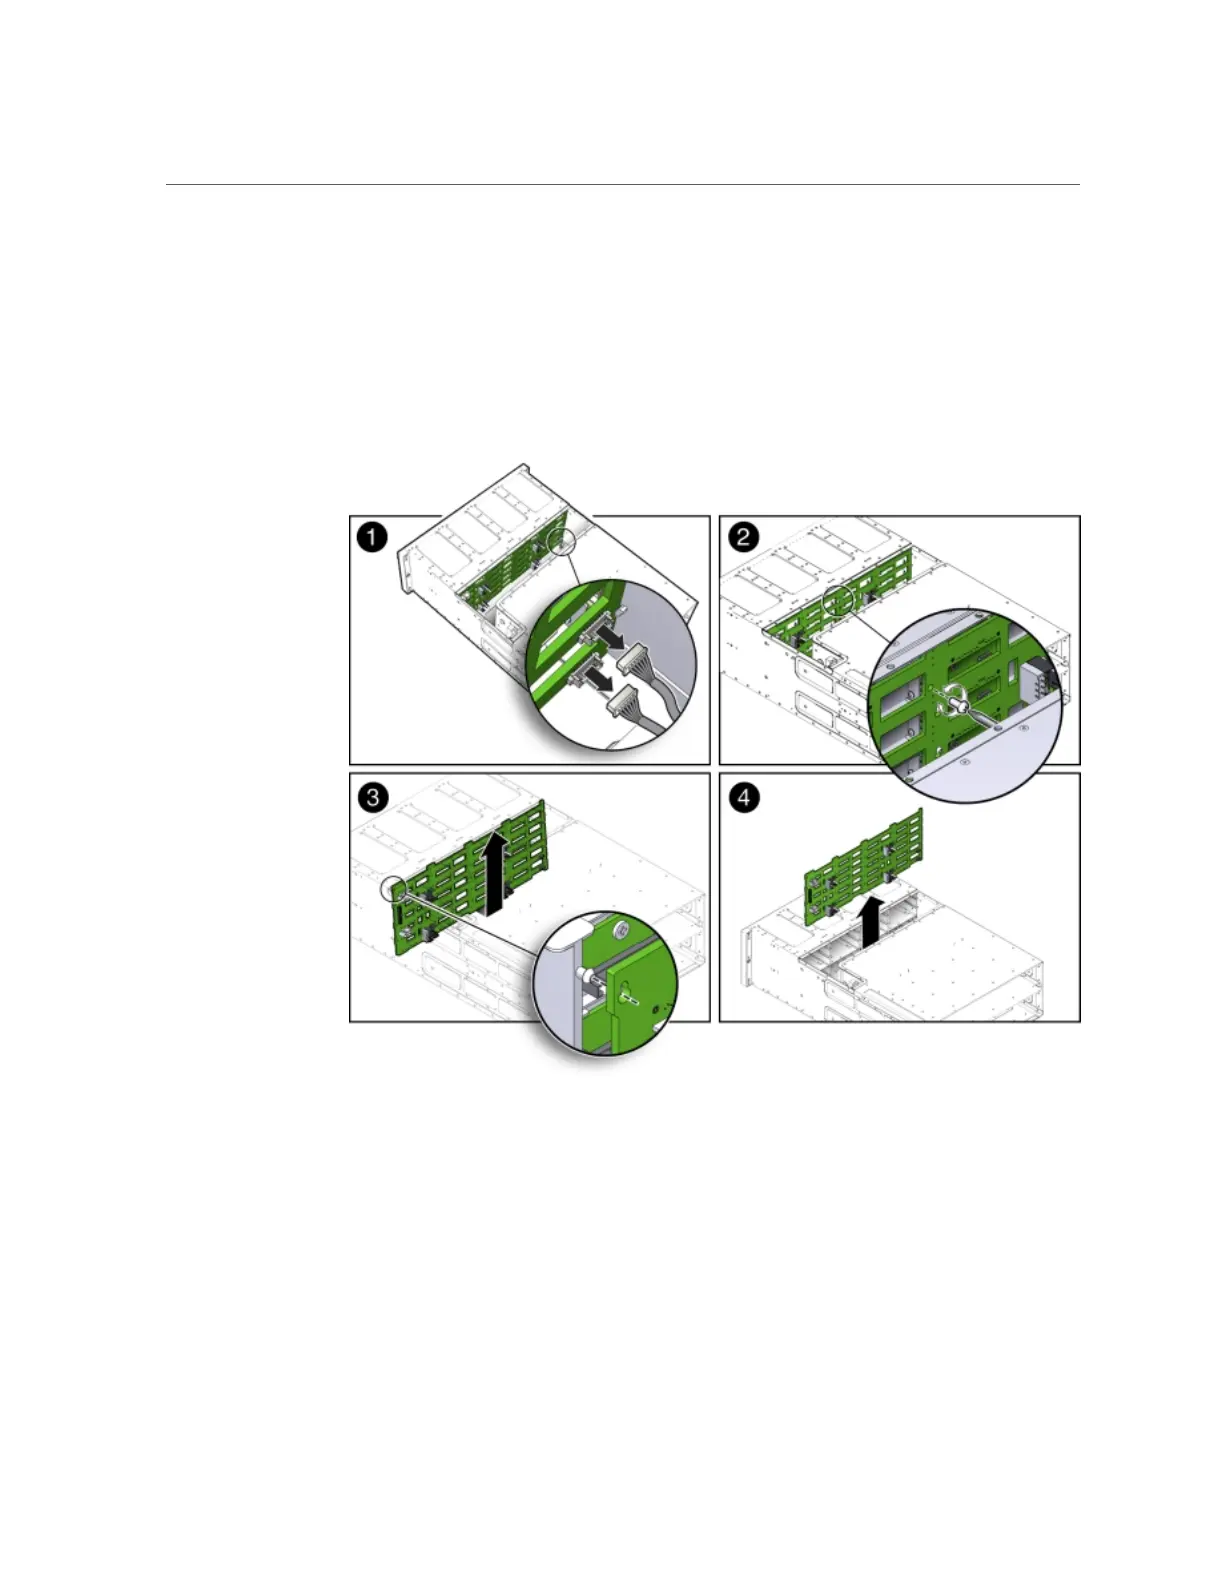
Remove Disk Midplane Module
a.
Before disconnecting the two front indicator module (FIM) cable connectors
from the disk midplane module, label them [1].
The lower connector on the disk midplane is for SN0 and the upper connector is for SN1.
b.
Disconnect the two FIM cable connectors from the disk midplane module [1].
c.
Remove the Phillips screw that secures the disk midplane module to the
disk drive cage [2].
d.
To remove the disk midplane module from the system chassis, lift the board
up about 0.25 inches (6.35 mm) to clear the standoffs that hold it in place [3].
216 Oracle Database Appliance Service Manual • November 2017

Table of Contents

Other manuals for Oracle Database Appliance X6-2-HA

Questions and Answers:

Question and Answer IconNeed help?

Do you have a question about the Oracle Database Appliance X6-2-HA and is the answer not in the manual?

Oracle Database Appliance X6-2-HA Specifications

General IconGeneral
BrandOracle
ModelDatabase Appliance X6-2-HA
CategoryStorage
LanguageEnglish

Related product manuals