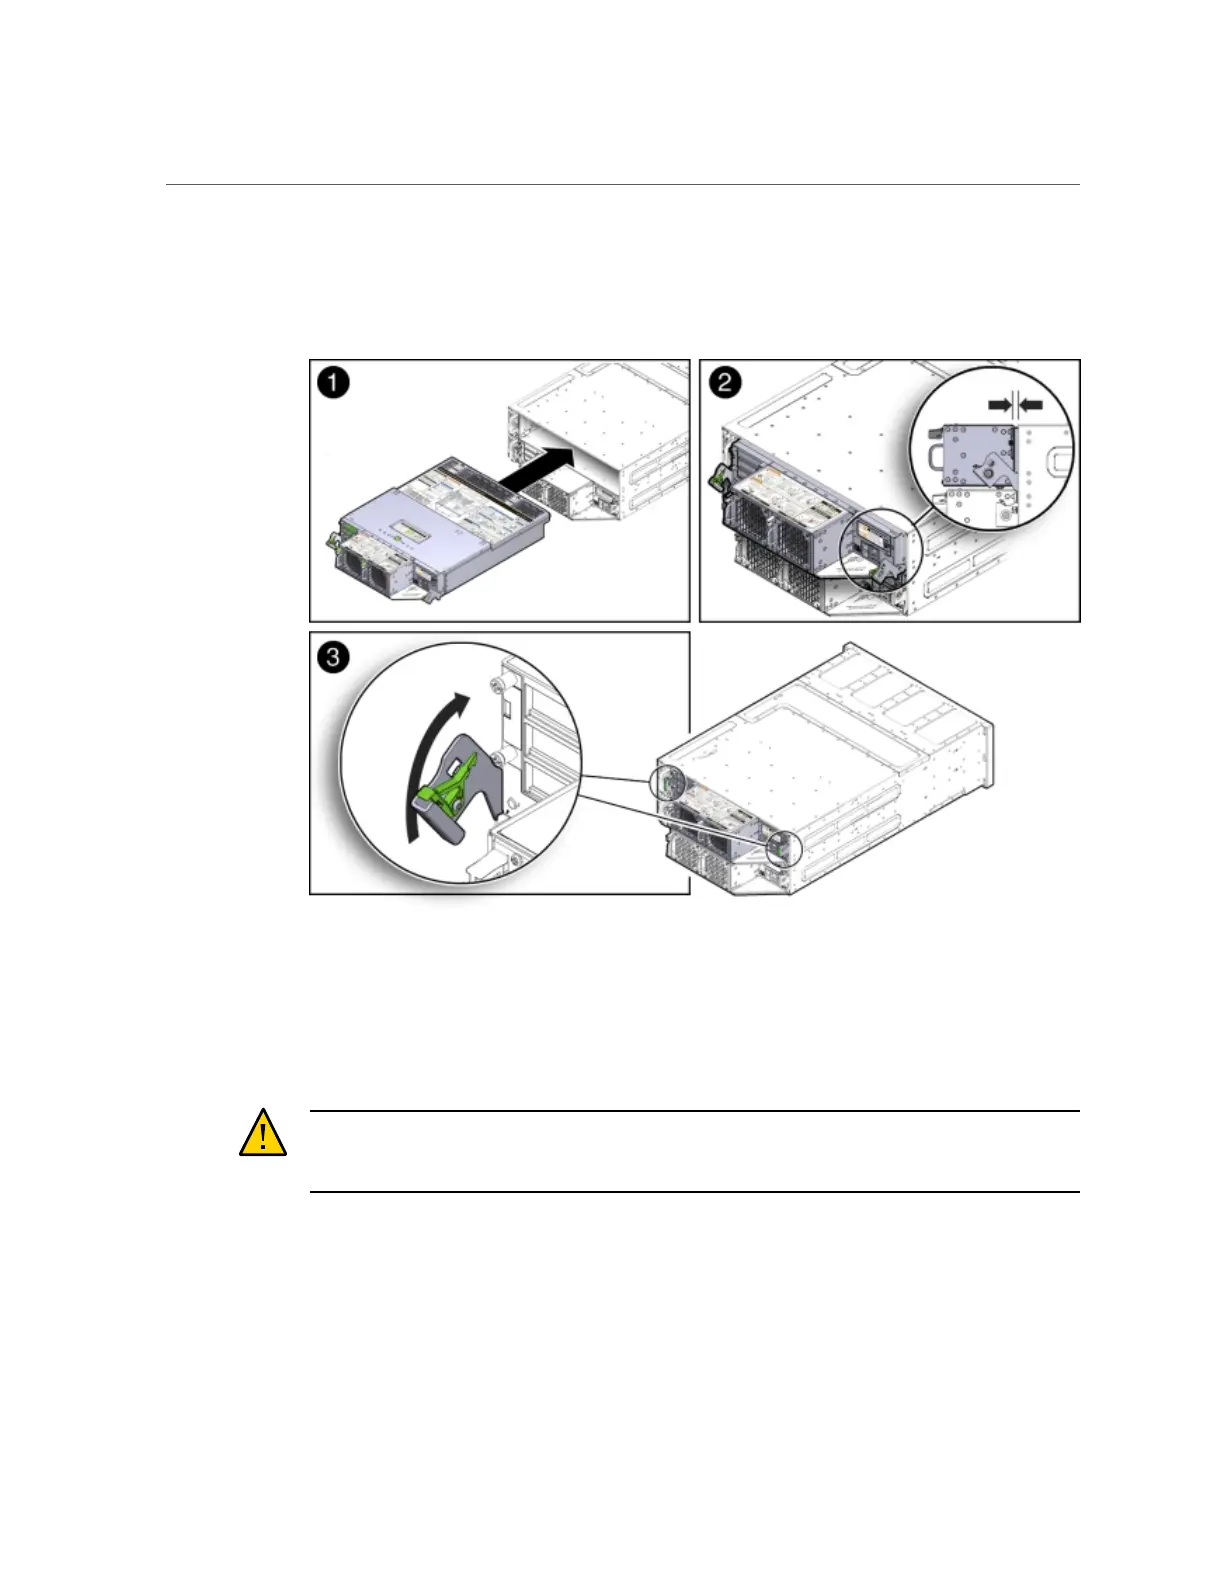
Install Server Node Into System Chassis
1.
Before inserting the server node into the system chassis, ensure that both
release latches on the rear of the server node are in the open position.
2.
Slide the server node into the rear of the system chassis until the bottom lips of
the release latches touch the chassis [2].
3.
To re-seat the server node in the system chassis, grasp both release latches, one
on each side of the server node, and push them upward simultaneously to the
closed position [3].
Caution - Equipment damage. Always use the release latches to re-seat the server node into
the system chassis as described in this procedure. Failure to do so might damage the connectors
on the front of the server node and/or the connectors on the disk midplane module.
4.
Reinstall the system chassis into the rack.
Follow the instructions listed in the "Inserting Oracle Database Appliance Version 1 Into a
Rack" section in the Oracle Database Appliance Owner's Guide.
248 Oracle Database Appliance Service Manual • November 2017

 Loading...


