Chapter 1. Programming Site Data
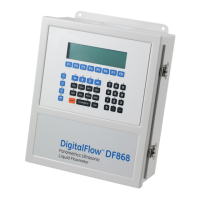
40 DigitalFlow™ DF868 Multipurpose Ultrasonic Liquid Flowmeter Programming Manual (2-Channel)
Setting Up the Analog Inputs
Complete the following steps to set up the two 4-20 mA analog inputs of an option card installed in Slot x:
Note: For information on programming cards with RTD inputs, see the next page.
1. Press [F1] to set up input A or [F2] to set up input B.
Note: The setup of input A is used as an example in this manual. Identical procedures would be used to set up
input B.
2. Enter a Label of up to eight characters for input A and press [ENT].
3. Press [F1]=OFF to disable input A and return to the previous prompt, or press [F2]=TEMP or [F3]=SPEC to
designate the Input Measurement as a temperature or special input, respectively.
• If you select TEMP, skip to step 6 below.
• If you select OTHER, complete the following steps.
4. Enter an Input Name and press [ENT].
5. Enter a Unit of measurement for input A and press [ENT].
6. Enter a value for the Base (low end) of the chosen input range and press [ENT].
7. Enter a value for the Full Scale (high) end of the chosen input range and press [ENT].
8. Press [F1]-[F2] to set up another input or press [EXIT] to select another slot for setup.
For instructions on setting up additional inputs and/or outputs proceed to the appropriate section. Otherwise, press
[EXIT] twice to return to the Global Program prompt.
Option Card RTD Inputs
Option cards with RTD inputs have a temperature range of –100° to 350°C. Complete the following steps to set up the
two RTD inputs of an option card installed in Slot x:
1. Press [F1] to set up RTD input A or [F2] to set up RTD input B.
Note: The set up of RTD input A is used as an example. Identical procedures would be used to set up RTD input B.
2. Enter a Label of up to eight characters for input A and press [ENT].
3. At the Input Measurement prompt, press [F1]=OFF to disable RTD input A and return to the previous prompt, or
press [F2]=TEMP to enable RTD input A.
4. Enter a value for the Base (low) end of the chosen input range and press [ENT].
5. Enter a value for the Full Scale (high) end of the chosen input range and press [ENT].
6. Press [F1]-[F2] to set up another input or press [EXIT] to select another slot for set up.