17
Registering the preset memory to recall when in ALL
mode
1 Press the MENU button to turn on its indicator
2 Open PM GRP1 menu [31]
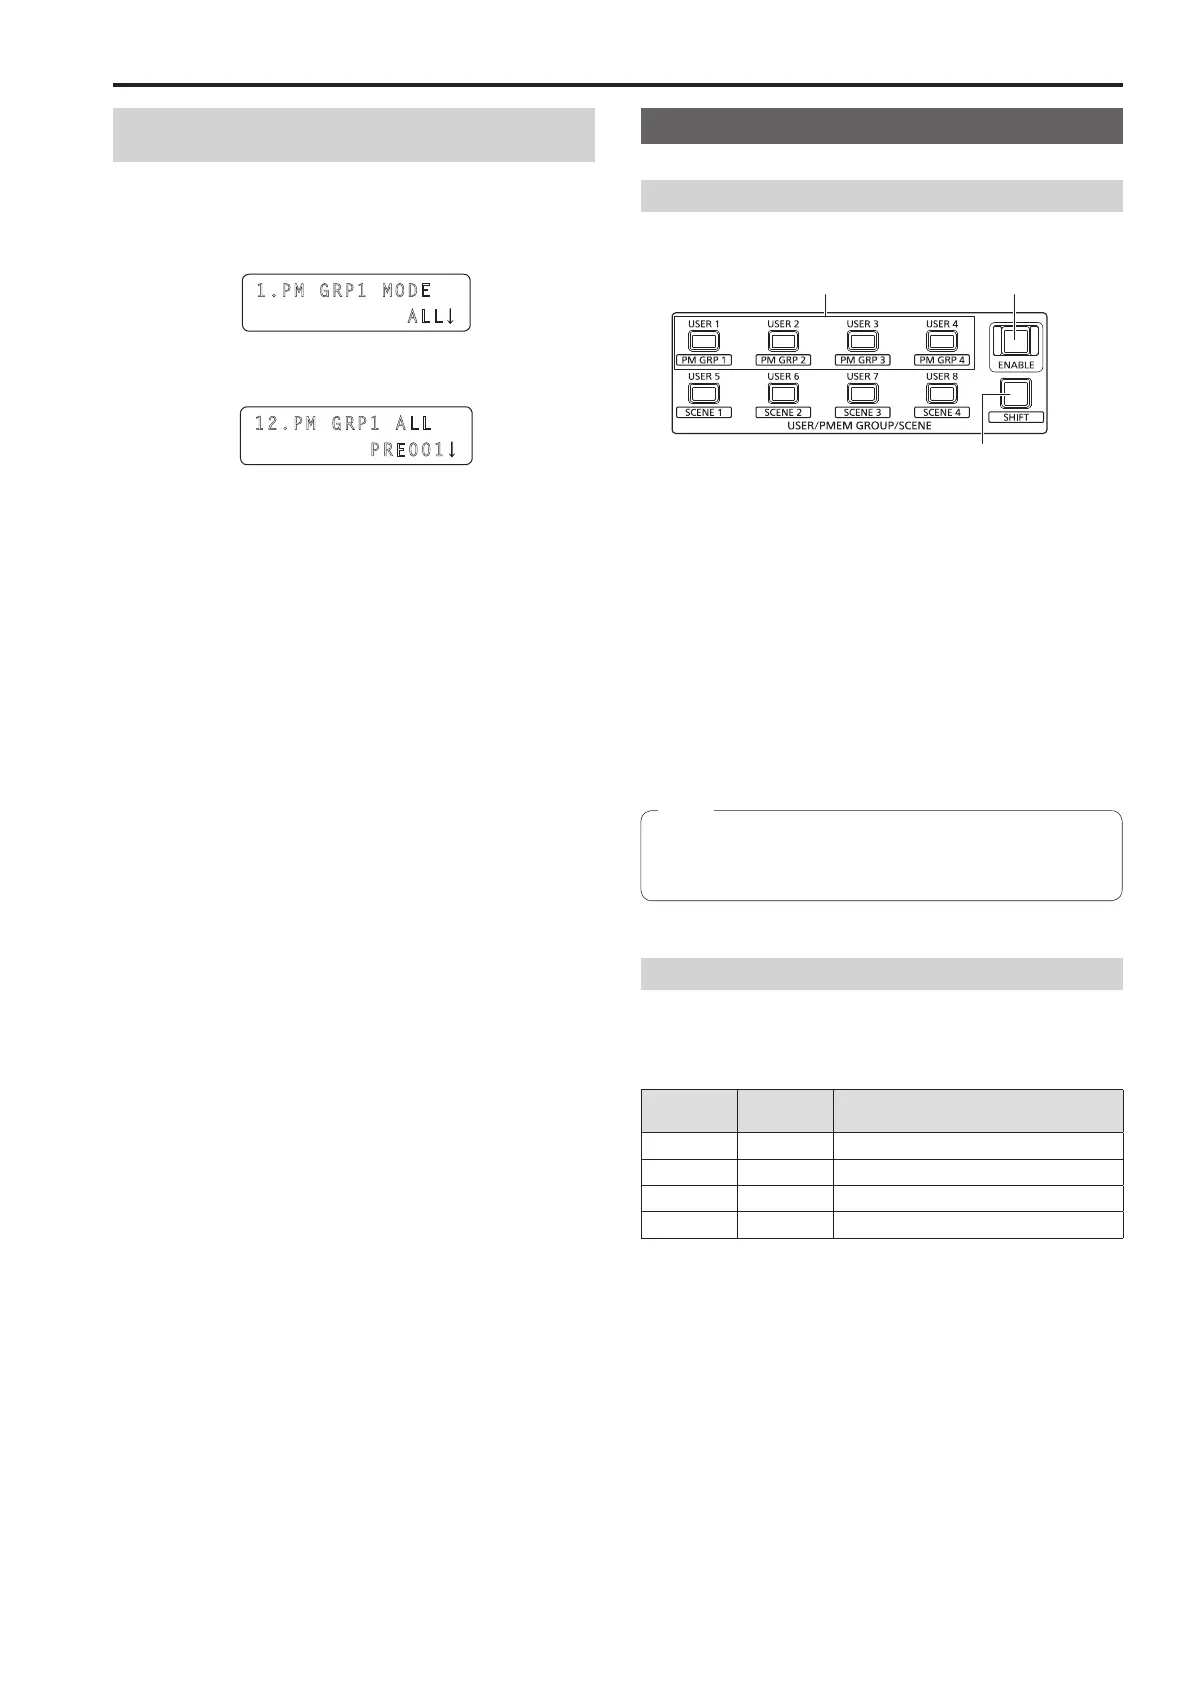
1.PM G RP1 MODE
ALL
3 Turn the F1 dial to display the “12 PM GRP1 ALL” item
12.PM GRP1 A LL
PRE 001
4 Turn the F2 dial to select a preset number, and then
press the F2 dial to confirm the selection
Recalling preset memory groups
Pressing a button to recall a preset memory group
Use PM GRP 1 to PM GRP 4 to recall preset memory groups
PM GRP 1 to PM GRP 4 buttons USER ENABLE button
SHIFT button
1 Press the SHIFT button to turn on its indicator
2 Press the PM GRP 1 button
When the operation mode of PMEM GROUP1 is “SEPARATE”:
Simultaneously recalls each remote camera preset memory
registered to the “2 PM GRP1 1/10” to “11 PM GRP1 10/10”
items
When the operation mode of PMEM GROUP1 is “ALL”:
The preset memory registered in the “12 PM GRP1 ALL” item is
recalled for all of the remote cameras registered to the unit
Preset memory is not recalled for a remote camera for which
“NoAsign” is set in CTRL TYPE menu [36]
If the USER ENABLE button indicator is off, operation of the
PM GRP 1 to PM GRP 4 buttons is not possible Perform
operation while the button indicator is on
Note
Recalling a preset memory group by GPI input
A preset memory group can be recalled by contact input of the TALLY/
GPI connector on the rear panel of the unit
<PIN numbers and preset memory groups>
Pin number
Signal
name
Corresponding preset memory group
19 GPI IN 1 PMEM GROUP 1
7 GPI IN 2 PMEM GROUP 2
20 GPI IN 3 PMEM GROUP 3
8 GPI IN 4 PMEM GROUP 4
⇒ “Control interface for external devices” (page 43)
Operating preset memory groups (PMEM GROUP) (continued)
 Loading...