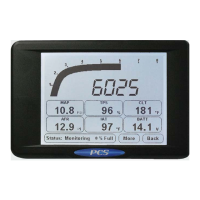
Page 35
Ph: 804.227.3023
10511 Old Ridge Rd. Ashland, VA 23005
v 2.0
Powertrain Control Solutions
Contrast and Backlight are typically adjusted from the touchscreen in the Display Settings Menu. The software provides
slightly more control of the settings and the ability to recover a dash if incorrect contrast and backlight settings result
in not being able to see the screen. It is recommended to always adjust the contrast and backlight settings from the
touchscreen. To open the Contrast and Backlight form in the software, select Display Settings on the left tree-view, then
double click Contrast and Backlight.
When the form opens, it should indicate whether a black screen or a blue screen was detected. If the software does not
match the actual screen type, the dash will work, but PCS technical support should be contacted.
The left side of the form is for backlight settings. There are 10 different backlight levels. When an up or down arrow is
selected on the dash, it is changing to one of the 10 levels. Each level is a duty cycle value between 0-100%. To change
the current level (same as touching an up or down arrow on the dash), move the slider for either the daytime or nighttime
mode. To change the duty cycle at each level, edit the number in the box.
The right hand side of the form adjusts contrast settings. The contrast is based on a temperature referenced 16-point
table. Differences in contrast exist from one dash to another based on the manufacturing of the LCD. To compensate for
this, the entire table can be offset accordingly. This offset number can be increased or decreased using the arrow keys.
The temperature table can be viewed by clicking the Advanced button.
Once changes are complete, click the update button. If the screen backlight or contrast becomes set such that the screen
can not be seen, select the Reset to Default button and then click Update. The screen should be visible once the update
is complete.
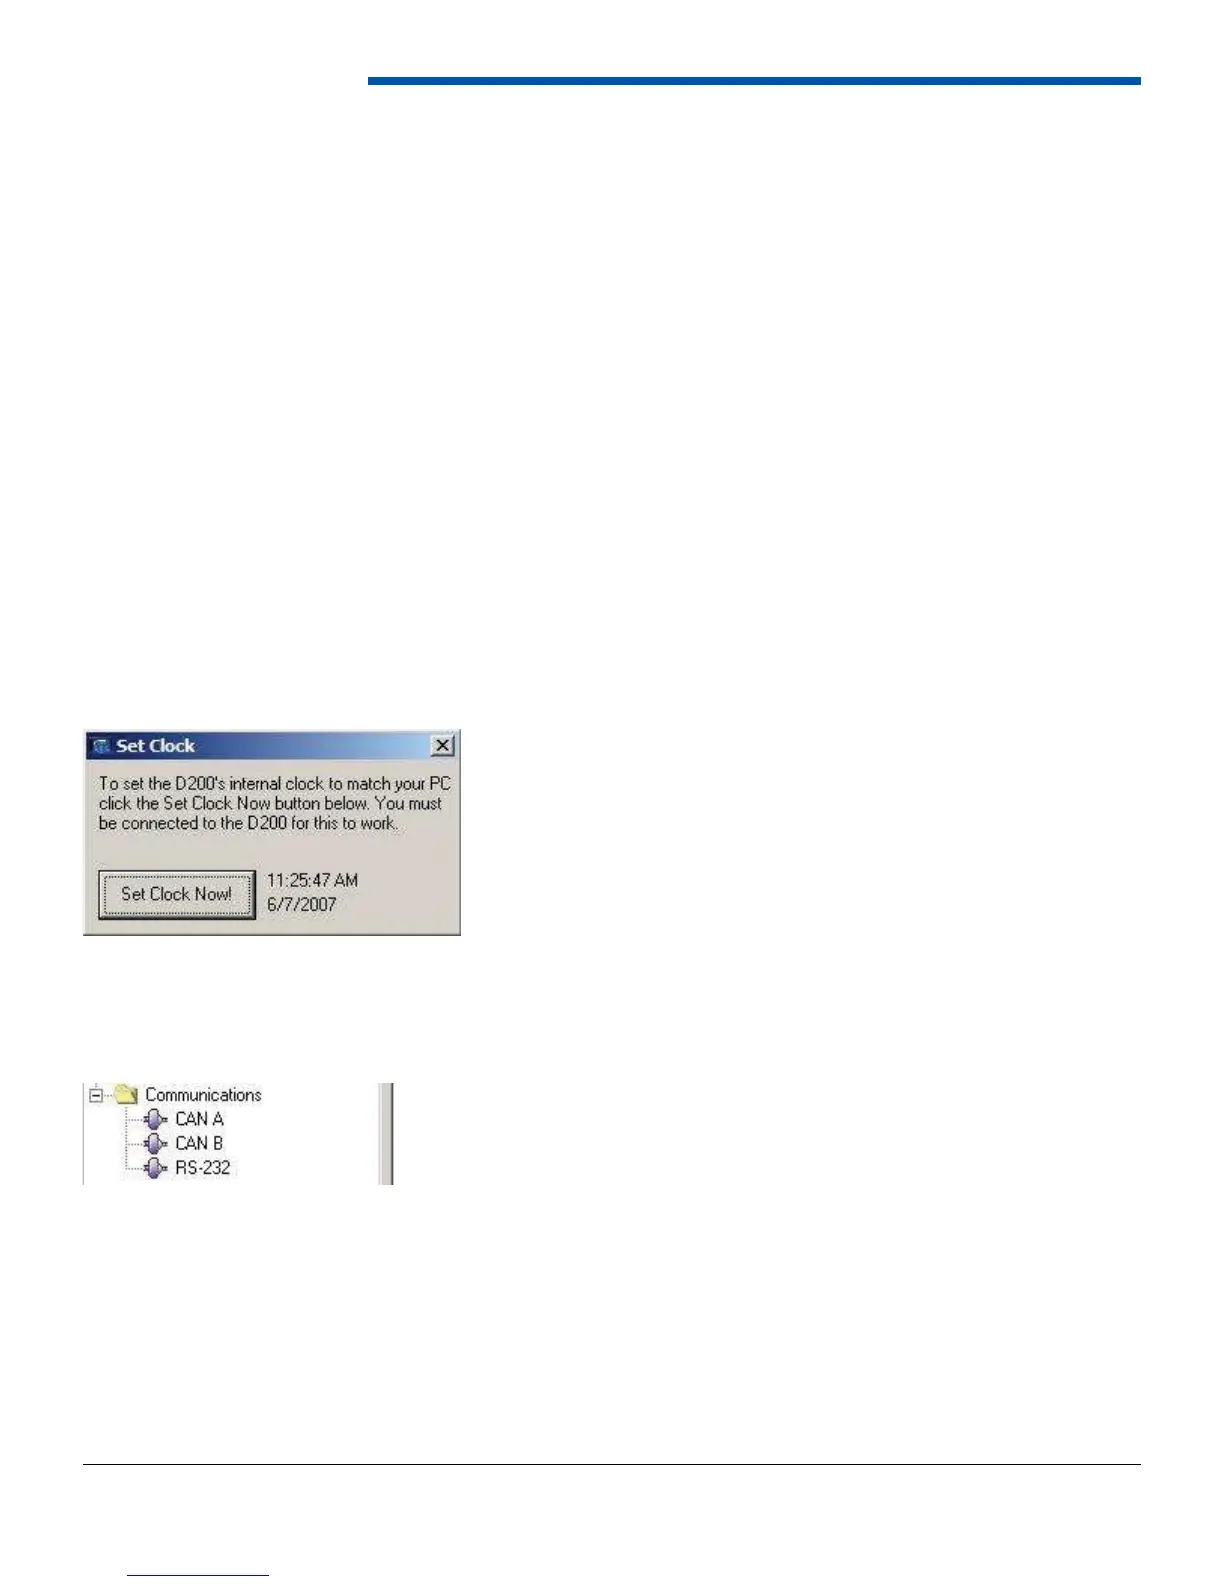
6.13.2 Set Date and Time
The dash’s on-board clock can be synchronized to the computer’s clock. Open the set clock window and wait for the
computer’s time to appear. Then click Set Clock Now. The dash time should match the computer’s time.
6.14 Communications
The Communications window is similar to confi guring the communications using the dash’s touchscreen. Choose the
communication protocol to set up and then select the input devices. RS-232 can only have one device, while CAN may
have more than one.