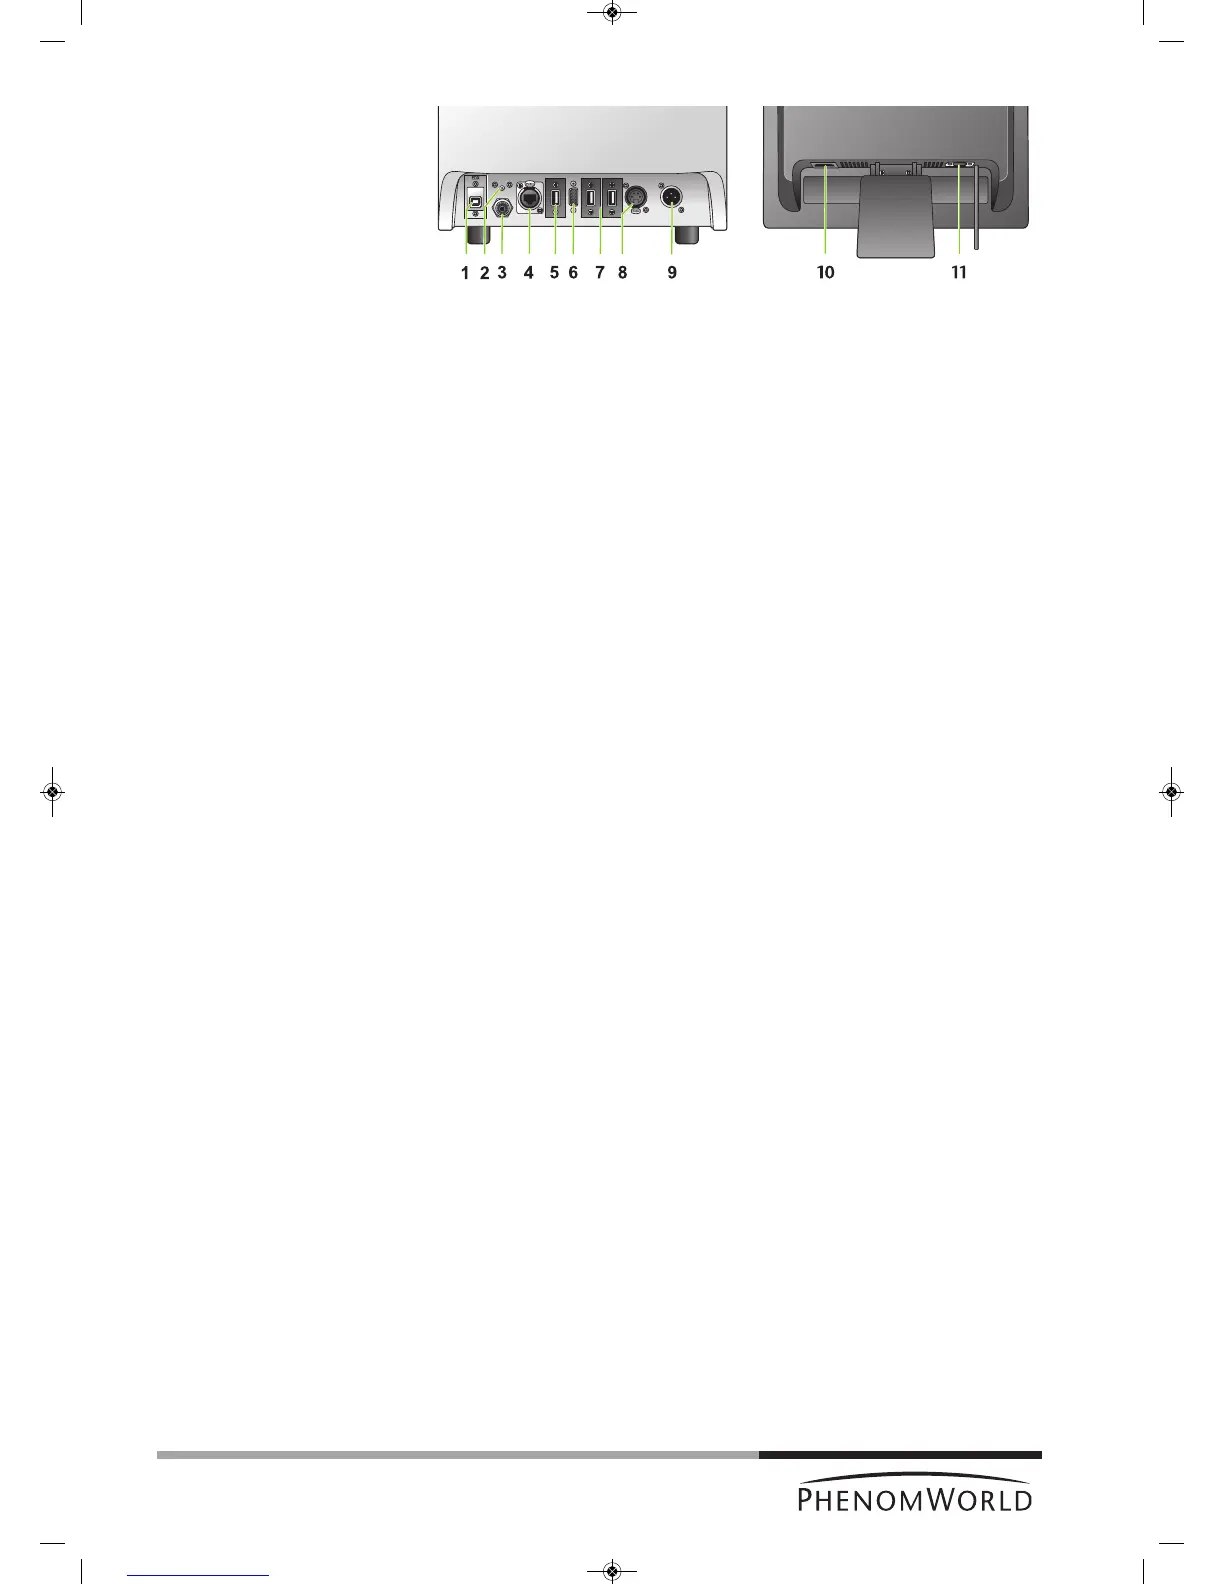
12
Connections
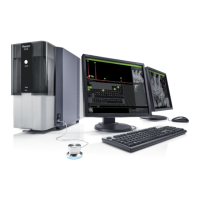
Phenom microscope
Flat panel touch
screen monitor
1 EDX / USB port
Connects the Phenom EDS (Energy Dispersive Spectroscopy) detector to the
ProSuite EeeBox PC (ProX).
2 Reset button
Reboots the Phenom software.
3 Connection for pre-vacuum pumphose
Connects the Phenom to the pre-vacuum pump.
4 Ethernet connector
Connects the Phenom to the Local Area Network.
PUSH button
Opens the ethernet connector.
5 USB port
Connects the Phenom to the monitor USB port.
6 VGA connector
Connects the Phenom to the monitor VGA connector.
7 USB ports
Connect the Phenom to the rotary knob and the mouse (ProX / Pro) and the ProSuite
for ProX.
8 Power connector (out)
Connects the Phenom to the pre-vacuum pump.
The Phenom supplies power to the pre-vacuum pump.
PUSH button
Opens the power connector.
9 Power connector (in)
Connects the Phenom to the power supply.
10 Power connector (in)
Connects the monitor to the mains outlet.
11 VGA connector
Connects the monitor to the Phenom VGA connector.
Fig. 2
Rear view: microscope (left) and monitor (right)