45
Tip!
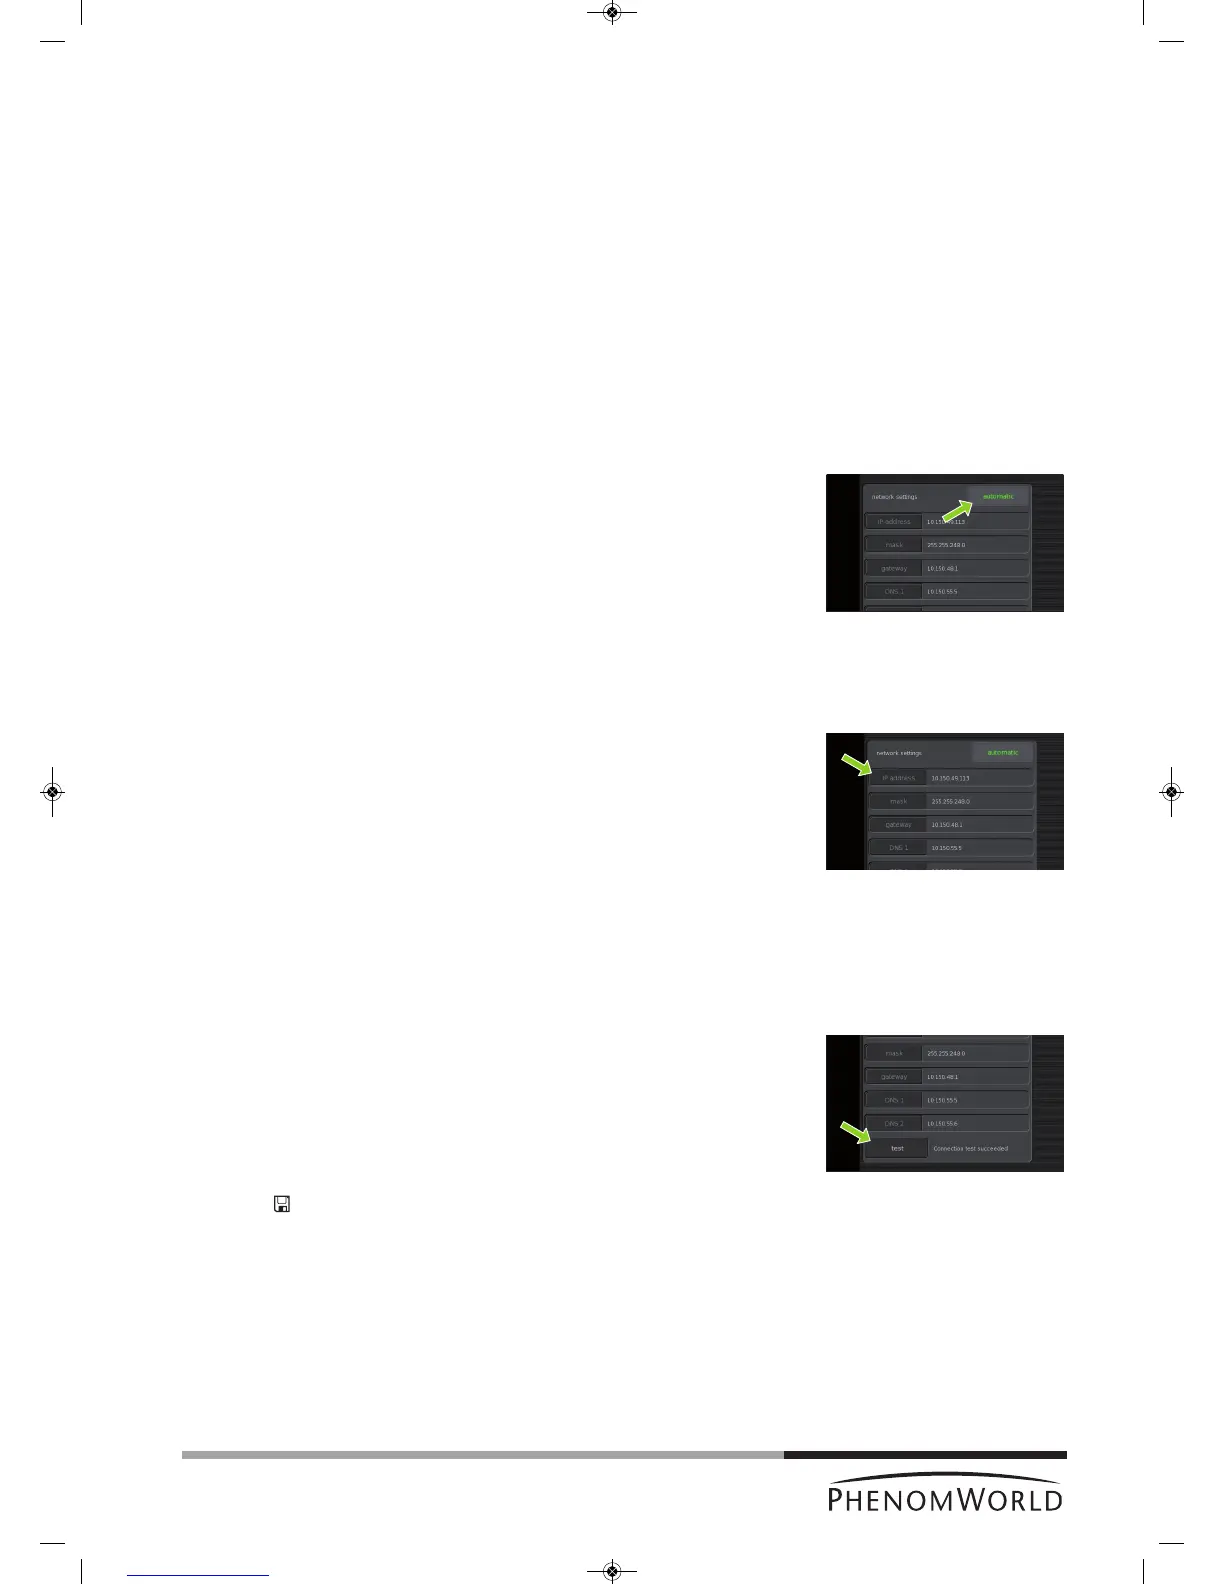
5.7.4.3 Network
If the Phenom is connected to your Local Area Network, you can store images on a Windows
n
etwork share (refer to 4.5.5 and 4.6.6 ‘Storing Images’). A functioning network connection
with access to the Internet is also required for the Phenom Remote Assistant (refer to
‘Phenom Remote Assistant settings’ under 5.7.4.4 ‘Connectivity’).
Network configuration
1 Check if the ethernet cable is properly connected between the Phenom Ethernet
connector (fig. 2,3) and your LAN (Local Area Network).
For connection, refer to 3. ‘Installing the Phenom’ - ‘Connections’.
> In most corporate networks, connected systems are automatically configured using
DHCP (Dynamic Host Configuration Protocol). If the Phenom detects a DHCP
server in your network, the message ‘Status: DHCP server detected’ is displayed in
the Statusarea (bottom left of the screen).
> If no DHCP server is detected, the Statusarea will remain empty.
2 If a DHCP server is detected, touch the automatic button in the network settings
pane.
>
automatic lights up green on the button. The DHCP server will now automatically
configure the Phenom network settings.
> During configuration you will see data automatically being entered for all settings.
When all network settings have been configured, continue from step 8.
If no DHCP server is detected (check Status area), the automatic button lights up
grey and the five network settings areas will be enabled. Manual configuration of the
Phenom network settings is now possible. Continue with step 3.
3 Touch the IP address button.
> A keyboard appears.
4 Enter the Phenom IP address, confirm by touching the OK button on the keyboard
and select the next setting by touching the appropriate button (mask).
5 Enter in the data for the other settings (mask, gateway, DNS 1 and DNS 2) in the
same way. Confirm each setting with the OK button on the keyboard and select the
next setting by touching the appropriate button.
You can copy the values for these settings from a Windows system in your network,
or contact your local network administrator.
6 After entering the data for all settings, touch the test button to test the connection.
> The Phenom will now try to contact your gateway system.
> If all settings have been properly made and connection is established, the message
‘Connection test succeeded’ is displayed next to the test button.
> If the message ‘Connection test failed’ is displayed, check if the correct data have
been entered for all settings or contact your network administrator.
7 Touch
’ ’ to save your settings.
> The message ‘Network configuration settings correctly saved’ appears in the Status
area.
> From now on you can store images on a Windows network share.
> All settings will be stored in the Phenom memory even after rebooting the Phenom
software. The network connection will be automatically restored after reboot or
shutdown of the Phenom.