31
4.6.2 Adjusting brightness and contrast
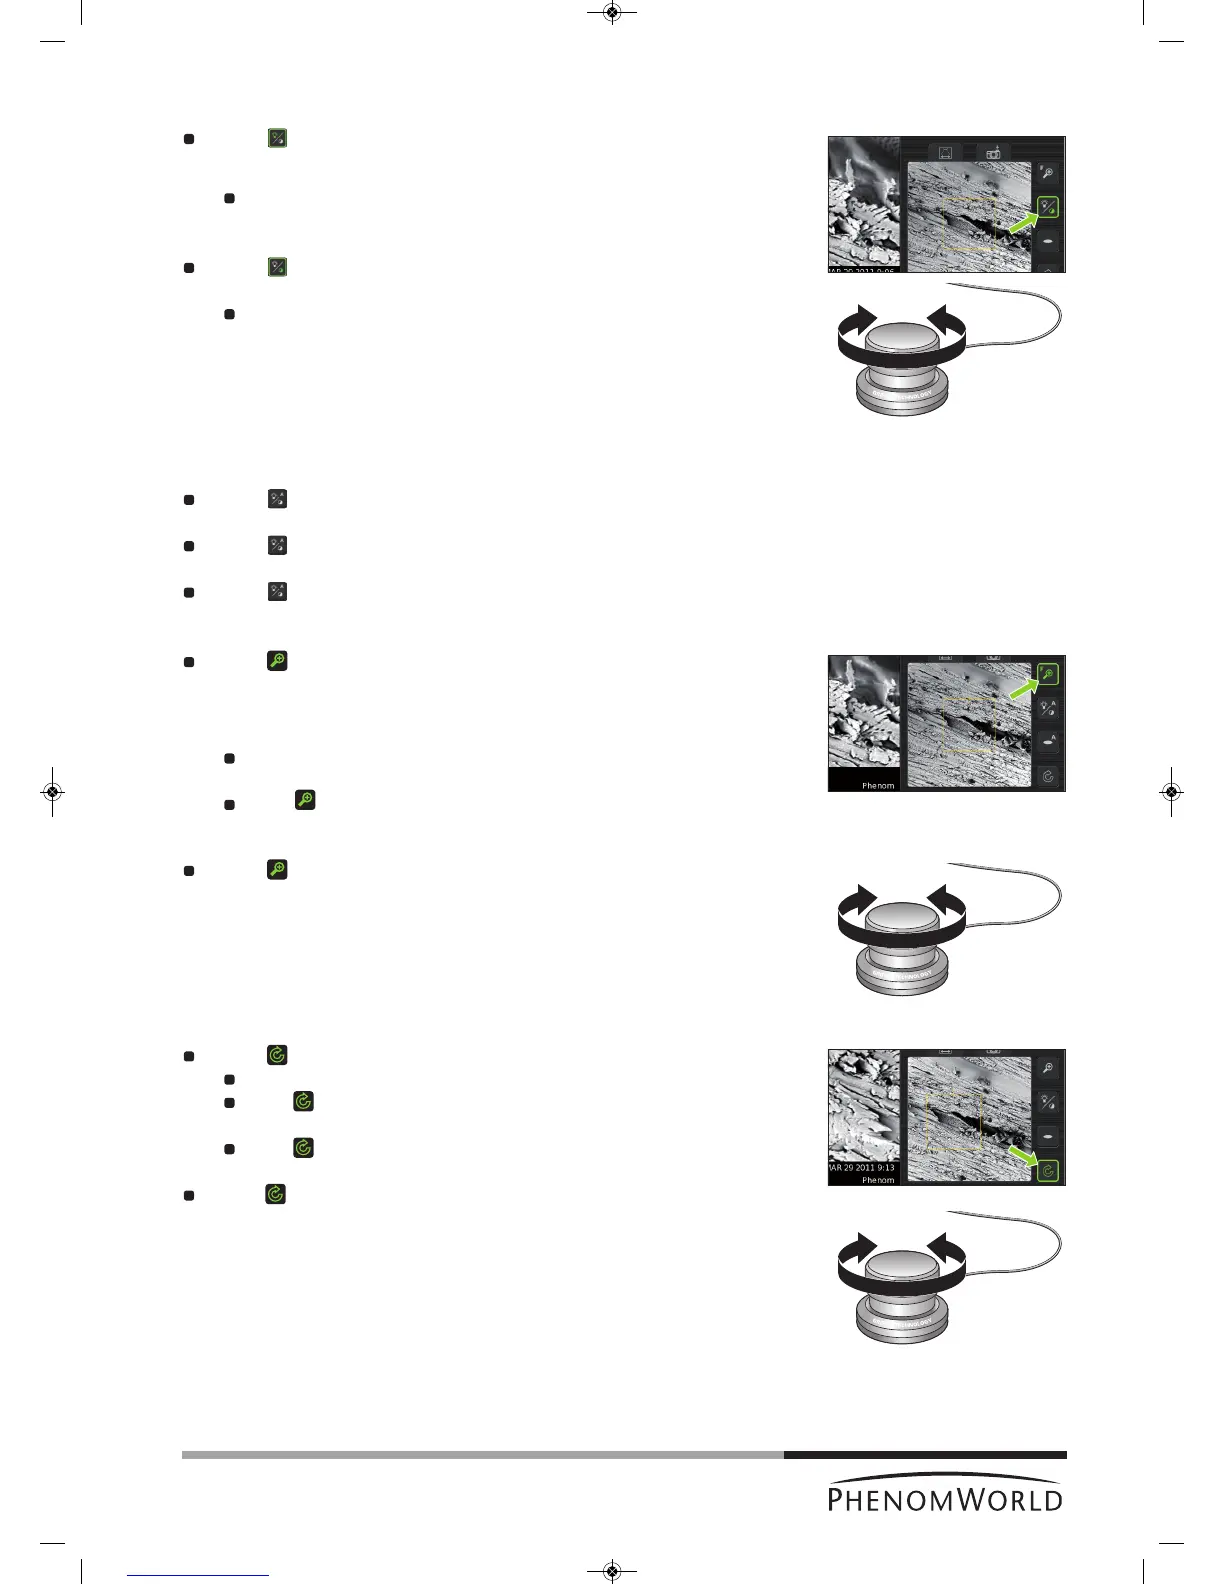
Touch (fig. 3,4) to activate brightness adjustment.
> A brightness slider appears, showing the current brightness setting.
Rotate the rotary knob (fig. 1,9) to adjust the brightness of the electron image.
> Adjustment is made visible by the slider.
Touch (fig. 3,4) again to activate contrast adjustment.
> A contrast slider appears, showing the current contrast setting.
Rotate the rotary knob (fig. 1,9) to adjust the overall contrast of the electron
image.
> Adjustment is made visible by the slider
Auto contrast / brightness
Touch (fig. 3,4) for 2 seconds to activate the
Auto contrast / brightness function.
> An ‘A’ appears on the button.
T
ouch (fig. 3,4) again to start
A
uto contrast / brightness
a
djustment.
> Brightness and contrast will now be adjusted automatically.
Touch (fig. 3,4) again for 2 seconds, to return to manual mode.
4.6.3 Magnifying the image
Touch (fig. 3,4) to activate the magnification function.
> A magnification slider appears, showing the current magnification factor.
The magnification factor is also shown on the data bar (fig. 3,2) if activated on the
Settings screen.
Rotate the rotary knob (fig. 1,9) to magnify the image to the desired size.
>
The magnification factor is made visible by the slider and on the data bar (fig. 3,2).
Touch (fig. 3,4) or the rotary knob (fig. 1,9) to select fine magnification.
> An ‘F’ appears on the button and magnification now takes place in small steps.
Touch (fig. 3,4) or the rotary knob (fig. 1,9) again to return to normal (coarse)
magnification.
4.6.4 Rotating the image
Touch (fig. 3,4) to activate the rotation function.
Rotate the rotary knob (fig. 1,9) to rotate the image in the desired direction.
Press (fig. 3,4) or the rotary knob (fig. 1,9) to select fine rotation.
> An ‘F’ appears on the button and rotation now takes place in small steps.
Press (fig. 3,4) or the rotary knob (fig. 1,9) again to return to normal (coarse)
rotation.
Press (fig. 3,4)
for 2 seconds to deactivate the rotation function and show the
image again in un-rotated state.