26
Note!
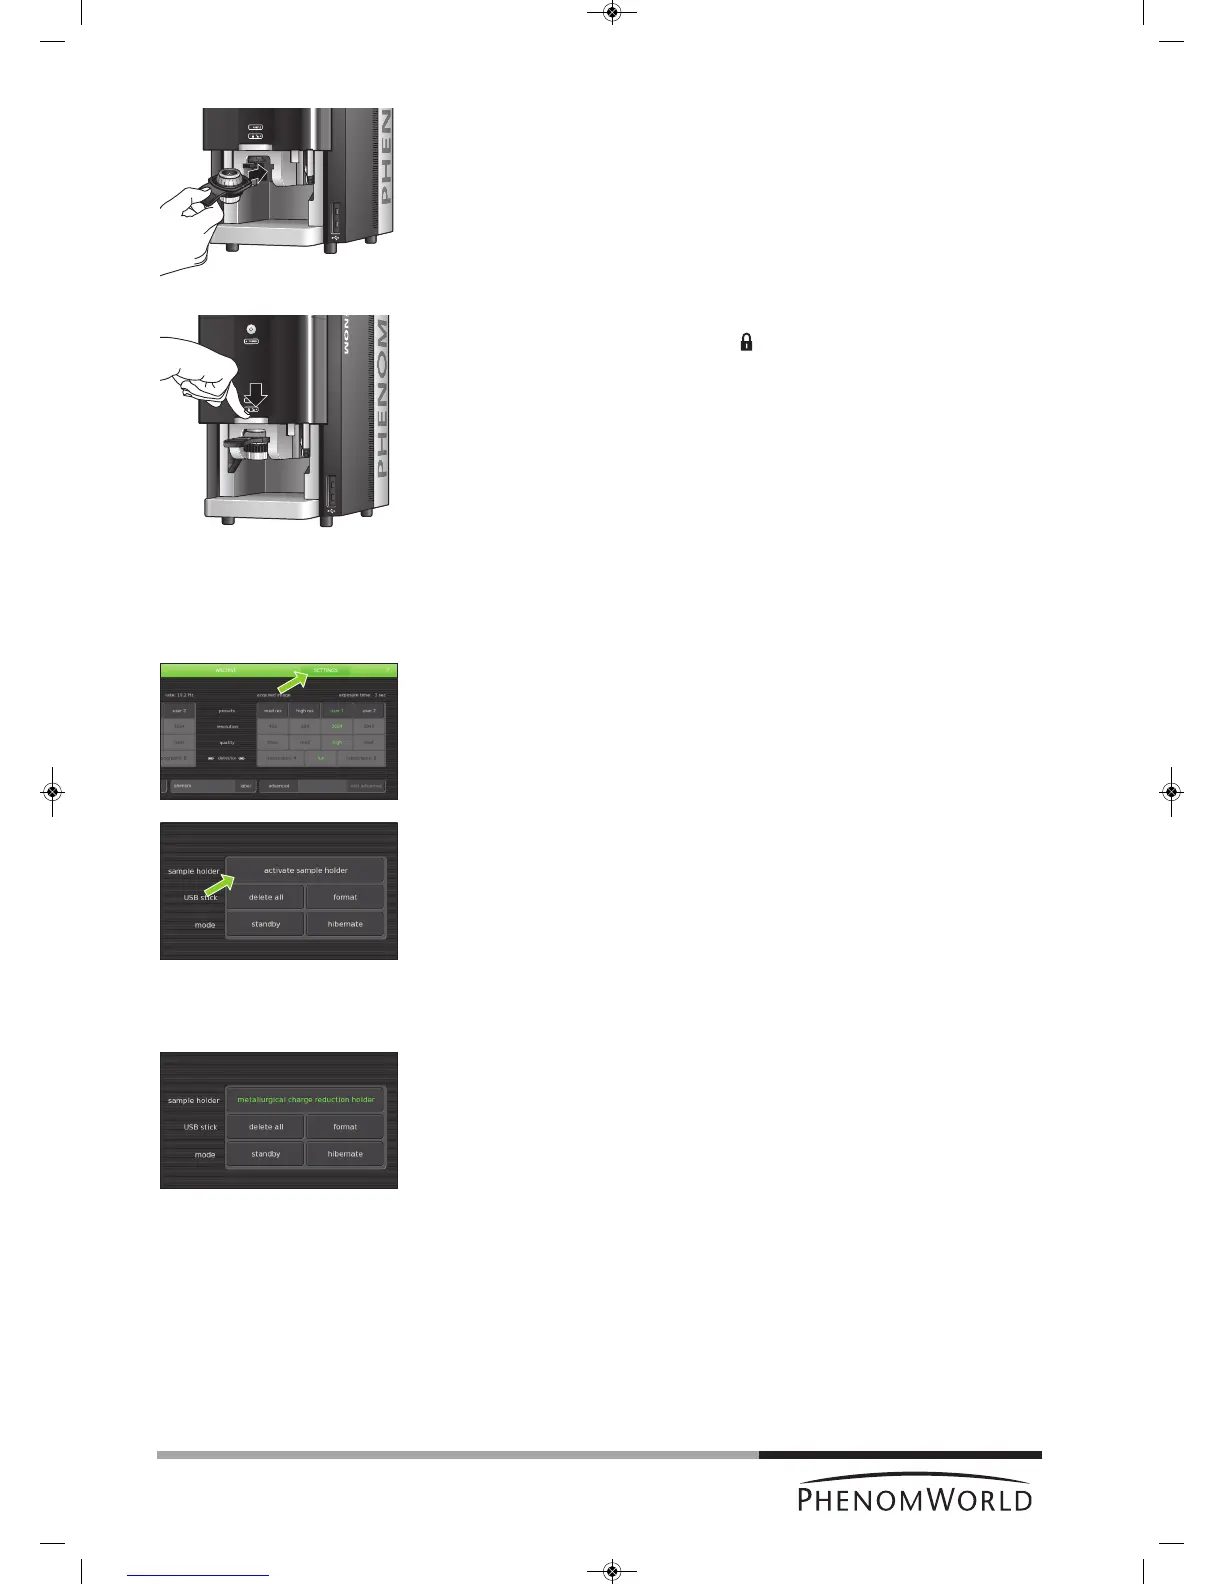
7 Insert the sample holder into the holder slot.
> If the door is not fully open the sample holder will not insert.
The sample holder is inserted correctly when the SAMPLE LED (2) lights up green
and the message ‘Please load sample’ disappears from the Image screen.
8 Close the door by sliding it down firmly (some initial force is required).
> The door will automatically be locked. ‘ ‘ lights up orange.
> The sample is loaded and ready for imaging.
> If the Phenom was in standby or hibernate (power saving) mode, the Phenom will
be now be re-activated. Refer to 4.1 ‘Waking-up the Phenom’.
> The sample automatically moves to the optical imaging position.
> Nosampleholderinserted (fig. 5,11) lights up when you start imaging without a
sample holder inserted. Refer to 4.3.1 ‘Activating the sample holder’.
4.3.1 Activating the sample holder
When a new sample holder is inserted for the first time, the holder needs to be activated.
1 Note the code that is located at the bottom of the sample holder.
2 Touch SETTINGS in the selection bar.
> The Settings screen appears.
3 Insert the sample holder. Refer to 4.3 ‘Loading samples’.
4 Touch activate sample holder.
5 Type in the code, noted in step 1.
If you forgot to note the code in step 1, you can still remove the sample holder from the
holder slot, note the code, reinsert the sample holder and continue with step 5.
6 Touch OK to confirm.
> The sample holder is now activated and its name will be displayed when the holder
is inserted.