30
Notes!
4.6 Electron imaging
After the part of the sample you wish to view has been centered in the optical overview
window (fig. 3,10), the sample can be positioned for high resolution (electron) imaging.
Touch (fig. 3,9) to select electron imaging mode.
>The sample will be transferred to electron imaging position.
> A progress bar shows the transfer progress.
> All settings made for optical imaging will be saved for electron imaging.
> When the sample is positioned for electron imaging, an image of the sample is
displayed in the main viewing window (fig. 3,1) of the Image screen. The image is
displayed in the lowest possible magnification (depending on the physical height of
the sample).
> The part of the sample that is magnified in the main viewing window (fig. 3,1) is
displayed in the electron overview window (fig. 3,3). This is indicated by a colored
s
quare. The image is displayed at the lowest magnification factor.
> A colored rectangle or cross (above a certain magnification level) in the optical
overview window (fig. 3,11) also indicates the part of the sample that is magnified in
the main viewing window.
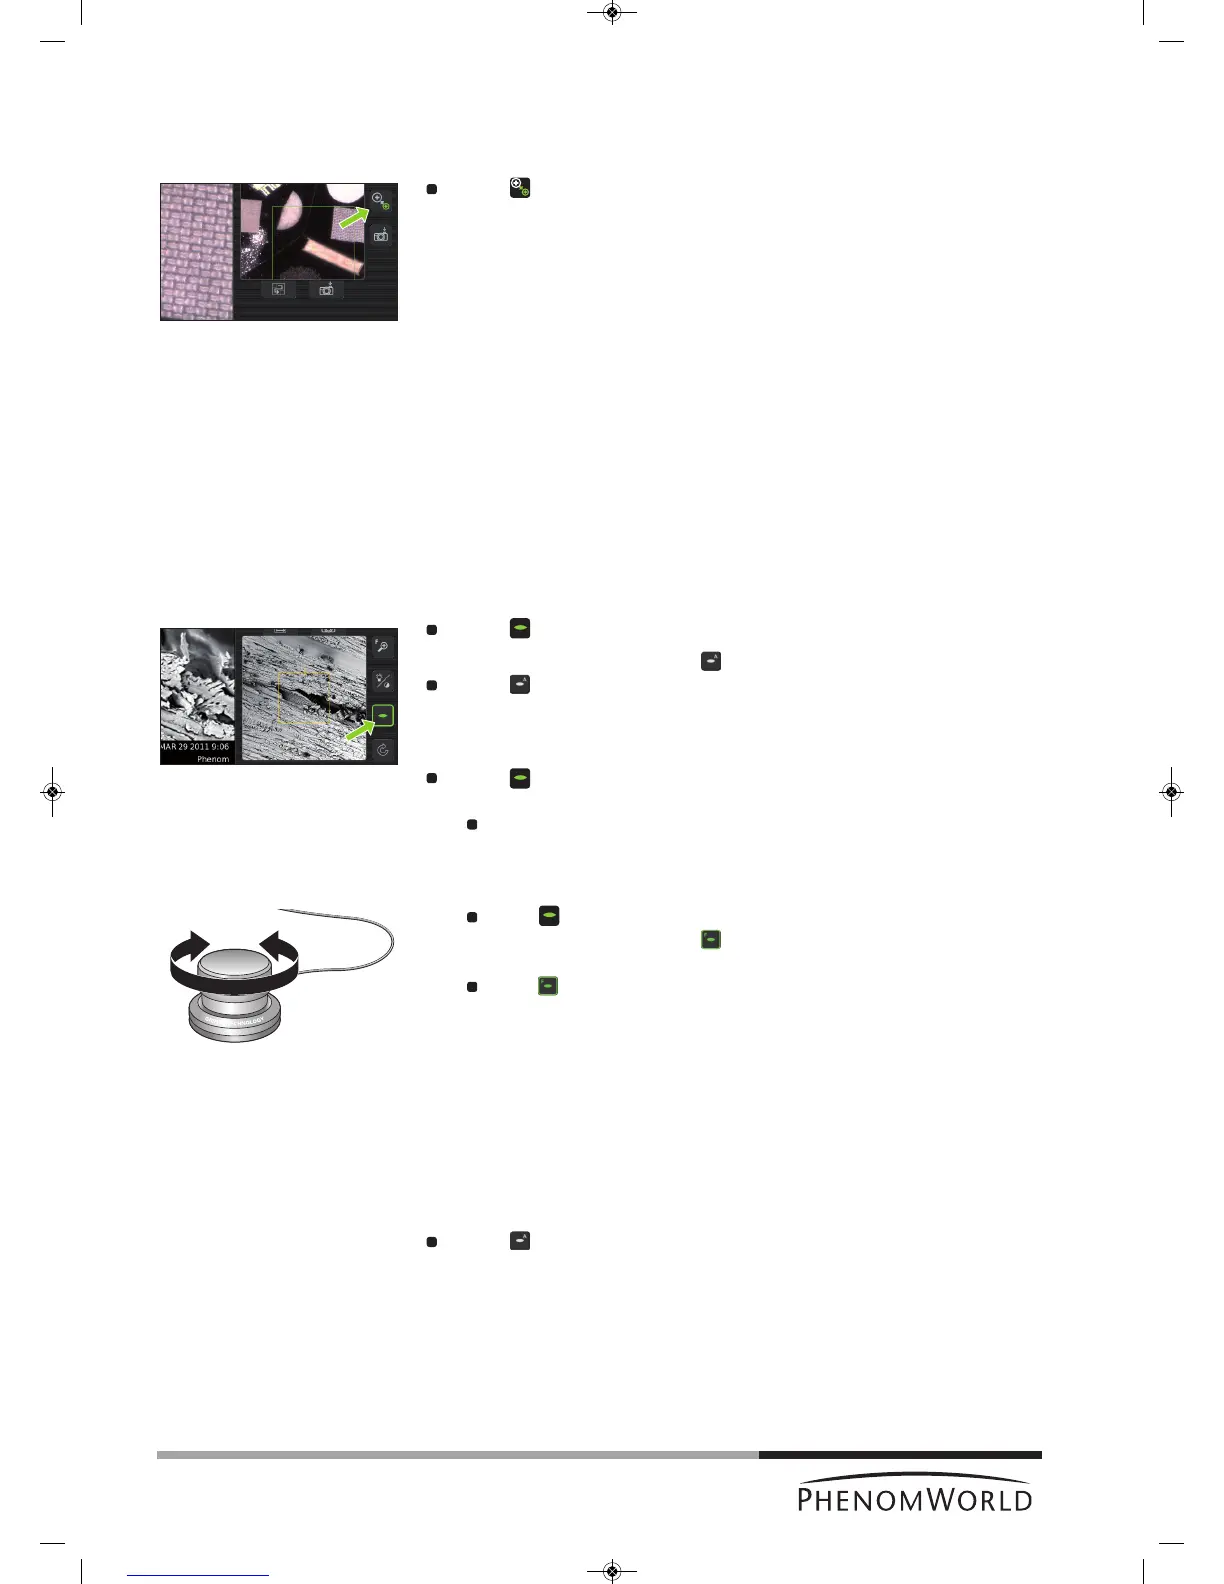
4.6.1 Adjusting focus
Depending on the current status, the focus can be set to automatic or manual control.
Auto focus
Touch (fig. 3,4) for 2 seconds to activate the Auto focus function.
> An ‘A’ appears on the button .
Touch (fig. 3,4) again to start Auto focus adjustment.
> The focus will now be adjusted automatically.
Manual focus
Touch (fig. 3,4) to activate the focus function.
> A focus slider appears, showing the current focus setting.
Rotate the rotary knob (fig. 1,8) to adjust the focus of the optical image.
> Adjustment is made visible by the slider.
Fine focus
Touch (fig. 3,4) or the rotary knob (fig. 1,8) to select fine focus.
> An ‘F’ appears on the button and focus adjustment now takes place in small
steps.
Touch (fig. 3,4) or the rotary knob (fig. 1,8) again to return to normal (coarse)
focus.
– Auto focus works best when high contrast features are present in the center of the
image screen.
– If auto focus does not produce the desired result, use manual focus.
– Manual focus takes place in steps that are proportional to the current magnification
setting. The higher the magnification setting, the more sensitive the rotary knob will
become.
Touch (fig. 3,4) again for 2 seconds, to return to manual mode.